Author Archives: bowtie6

bowtie6‘s Frame Failure – Revisited –

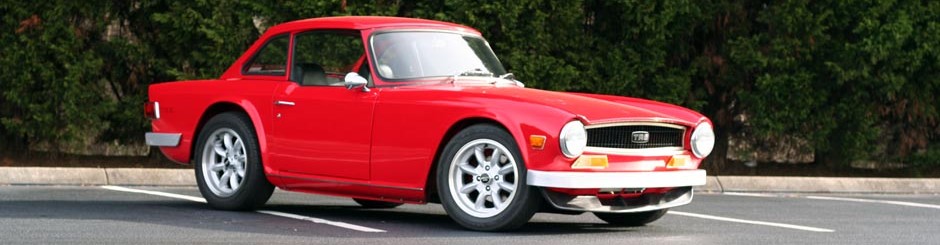
I have a few pictures with the rear section of the original frame on bowtie6.  This frame was as about as pristine as could be found when I bought my car several years ago.  There were gussets made and welded onto the frame, as well as reinforcement plates.  Every weld on the frame was gone through and reinforced.  Yet with all this work, after some 15,000 miles the frame failed.

The following pictures show the seam that failed.  Granted the rear is far from stock, but this goes to show that you can weld on the original flimsy frame but this does not guarantee it will survive.  The original frame might be OK for the anemic tractor engine that powers “original” TR6’s, but if you are going to put some real horsepower (and torque) in front of a TR6 then you might want to rethink if the frame will hold up or not.  In my case, sadly the frame gave up the ghost.

The picture above shows the Nissan R200 “long-nose” differential we used.  This diff came from a 280ZX and worked very well – however, it was quite heavy and did not have posi-traction.  The ratio was quite nice – actually a 3.90 to 1 – and this was the reason we chose the 3.80 to 1 for the solid axle currently being installed.  The picture above does not show the coilovers however, that can be found on my “old” website.  The failure happened on the left side (the passneger’s side) and the following picture shows more about it…

In the above picture you see the crack on the tower that supported the coilovers.  Here is another shot:
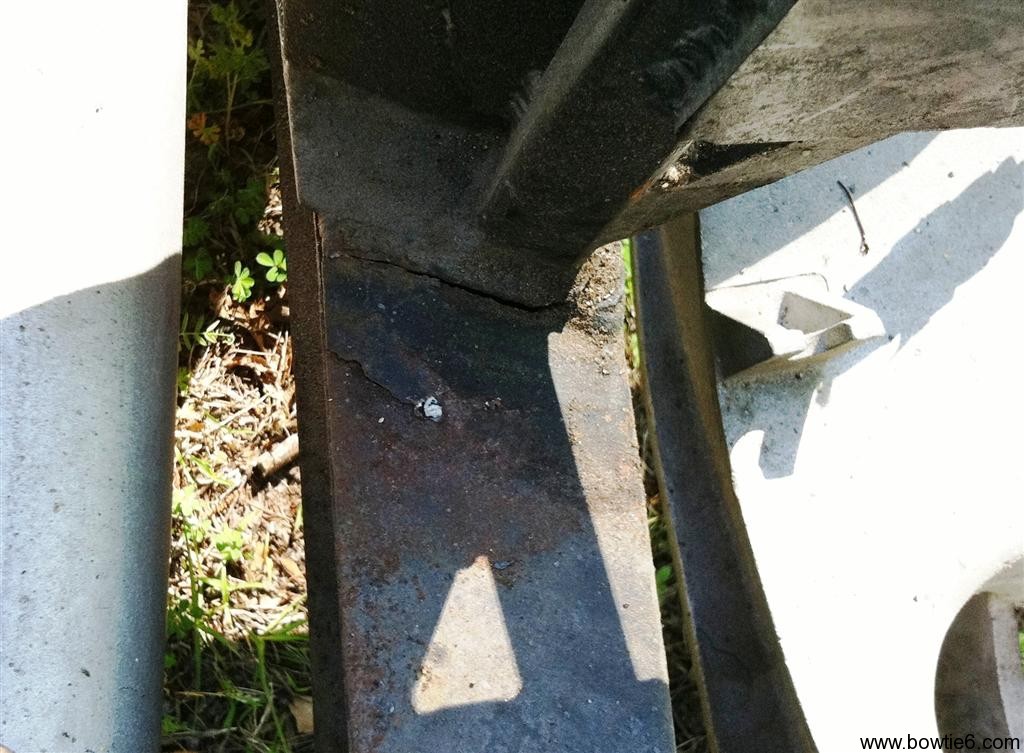
As you can see, the top section of the frame “lifted” off the rest of the beam.
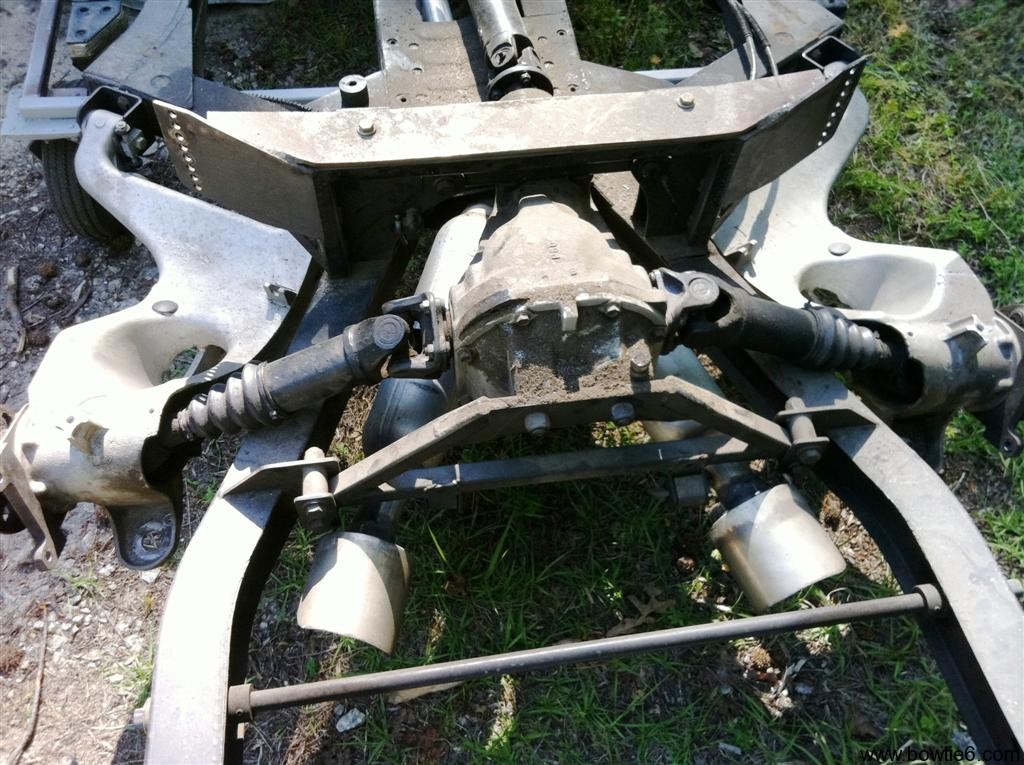
Finally the above picture shows what the rear of bowtie6 looked like.  The diff is in the centre, with the custom made halfshafts.  The Nissan diff is held in place by the two bridges, the dual exhausts can be seen as well as the rear sway bar.  This was a nice setup and would still be in place except for the crapy Triumph TR6 frame giving away…

Seriously folks.  No joking aside.  I spent a considerable amount of resources on this “original” frame with the work we did to it.  Yet, it failed.  No, I did not abuse my car but I did get down on it in such a way that I could enjoy the upgrades.  For anyone remotely thinking about doing an engine swap using the original frame:  think and double-think what it is you want to do.

The original diff will never hold up.  Eventually after you put enough miles on it, it will fail.  Ditto for the frame.  Once again, the section that failed might have not been “original”, but we had a pristine frame to begin with.  I hope these article and pictures are of value for you.


bowtie6‘s ECOTEC Custom Intake

Lots of new progress to report this weekend.
  • Solid axle & Posi-Traction differential – check
  • Disc brakes (on all four wheels) plumbed with hand-formed stainless lines – check
  • Handbrakes using original TR6 cables – check
  • Wilwood proportioning valve – check
  • ECOTEC using custom/factory mounts – check
  • Fourth Gen Camaro hydraulic clutch – check
  • AISIN 5 speed gearbox on custom mounts – check
  • Tilt steering on a Triumph TR6 (I’ll have more on this later) – check

And the pièce de résistance for today’s post:  a hand formed aluminium intake.

The factory ECOTEC comes with a very intricate and quite impressive composite intake manifold.  The thing has a very unique shape, with a convoluted “S” shaped intake that splits the aft of the throttle body into four runners feeding each intake port.  With the longer runners, lower torque is improved.  Too bad we could not use this intake.  Why?  In the TR6 the steering shaft is in the way and the front fender would just not allow the factory intake to fit.

So what is one to do?  Answer:

GM makes these cool plates for the exhaust and intake ports that are intended for exactly this type of application.  The exhaust plate has already been used to make the exhaust headers on bowtie6 (if you haven’t seen that, CLICK HERE).

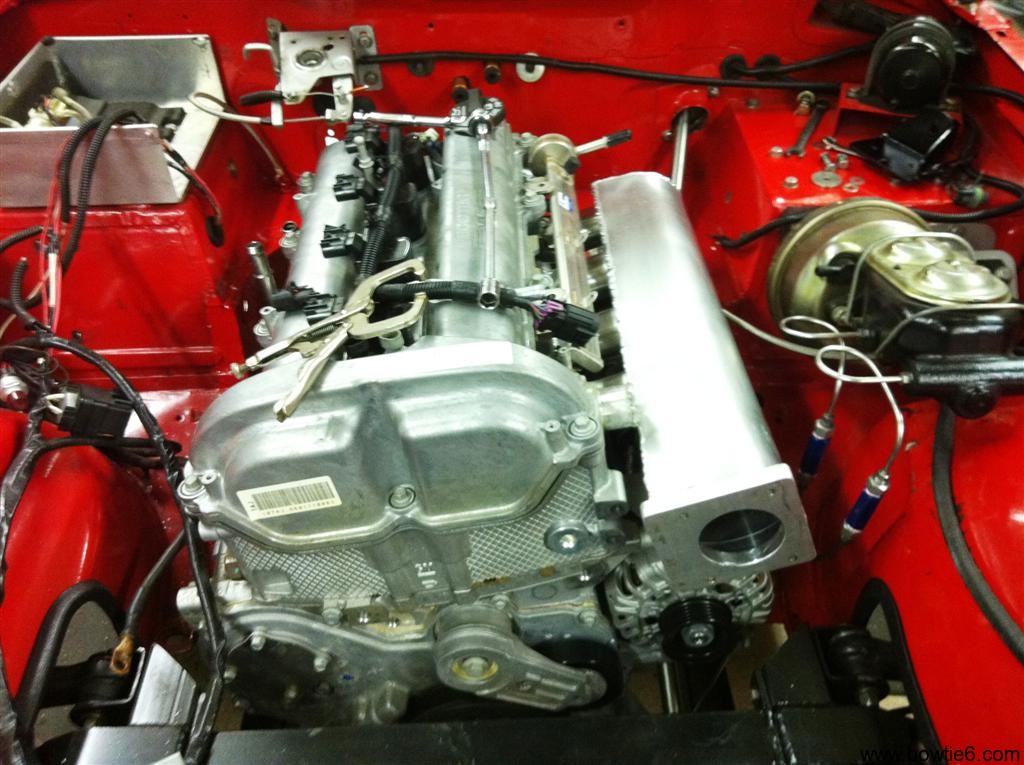
Now the intake plate along with my cousin Jim’s serious welding and fabricating skillz yields the following:

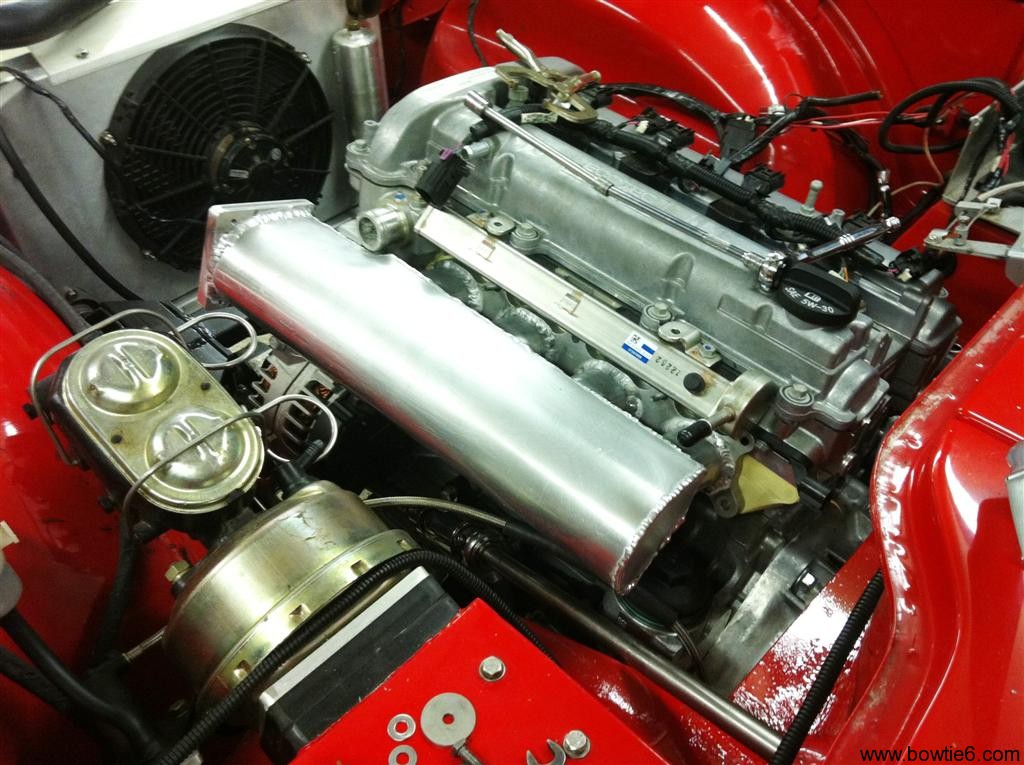
The intake is fitted for a trial fit and the all-aluminium body is yet to be fully finished.  Here is another set of pictures:

The photo above shows the front section of the custom intake.  The fly-by-wire throttle body will bolt to the flange on the front.  Not shown on the picture above is the port for the MAP sensor as well as the bung for the vacuum line going to the brake booster on the right.  Which, by the way is from a Vette along with the mastery cylinder.  What are those blue thinggies on both of the brakes lines?  Hmmm…  Wonder what that is all about??

Last but not least, another view this time towards the front of the car.  Yes, that is an all aluminium radiator up front.  The fan is SPAL (the same kind used by the boys from Maranello) mounted on an aluminium shroud.  Why the shroud?  I covered that in my original explanation in my original website.  Want to read about that?  CLICK HERE.

Pretty cool, huh?

Final Pics of the New TR6 Frame

Here is a final set of pictures of the new frame serving as bowtie6’s backbone.  The body has now been permanently bolted on, so this is the last set…

Some misconceptions have surfaced as to the origin of this frame.  This is NOT a RATCO frame.  Those folks produce a nice aftermarket frame but this one is all bespoke and designed for the ECOTEC and the solid rear axle specifically.

Why so many entries on this blog about the frame?  Well, simply put:  I am very proud of it.  My cousin Jim Thompson has put together a very clever, lightweight and strong frame using modern frame-building techniques and materials while being able to retain some of the original TR6 bits.

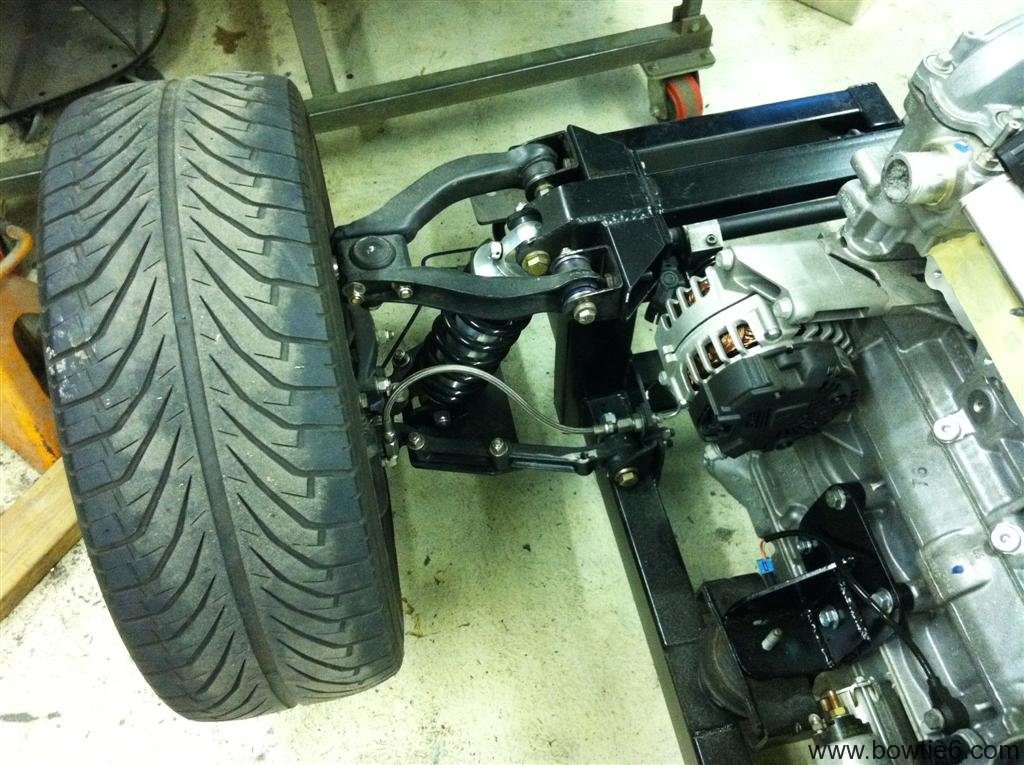
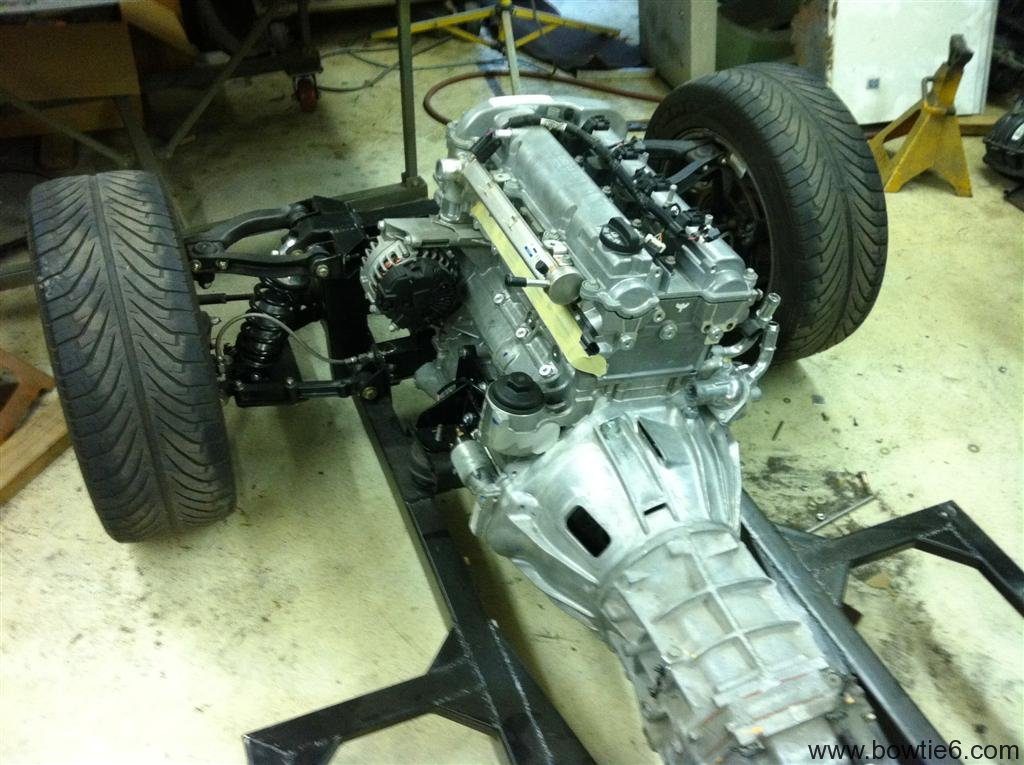
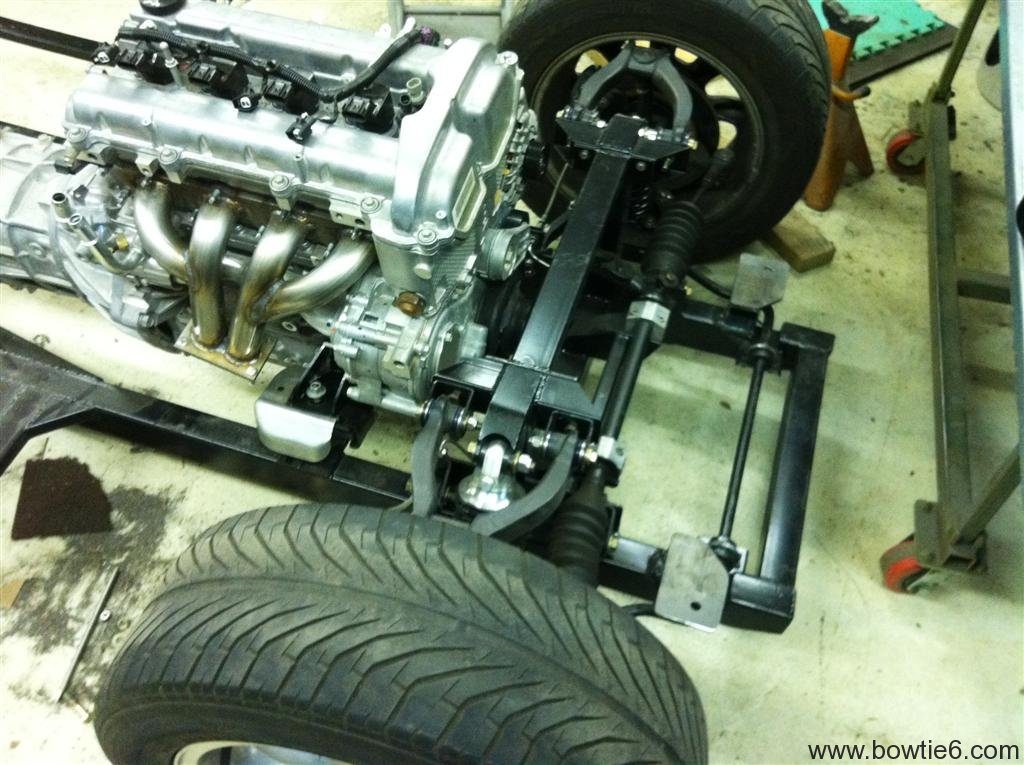
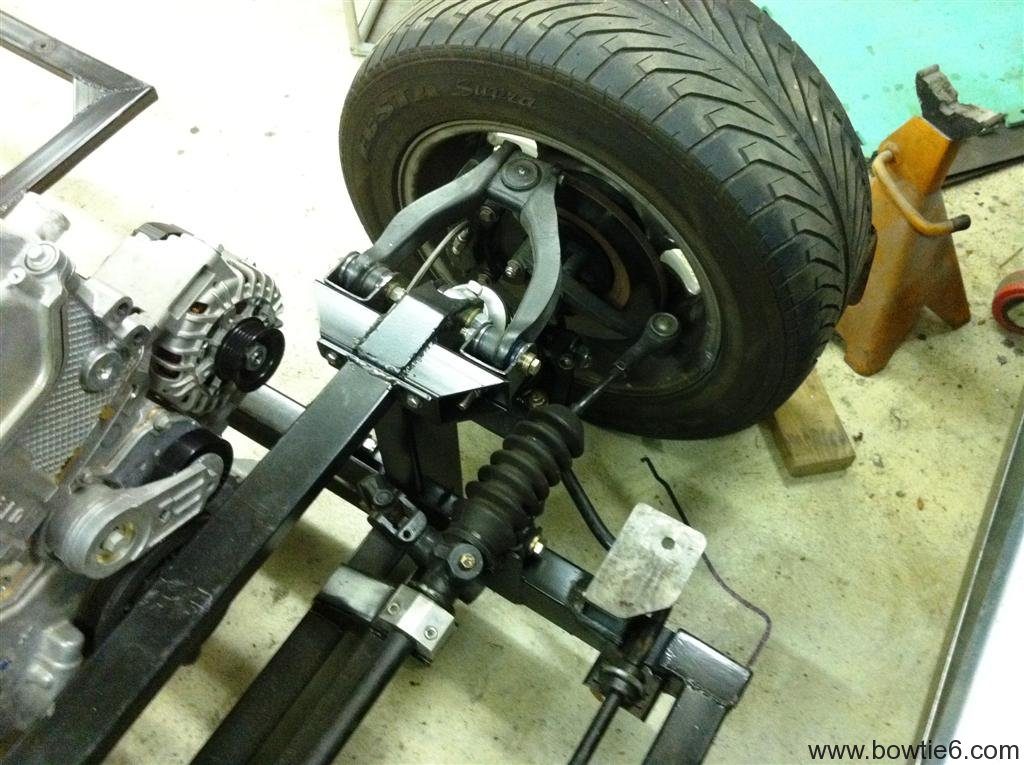
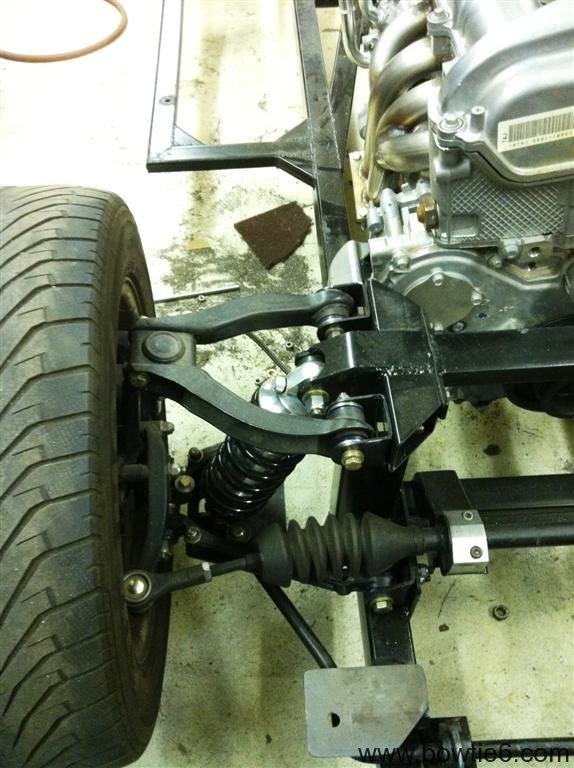
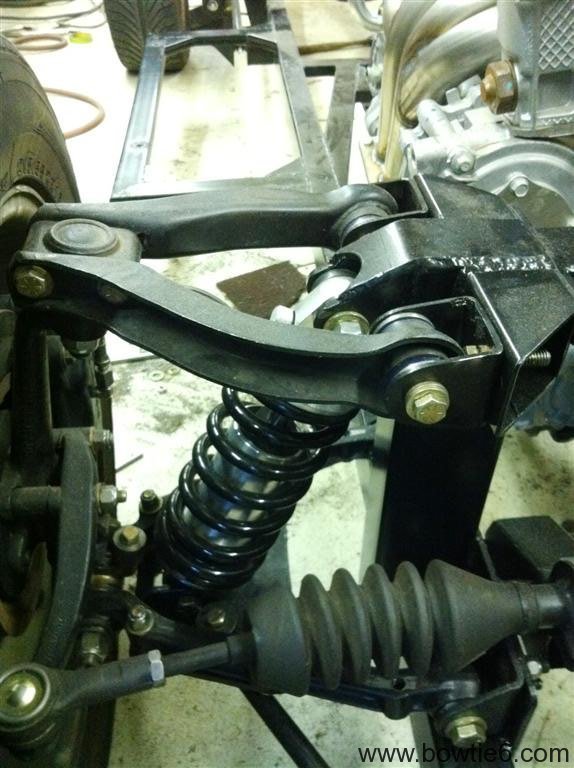
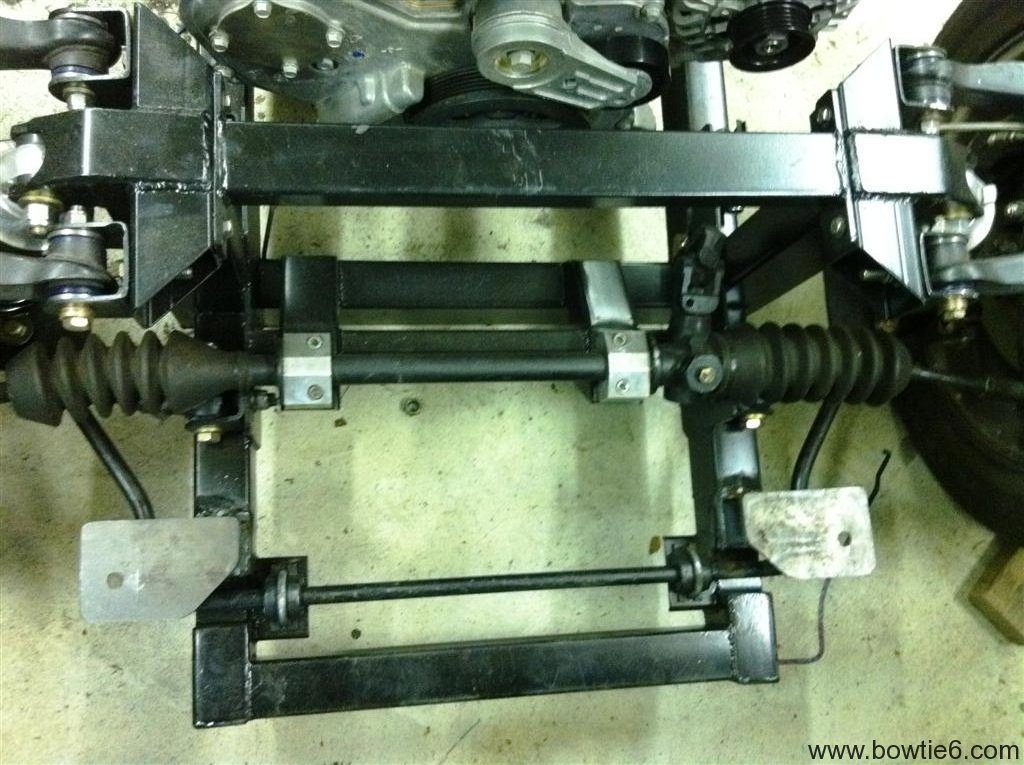
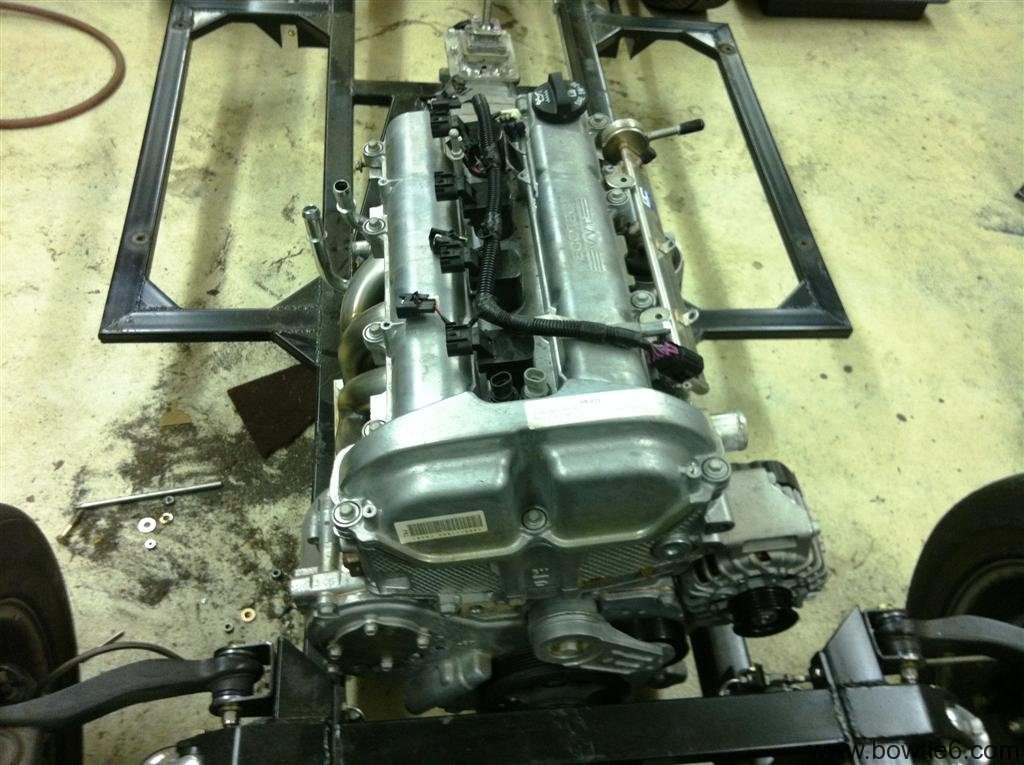
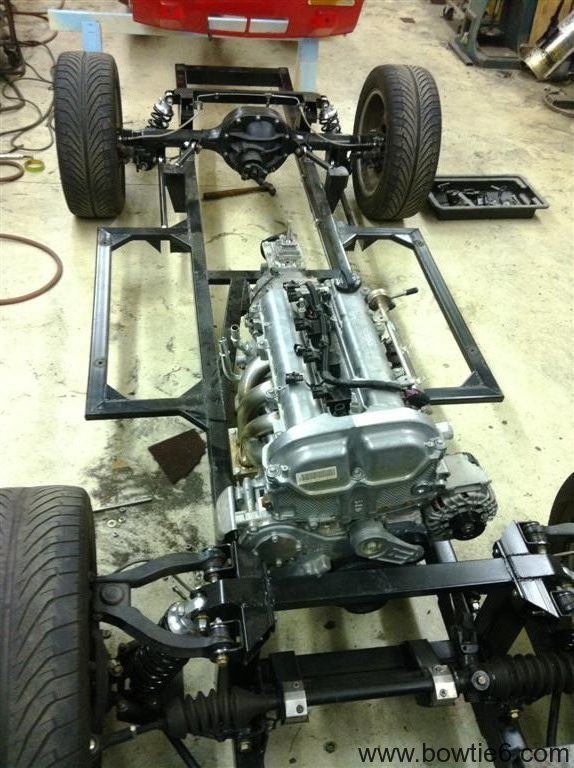
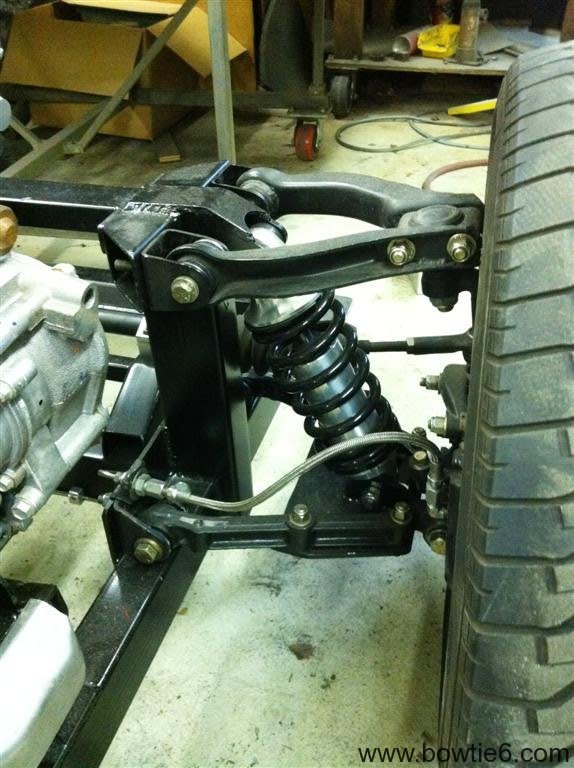
The front suspension is almost all stock TR6.  The “A” arms, ball joins, steering rack, sway bar, trunions, hubs and rotors are all stock Triumph.  The calipers are Wilwood.  The springs/shocks have been replaced with coilovers.  The coilovers offer several advantages:  no spring compressors, spring interchangeability and the ability to control ride height.  However, they are not cheap but worth every penny.

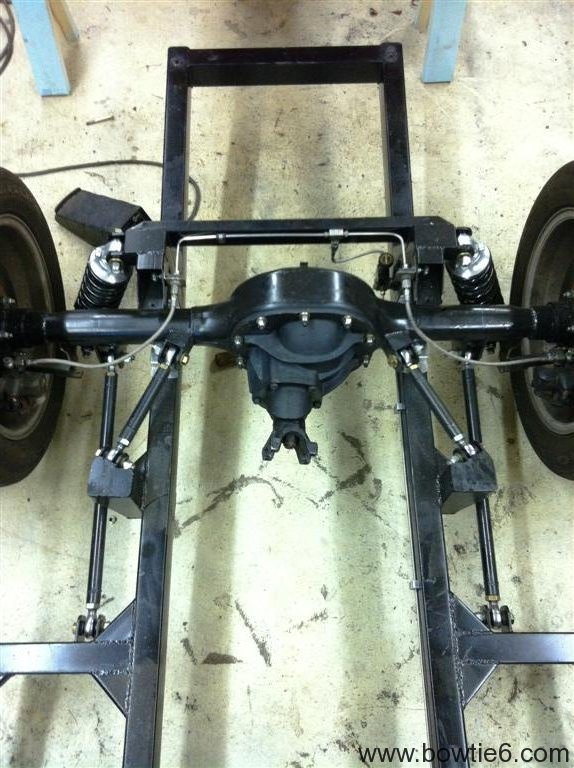
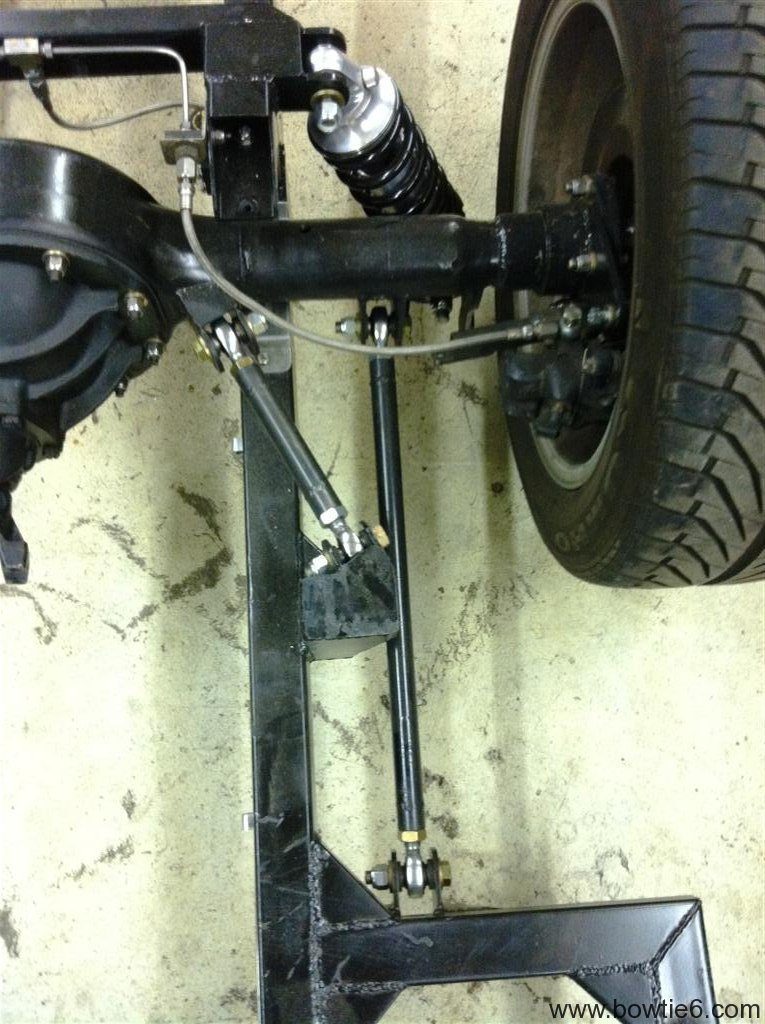
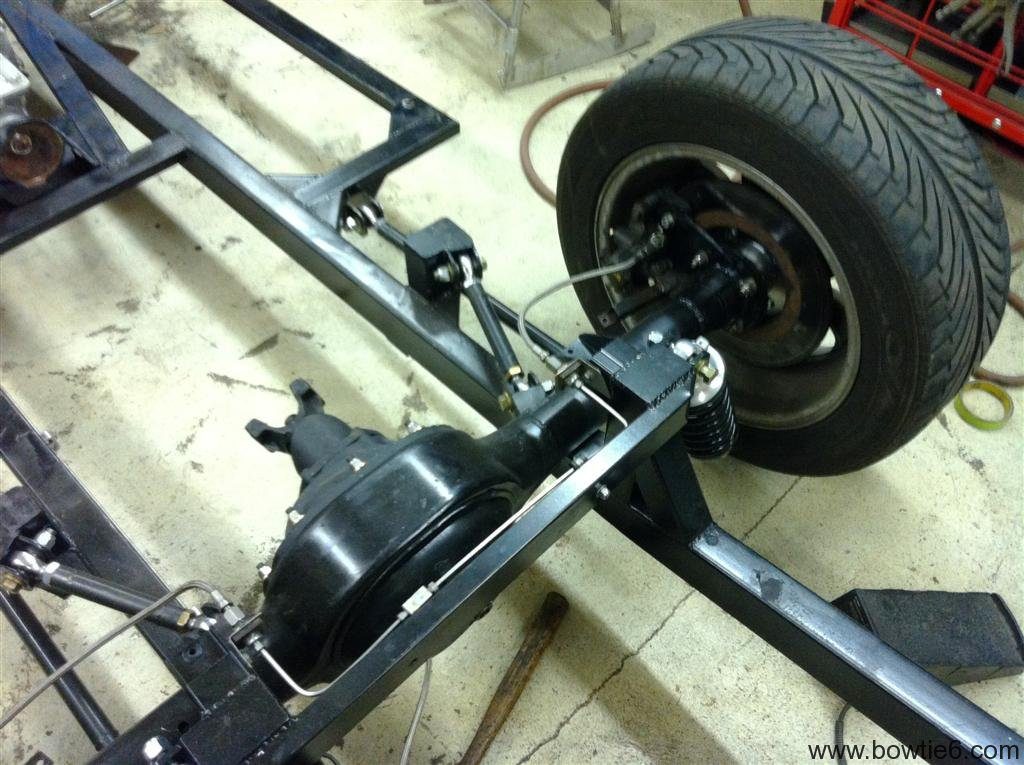
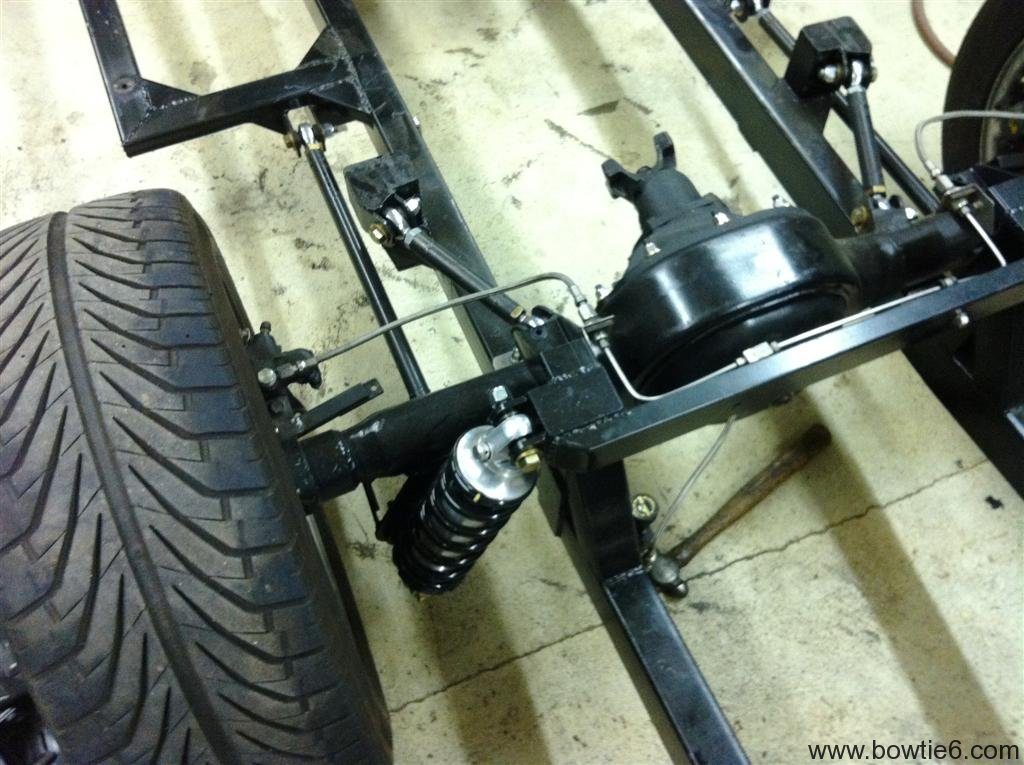
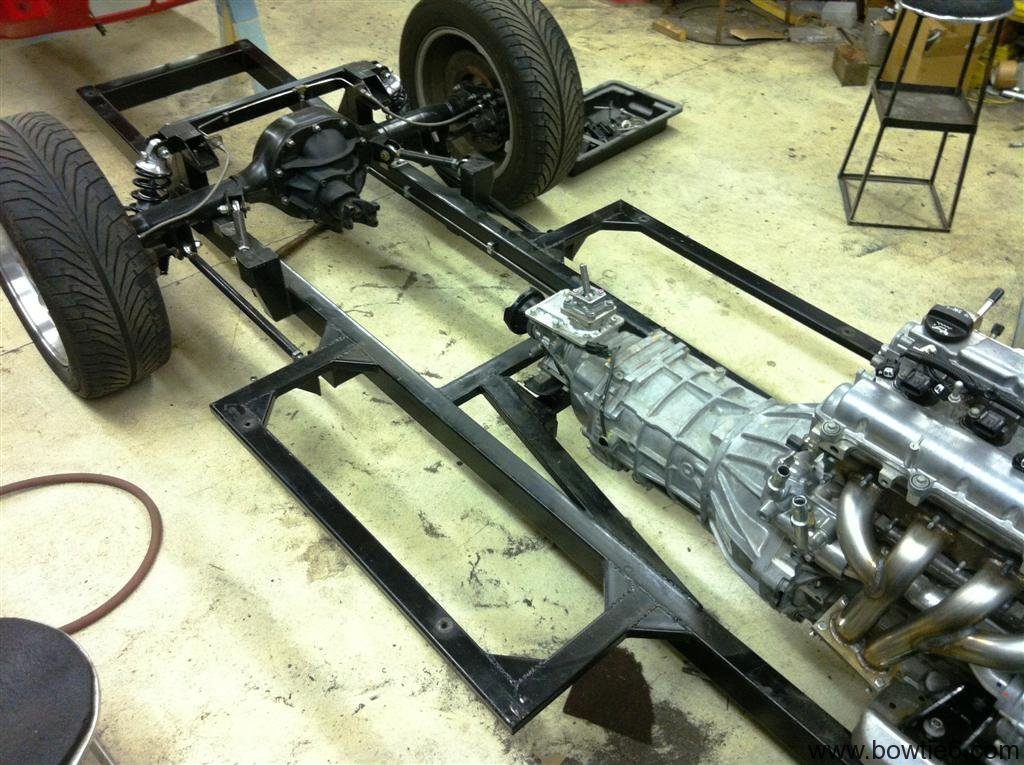
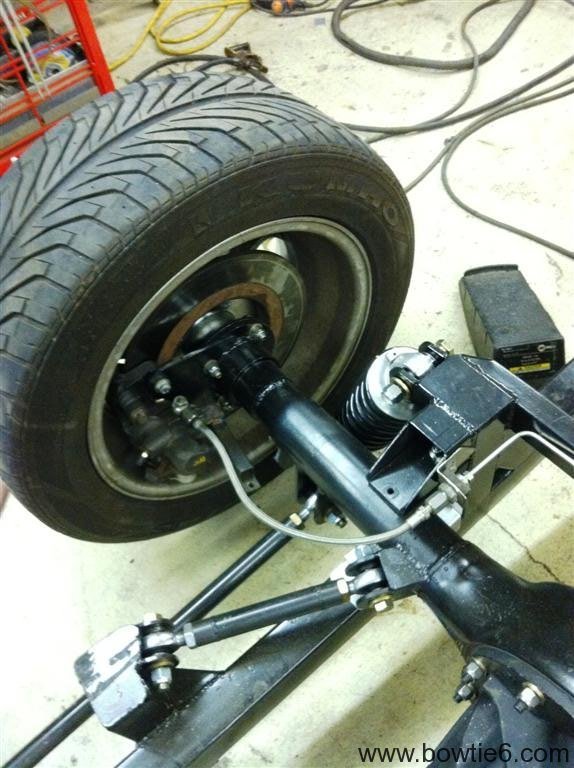
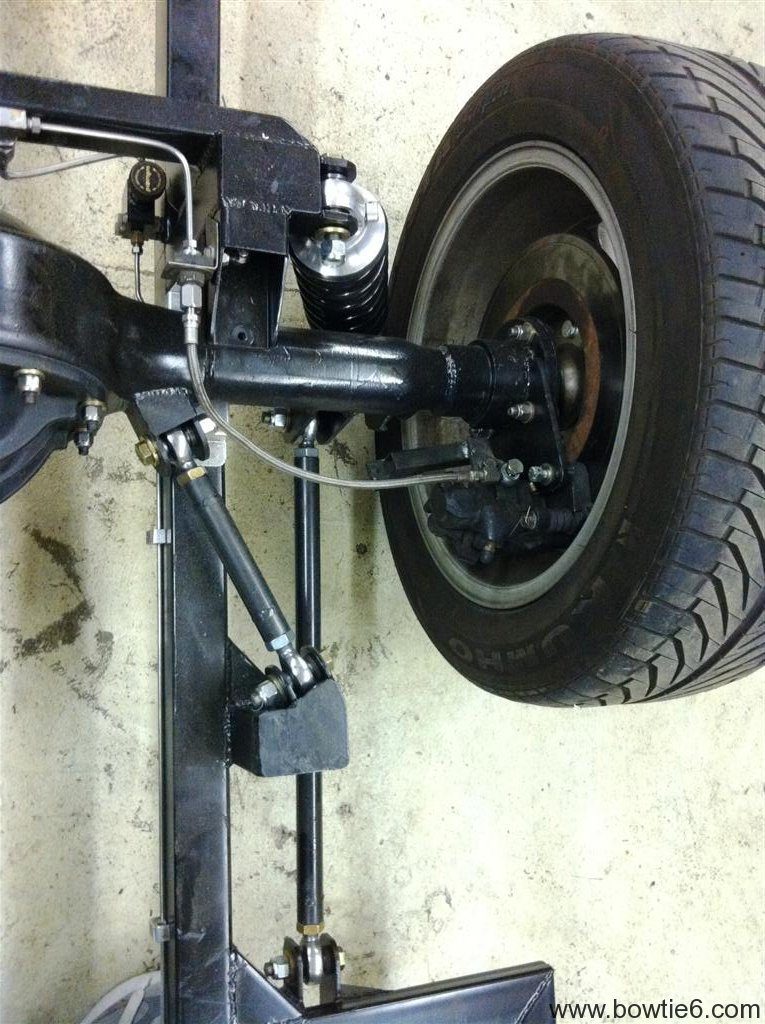
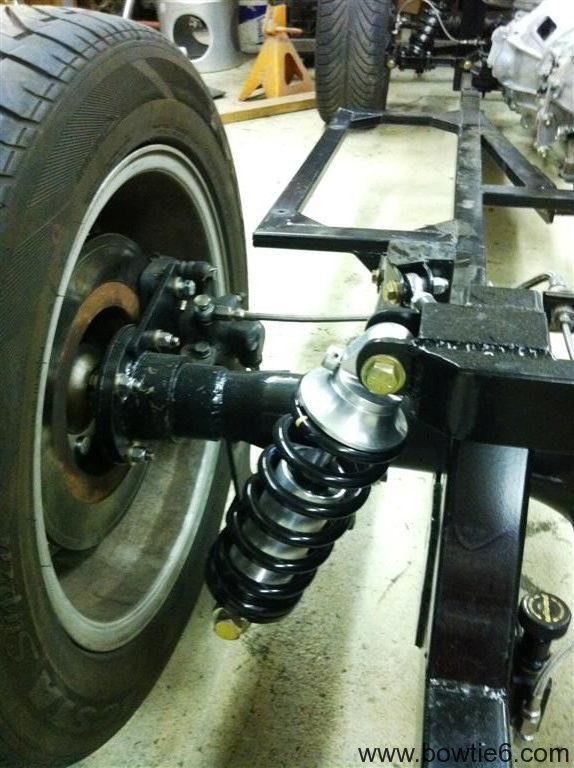
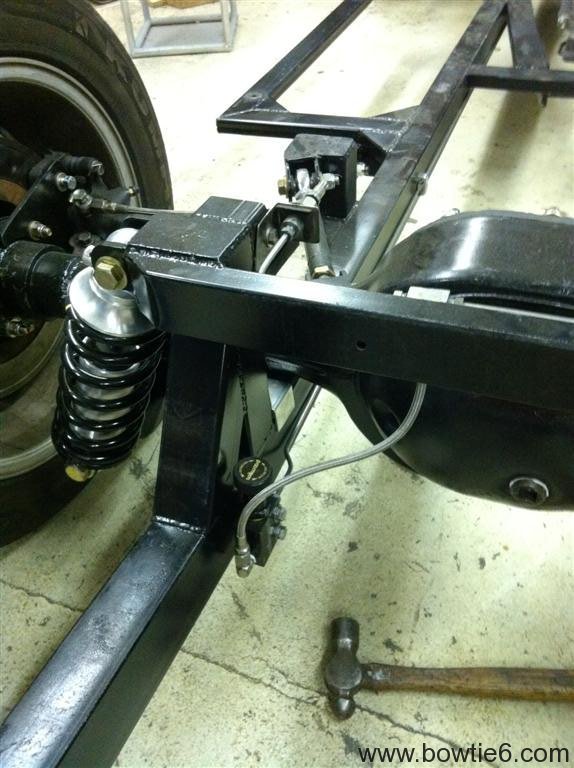
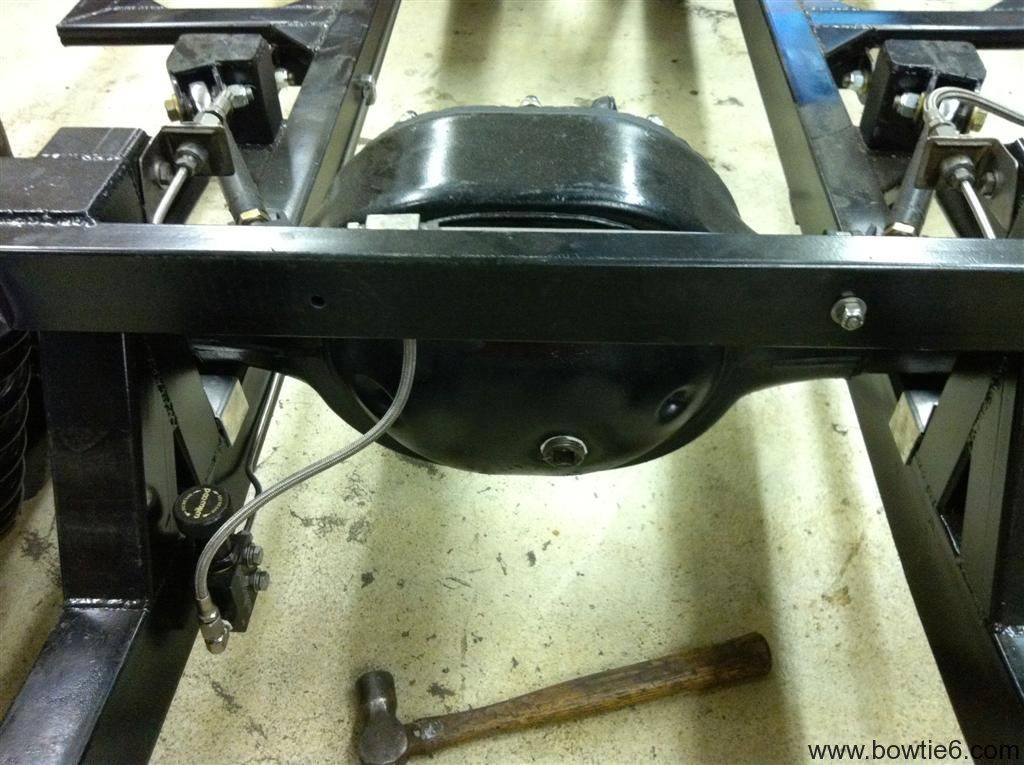
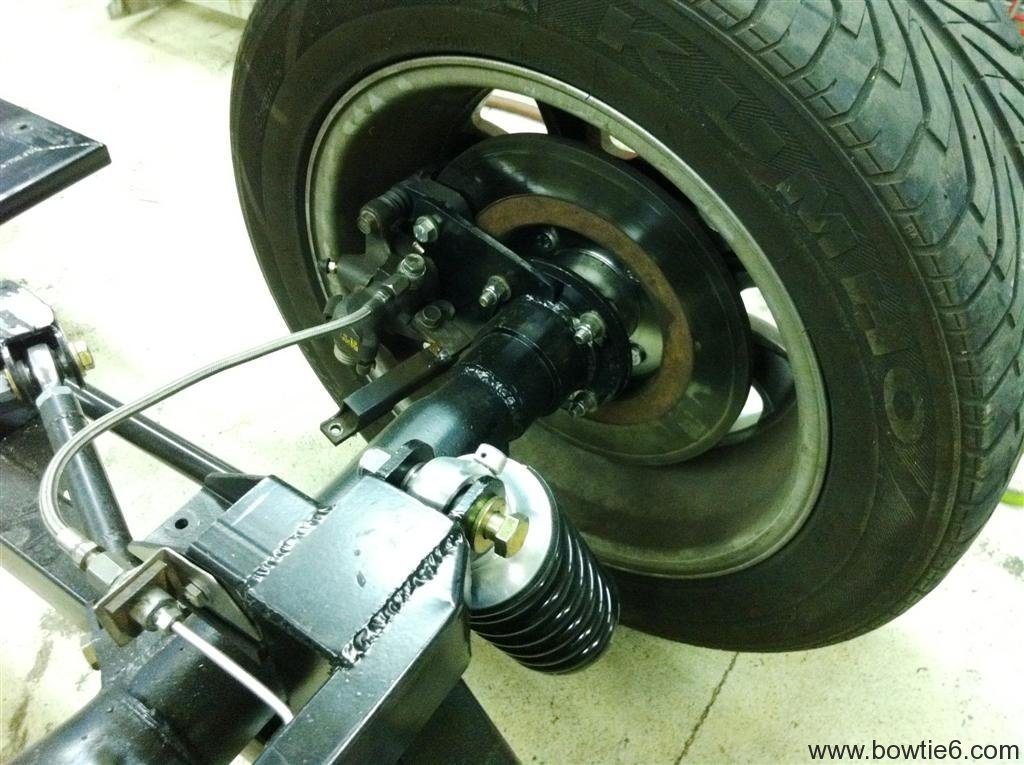
The rear is all new and it is trick!  The axle is an 9” Ford, custom sized.  It was cut on both sides and custom cut axles have been sourced from Moser.  The gears are from Motive; posi-traction (of course) with a 3.80 to 1 ratio.  Disc rotors and calipers are used on the rear end (with full emergency brake capability using the original TR6 cables and lever), as well as matching coilovers.  There is a four point suspension holding the axle in place with Heim ends on all four control arms.  We tried polyurethane ends, but they did not survive the power from the ECOTEC.  Enter the Heim ends.  Again, only the best have been purchased.  These are precision ground steel (normally used on sprint cars) along with special boots to keep debris out.  Brake and fuel lines are all hand made, hand fitted and hand formed from stainless tubing; with teflon lined, braided lines going to all four calipers.  Again, only the best has been sourced.

This is the second frame built using this design.  The first frame is under Jim’s TR4 and it has proven to be astounding.  It is very stiff – gone is the ‘flex’ that the original frame exhibits.  The new frame is made from much stronger square tubing.  This tubing is a solid square, not a “U” channel with a cap spot-welded as in the original design from Triumph.  I repeat, this is very strong stuff.

Finally, the ECOTEC 2.4 litre engine sits on special plates (on the frame side) that allow the use of the original Solstice engine mounts as well as tranny mount.  The mounts are really nice because they are made with rubber to help isolate vibrations.  Furthermore, the GM mounts have a locking mechanism that if the rubber ever fails the engine will only rock a very small distance and the locks keep it from making undesirable and expensive damage.

Finally some thoughts:

  • I realize this frame has nothing in common with the ‘original’ frame.  My condolence to the purists – but the idea is performance and this frame works and works very well.
  • I’ve read where folks discuss the shortcomings of the AISIN gearbox and say the gearing is all wrong.  Depends what you want to do:  bowtie6 is not built as a drag car.  Yes, first gear is a bit tall and that might not sit well with folks.  I don’t mind it.  From the experience gained from my prior setup and my cousin’s TR4, the car excels like a dream in second, third and fourth.  These three gears are quite simply awesome.  What about fifth?  Well, suffice to say that at speed and in fifth gear all you have to do is punch it and the car will take off.
  • The last thing about the new frame has come as a bit of a surprise to me.  In my cousin’s TR4 the steering “effort” has been reduced significantly.  The “far-back” engine placement has something to do with this.  But there is also the extra pressure of the original spring pushing on the “A” arms that has been deleted.  The new “feel” is much more positive, lightning-quick and a delight to use at parking-lot-speeds.

Here is the final picture gallery of the frame prior to the body being permanently installed.


ECOTEC in a TR6

Today was  a milestone.

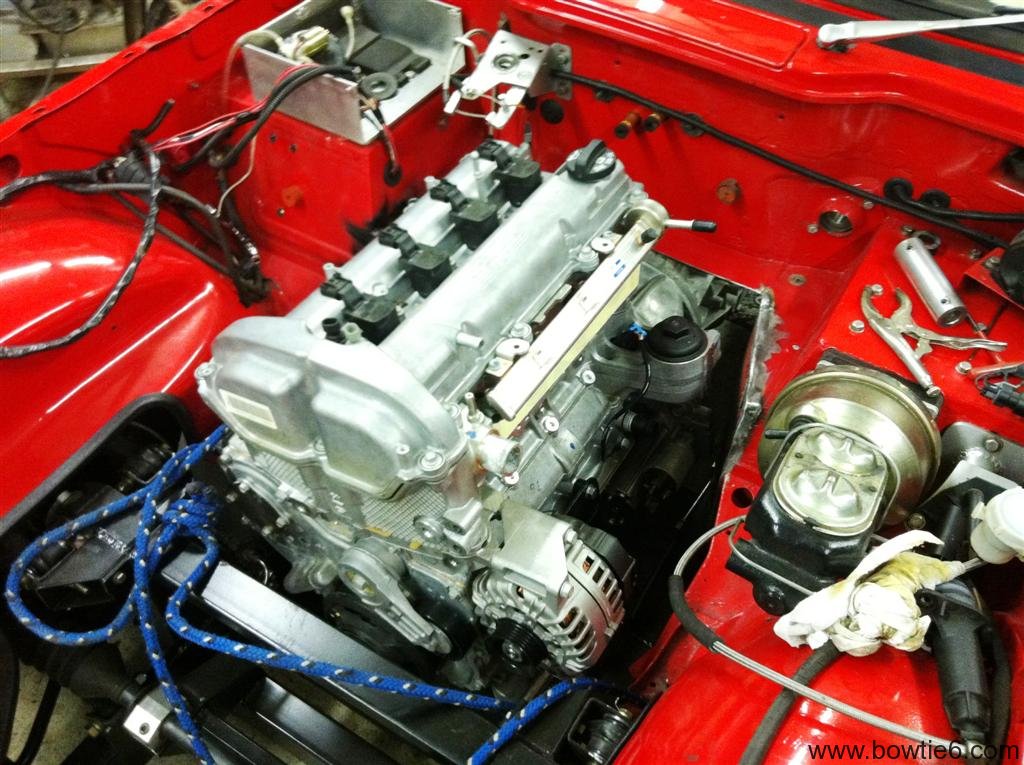
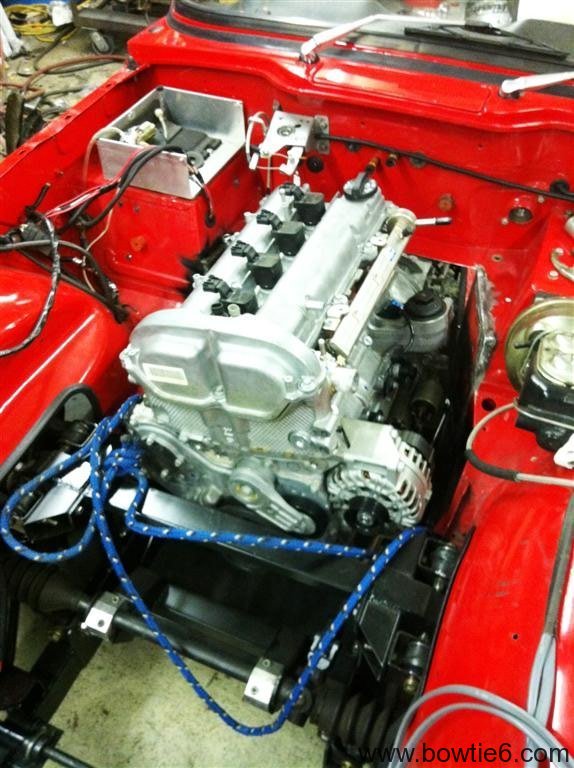
bowtie6 had a trial fit of body, new frame and ECOTEC engine.  The following pictures show what this all looks like.

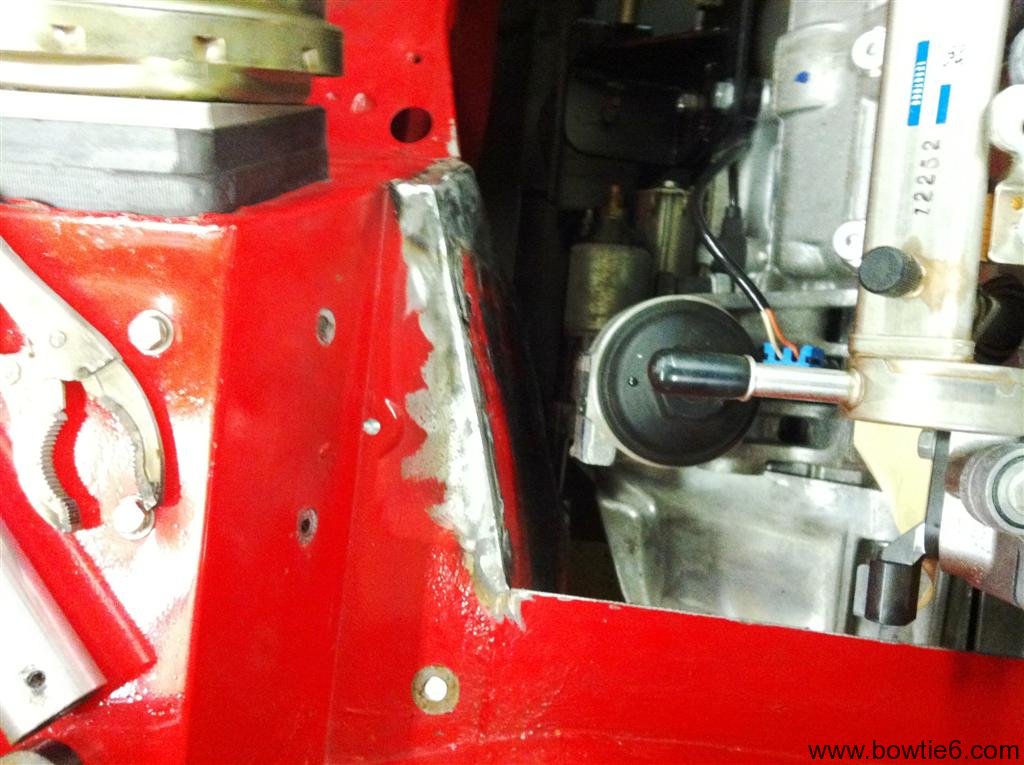
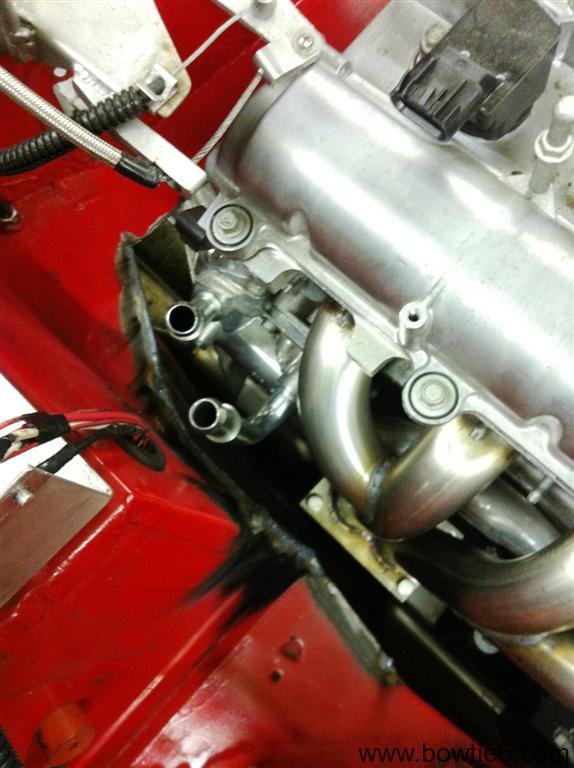
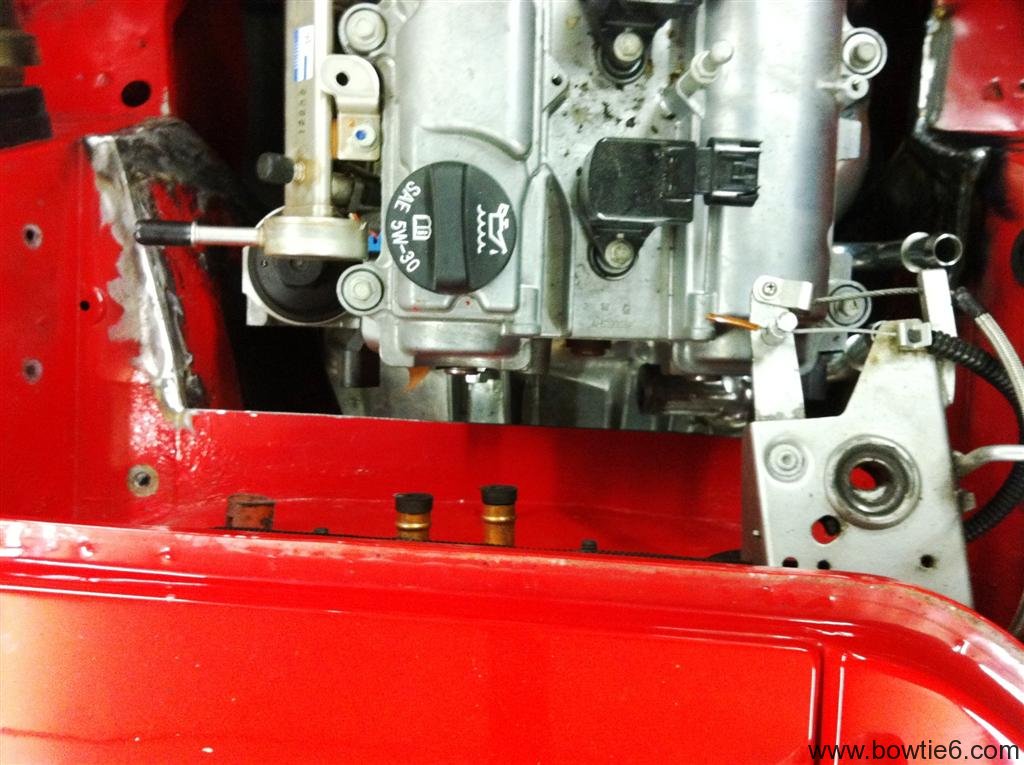
Yes, there has been some “shaping” done to the body.  The area past the firewall was in need of change to make room for the oil filter (on the driver’s side) and the thermostat housing (on the passenger’s side).  For anyone thinking about doing this to a “stock” TR6:  beware.  There will be some work required on the firewall as well as the battery box tray on the stock TR6.  Since bowtie6’s firewall had already been modified, this was a small change.  Under the experts hands of my cousin Jim Thompson, there was some welding involved and voilà – the engine fits.

Once all that work was completed, I mixed up some of DuPont ChomaOne single stage urethane red paint and the bare areas were re-painted.  This took some doing but the result is awesome.  Tonight the new areas are drying and the plan is to bolt the new frame to the body permanently tomorrow.

Well… Here is what an ECOTEC looks like in a TR6 with a custom frame underneath it.  Note how far back the new engine sits.  This change is highly desirable in moving the weight back.  This is indeed a great day!


ECOTEC, Meet Gearbox; Gearbox, Meet ECOTEC…

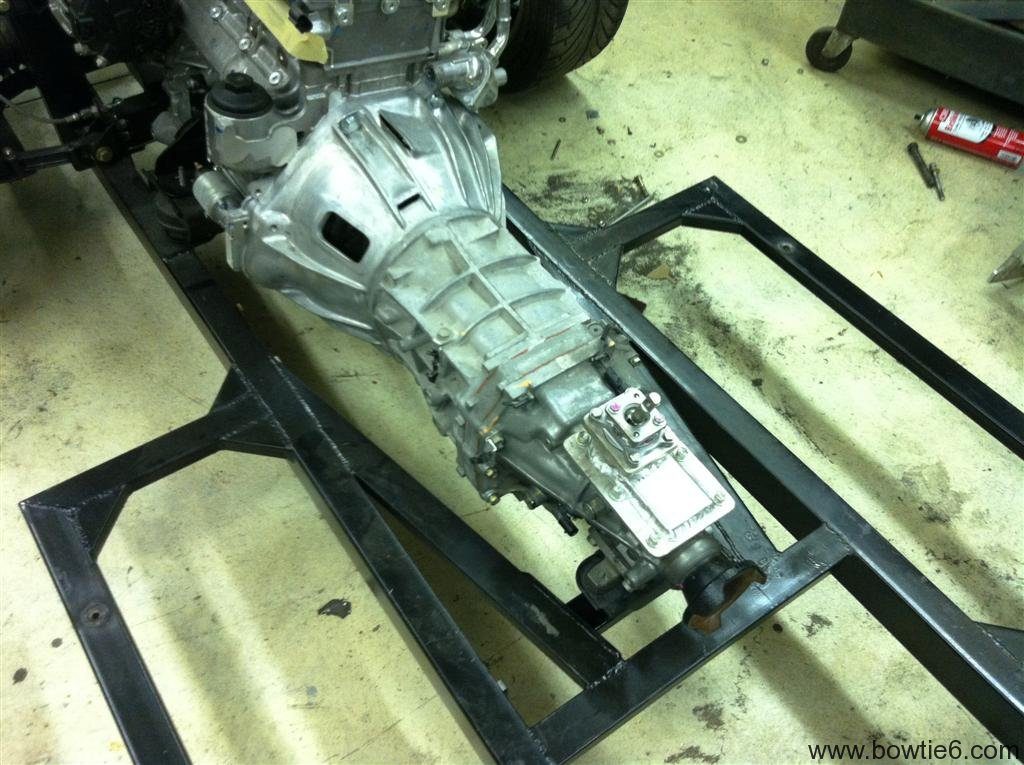
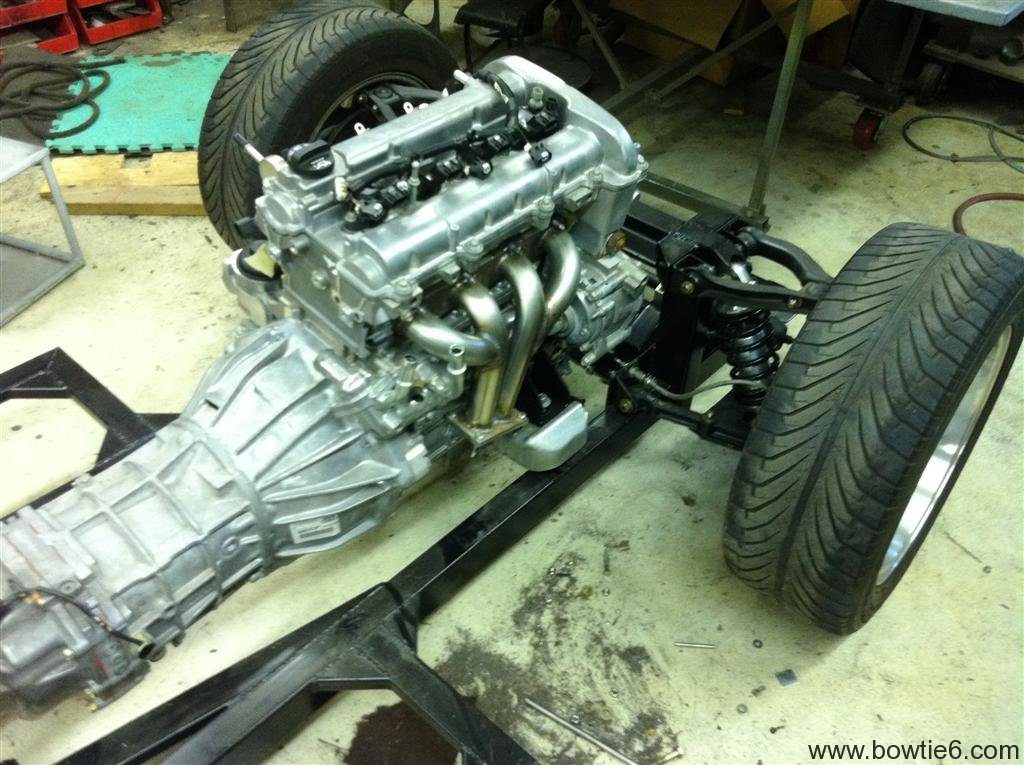
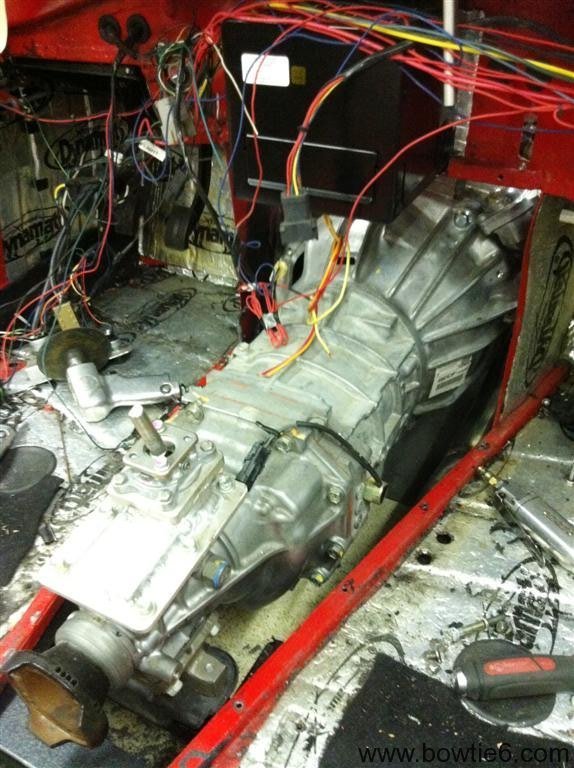
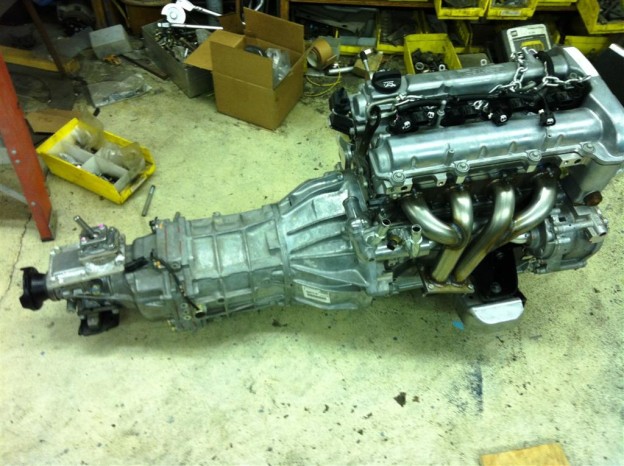
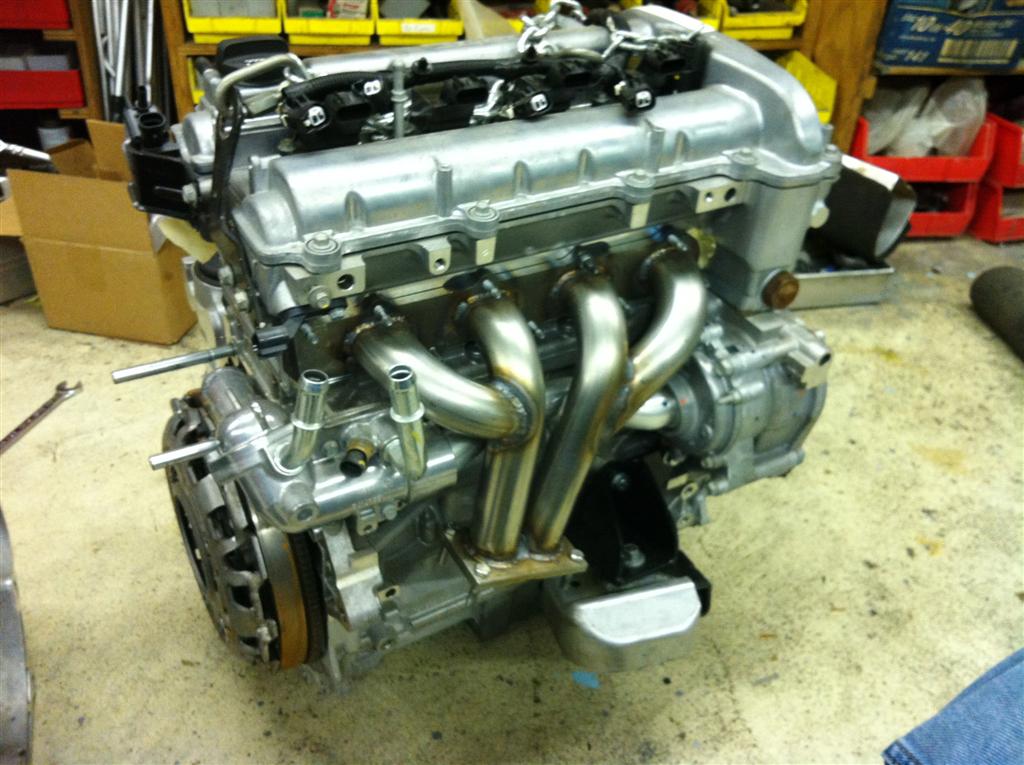
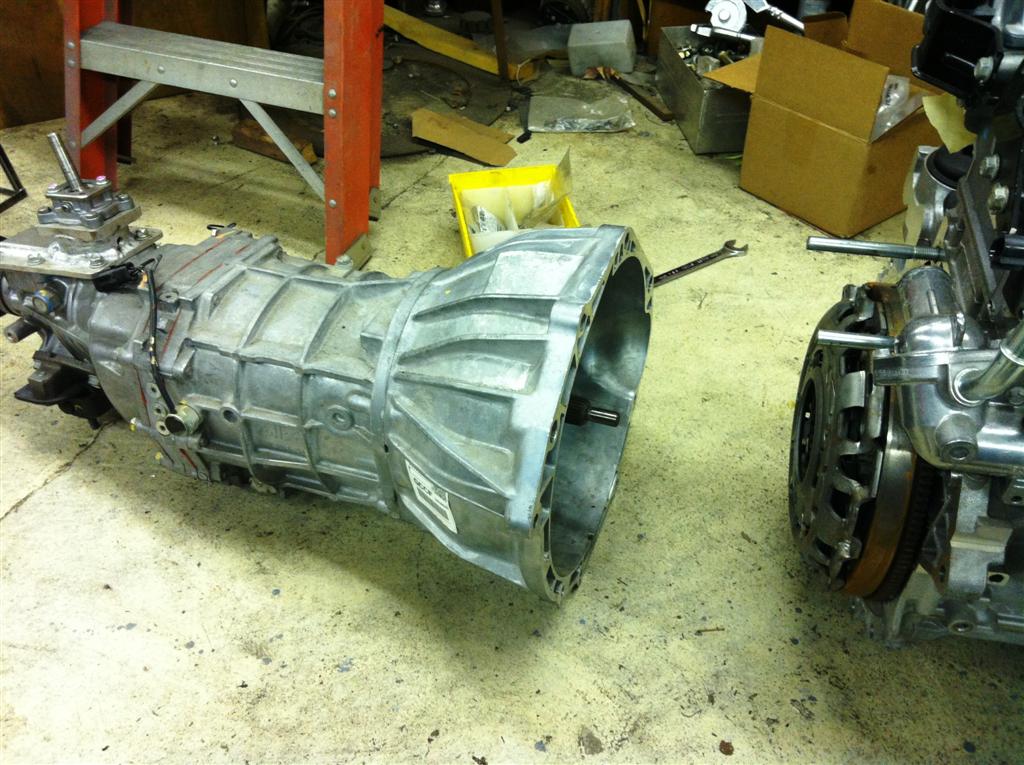
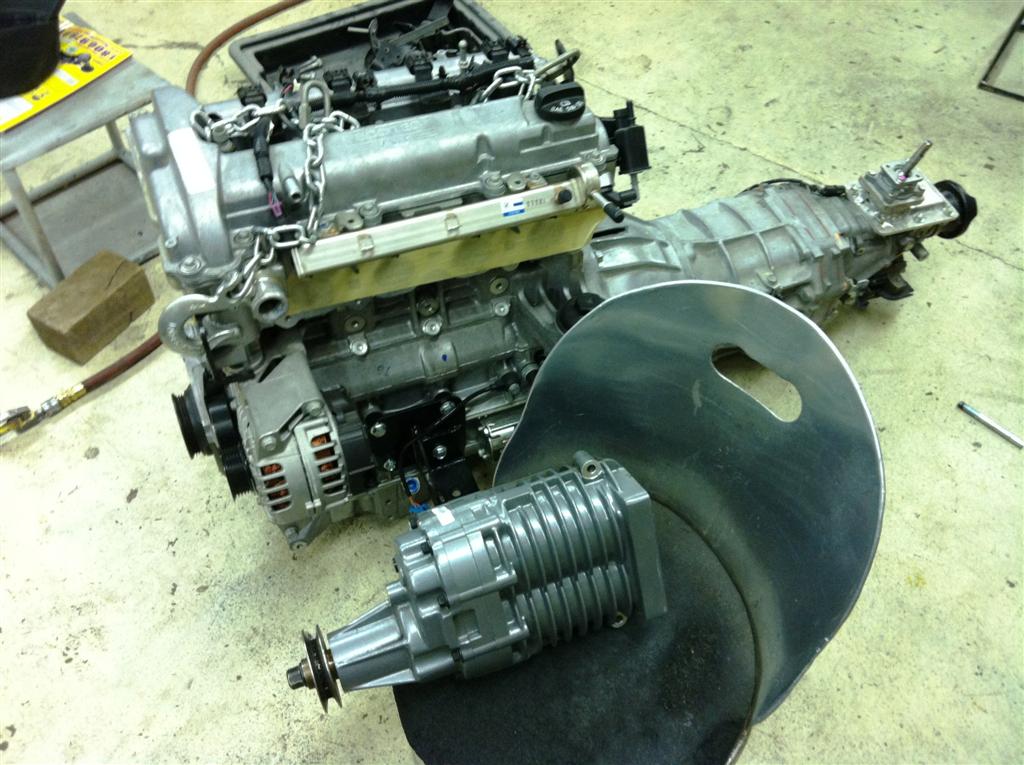
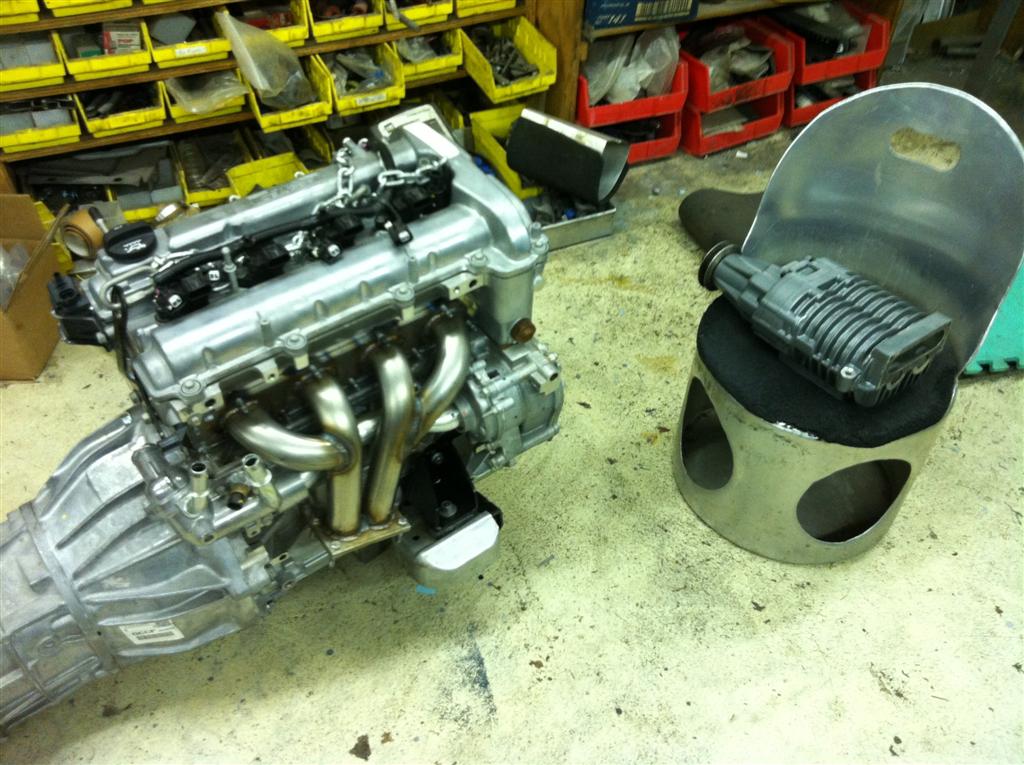
bowtie6‘s ECOTEC permanently met the new AISIN 5 speed Solstice gearbox.  It took some doing to get the right bolts because they were not supplied with the Mallett “take out” engine.  But, after some searching, I found the nine metric bolts that hold the two together.  Here are some pictures (and a little extra) of the event.  The clutch actuator has been installed, the only thing missing is the special metal pipe that fits on the side of the hydraulic actuator.  This pipe will be modified so I can use my Camaro clutch master cylinder.  I’ll pics on that later.

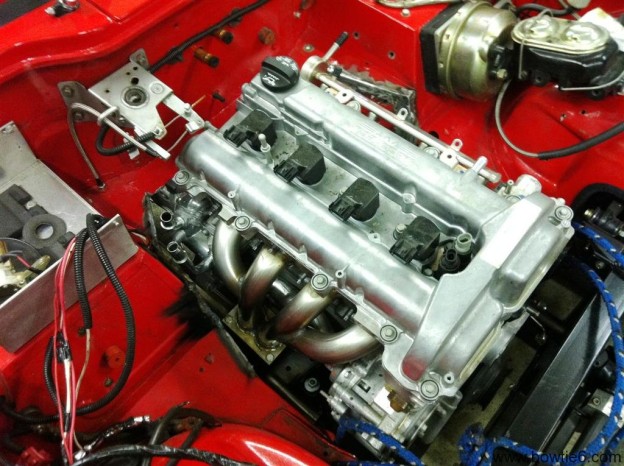
BTW, the header you see has all been hand made from stainless tubing.  The bung for the O2 sensor will be on the other side of the flange.  Take a look: