Category Archives: 5. Triumph TR4

Triumph TR4/TR6 Wheel & Tire Sizing

A few days ago, I received an email from a reader (thank you Richie) asking to know more about Triumph TR4/TR6 wheel & tire sizing as fitted to our cars.  I thought this might be helpful for others so I decided to take a few pics and show you what we have installed.

My Cousin’s TR4 Wheels and Tires

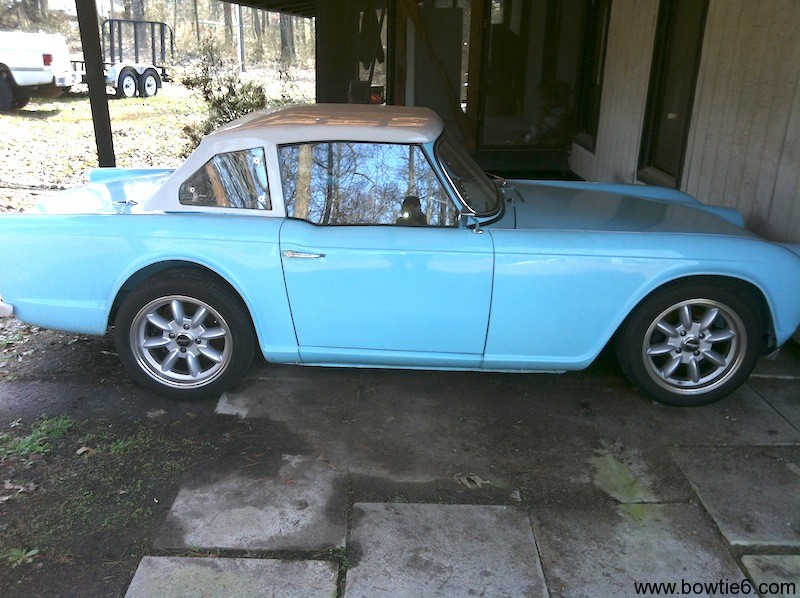
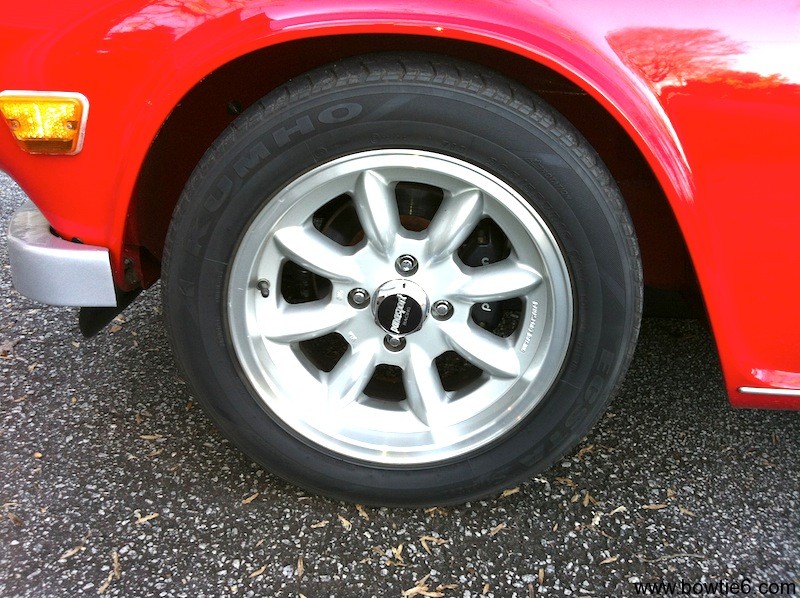
The email from Richie mentioned he had never seen a TR4 with 16″ Panasport wheels as in the case of my cousin Jim’s TR4.  The wheels are Panasport in the “standard” size for a TR6: which is 16 x 7 inch, zero offset as indicated by the following picture from taken from one of the boxes.

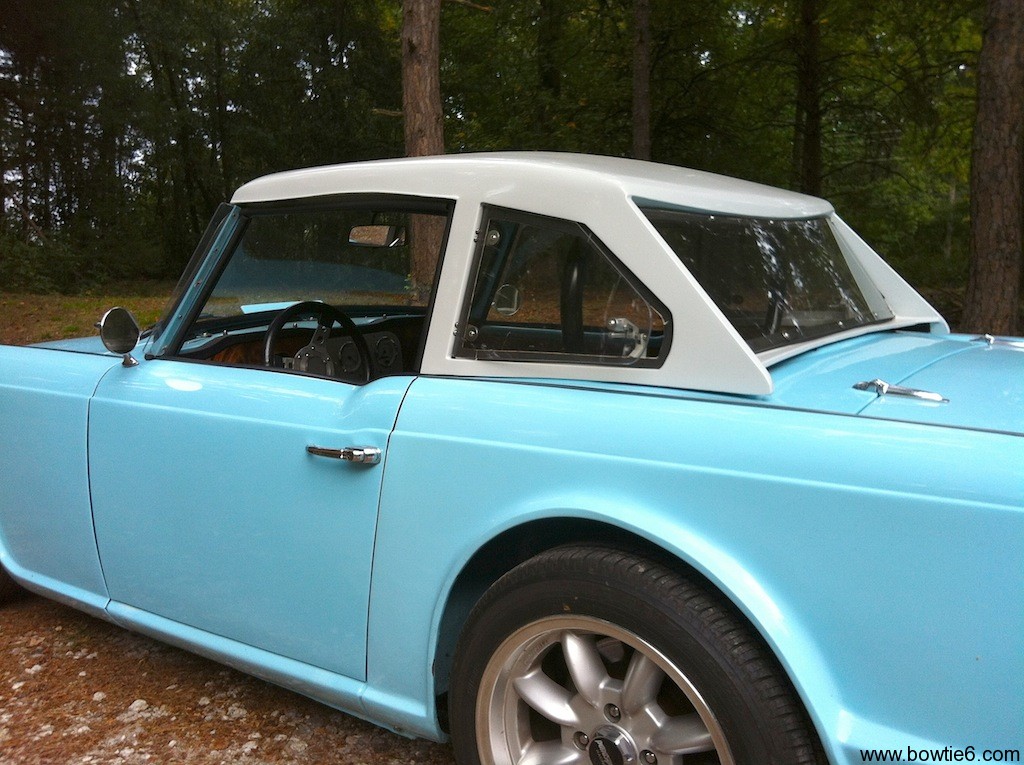
Richie also mentioned in his email that this wheels size would be too wide for a stock TR4 because the wheel would make contact with the leaf spring.  I suppose this is correct, however in our case this is not an issue because the rear suspension on my cousin’s TR4 is using coilovers instead of a leaf spring.  As seen in the following picture the wheel/tire package fits very nicely without the need for any sort of wheel spacers.  On closer look on the picture below, the rear wheel looks a bit “off” but that is just because of the way the surface is below the tire.  There is a dip in the driveway ahead of the concrete pad.

IMG_1380
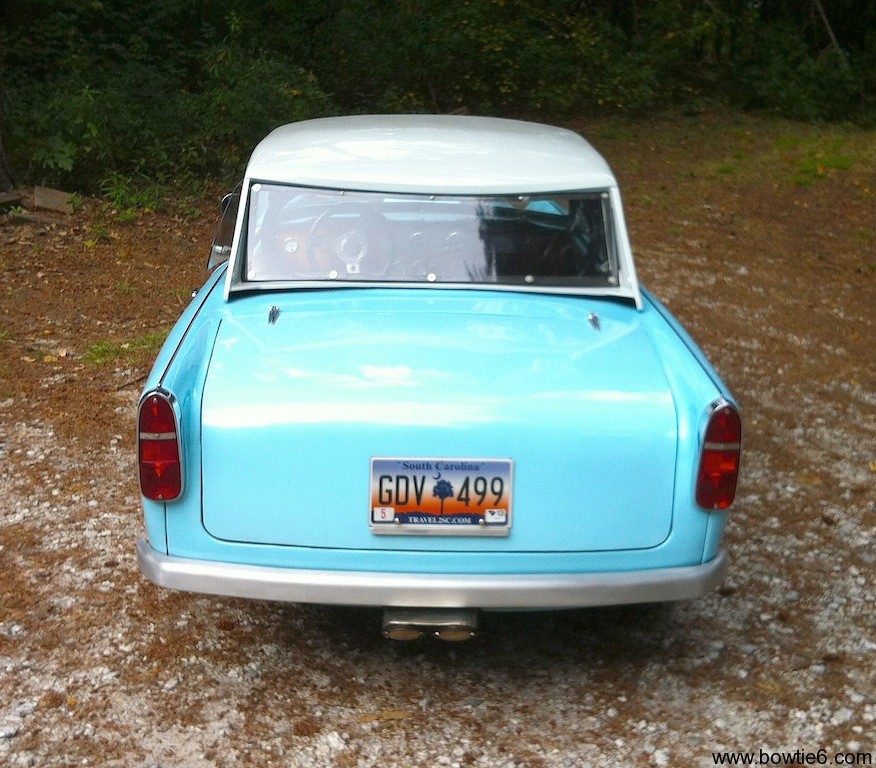
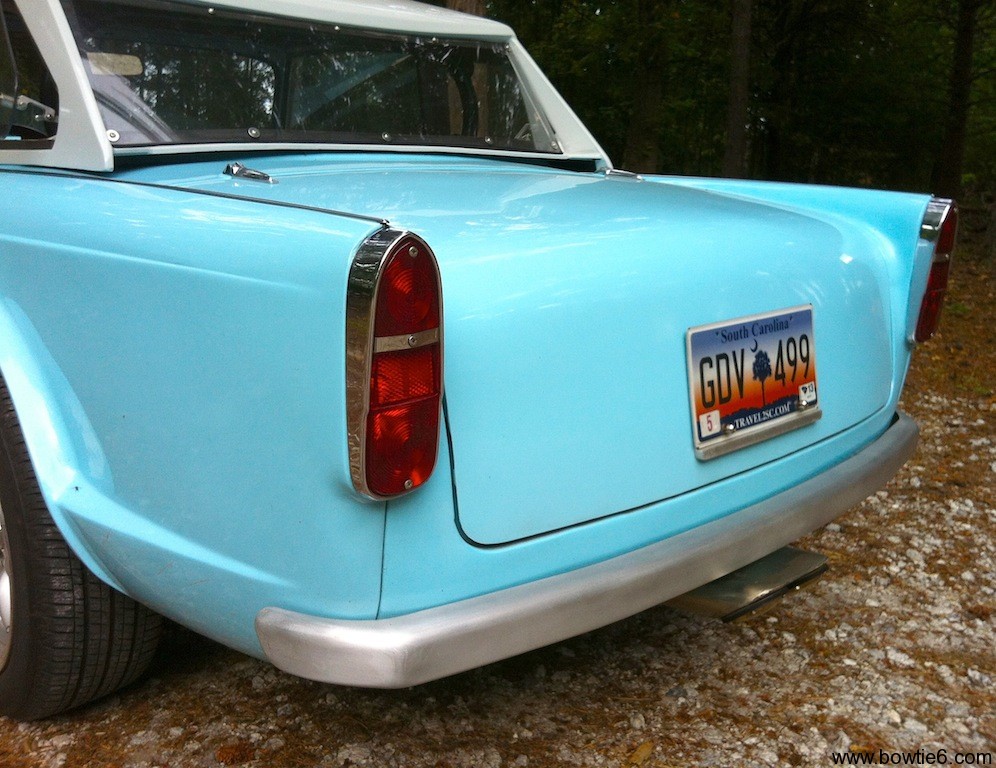
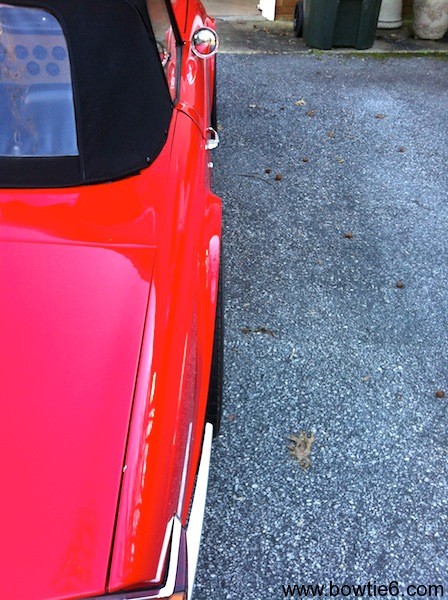
Here is a picture from the back of the car just to show the profile.  It is a little dark – sorry about that, I took this with my cell phone – but you can see the tires don’t stick out too far out from the fender edges.

IMG_1382
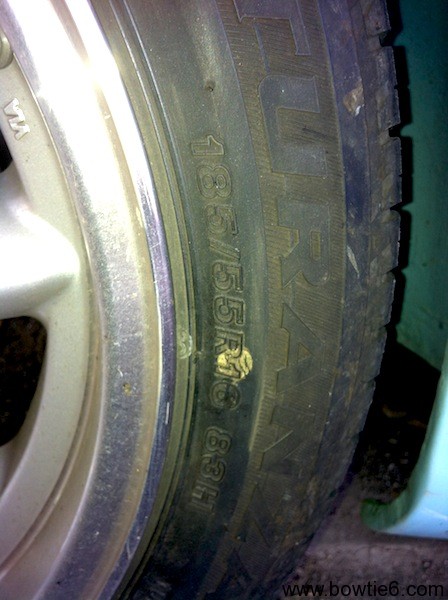
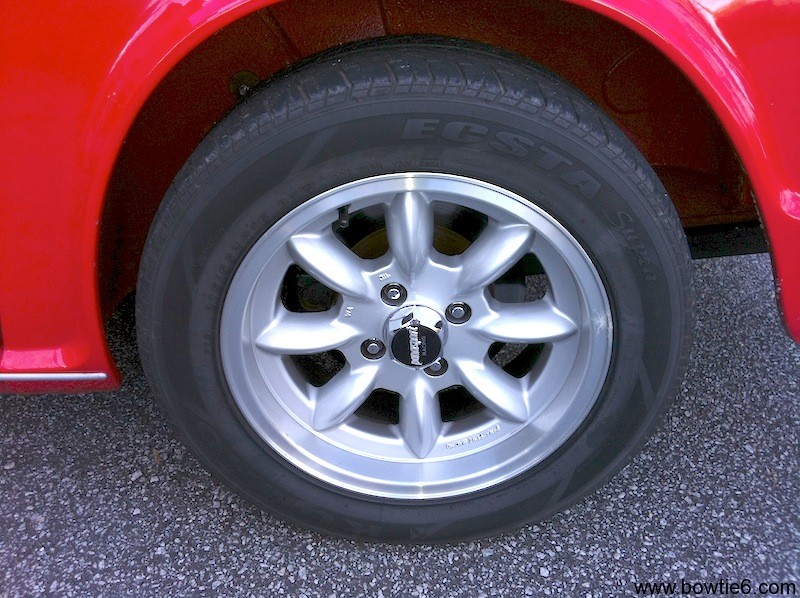
So now lets talk about tire size.  My cousin decided on a set of Bridgestone Turanza 185-55 R 16 as show below, on all four wheels.  They are a little narrow, but they work well.  If I am not mistaken, these tires came from a local Discount Tire store.

IMG_1383
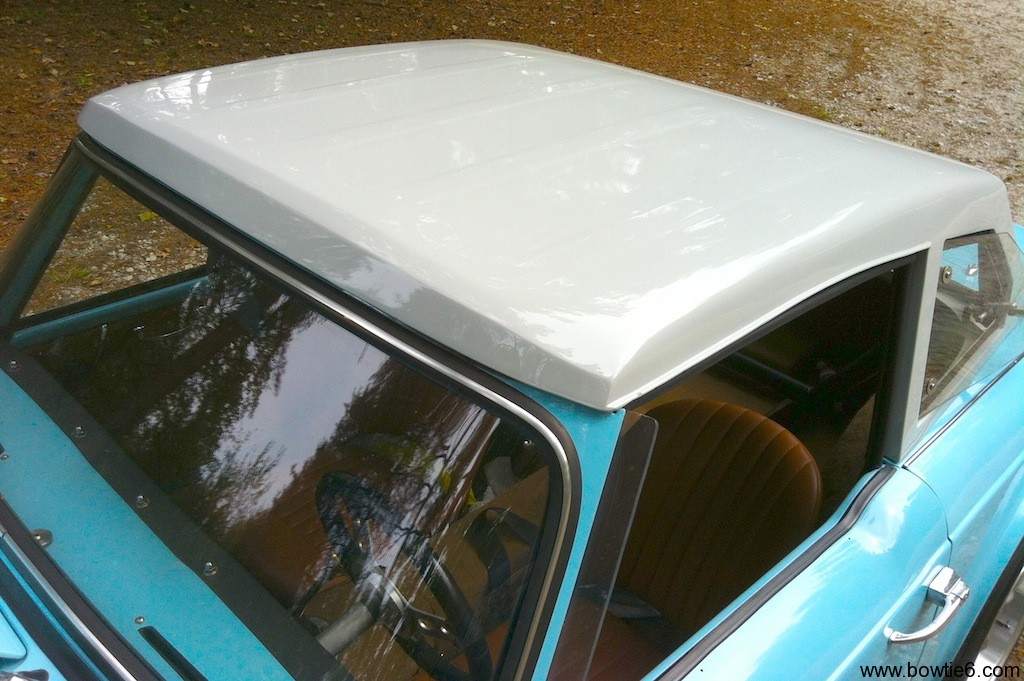
bowtie6‘s (TR6) Wheels and Tires

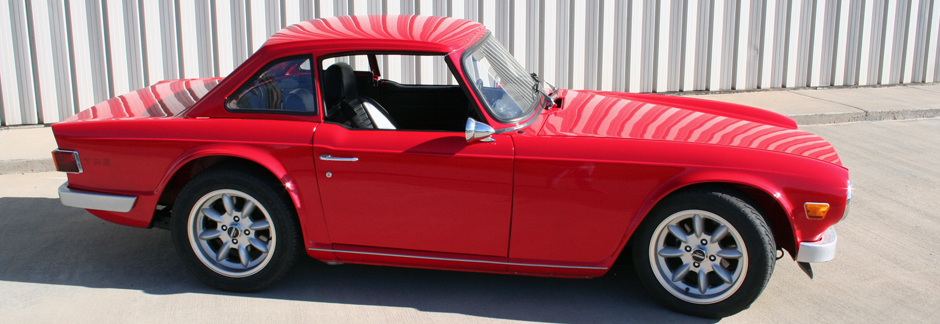
I have the same wheels as fitted to the TR4 on my TR6.  However, the tire sizes are quite different.  My first attempt was a set of matching Kumho 215-55 16’s.  This worked very well and gave bowtie6 a very aggressive look.  However, the front tires in this size were just too wide and on cornering I heard the edges of the tire digging into the front fenders.  I did not want to push my luck and have further problems so I bought a set of matching Kumho 205-55 16’s for the front.

This is what the 205-55 16’s look like on the front:

IMG_1387Here are the rear 215-55 16’s:

IMG_1386
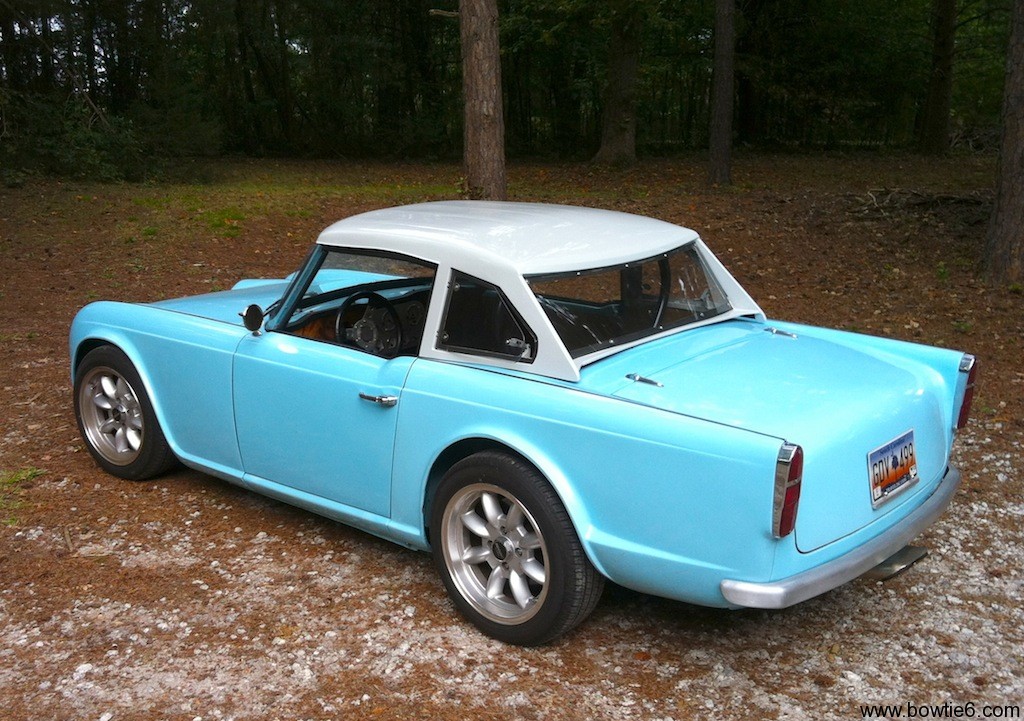
And finally, what this combination looks like showing the profile:

IMG_1384

The Kumho’s have been very good and have lasted about as long as you would expect from a “summer performance” tire.  When new, these tires were very soft and sticky, however after almost 18,000 miles they are now showing quite a bit of wear.  They are also much harder and need replacing.  More than likely I will be ordering a new set of BFGoodrich tires, just like the ones I recently bought for my Honda S2000 and they were sourced from The Tire Rack.  They are also “summer performance” tires and I anticipate good service from them.

Just as in the case with my cousin Jim’s TR4, my frame has coilovers and clearance is not an issue.  Finally, bowtie6 does not use any form of wheel spacers.

What about size for the next set of tires?  Well, I have been struggling with this a bit.  The staggered 205/55 front and 215/55 rear gives the car just a tad of rake that I really like.  The downside is not being able to rotate tires.  So the question is whether to go for the staggered look or just buying four 205/55 16’s for all corners.  Stay tuned, I’ll have an update when I make up my mind!  😉

Final Thoughts and Considerations

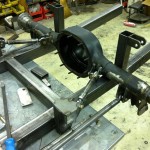
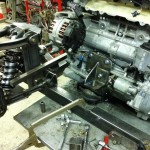
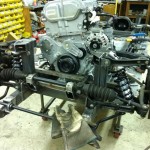
Please keep in mind as you study these pictures that we have custom made frames under out cars.  The frames and suspensions were specifically designed in order to give the necessary room for clearance between the wheels and all other components without having to resort to dreadful spacers.

As a side note though, I did use the staggered setup along with the Panasports on my TR6’s factory original frame before it broke.  In the front though, the upper “A” arms had to be trimmed just a tad in order to clear the wheel weights on the front wheels.  The rears though, fit perfectly with the stock TR6 trailing arms.  So a 16 x 7″ Panasport will fit on a TR6.

Another trick that is not easily visible is the way both TR4 and TR6 body shells are mounted on our frames.  You see, we made spacers in order to adequately raise the body just a small amount in order to make things line up properly.  This required a little “thinking outside the box” but the end result turned out very nice indeed.

And there you have it.  If you have any questions, suggestions or comments they are all welcome.  Just fill in a comment below and I will be happy to elaborate some more.

Update:

More info about tires on a TR6 here: Yokohama ADVAN Neova AD08 on a Triumph TR6

Details About an ECOTEC Powered TR4

After the success we had with bowtie6, my cousin Jim and I had many conversations on improving the concept.  I remember countless hours of discussions next to the space heater in Jim’s well equipped shop several winters ago.  We quickly zeroed-in on the engine:  the Ecotec as fitted to the Pontiac Solstice mated to the Aisin 5 speed gearbox would supply a powerful and reliable drive-train.  It would also offer a PCM that we could tweak with a laptop.  We also decided a Triumph or MG would be a good platform for the Ecotec.  Finally, we would subscribe to the ideas that Anthony Colin Bruce Chapman based his designs upon:  keep wight at a minimum.

Eventually, we got word there was a local fellow with several cars in his basement that had to be sold  Needless to say, Jim and I quickly grabbed our gloves and jumped in the shop-truck and headed out to this fellow’s basement.  Sure enough.  We found a 1964 TR4 as well as a Datsun 2000 roadster.  The Datsun was our first choice since it is the more “exotic” of the pair however it was missing entirely too many parts.  Jim decided the TR4 would be the best choice.  A few days later we arrived with a trailer and brought the TR4 home.

I could write about all this for hours but I think you want to see pictures and not a bunch of words, so let me fast forward to the present and show you what Jim’s TR4 looks like today.  Unfortunately I cannot cover the entire car in one article; I’ll break this up into several.  Today, I’ll start with the outside.  After all, beauty can’t be only skin deep, right?

As you can see in the picture above, the nose of this TR4 incorporates many subtle changes.  For starters, the turn signals are gone.  They are now hidden behind that hand-made aluminum grill.  The front bumper is also gone and the oval air inlets below the grill have stainless mesh behind them.  Finally there is a hand formed “air dam” with two “nerf” bars on the roll pan.  Jim likes his “nerf” bars – Steve if you are reading this, I am sure you will agree with me.  🙂

The picture above shows the new bonnet.  When I mean “new”, I mean this piece was formed entirely from aluminum.  If you look closely, you will see the “bulge” is missing – I guess it is a matter of choice but this is the way Jim decided to build the bonnet.  The trick to making this bonnet was piecing together several sections.  They were all carefully formed on the English wheel and TIG welded together.  The following gallery shows what the back of the bonnet looks like.

But… Before you start clicking on all these pictures take a look at the first one of the set.  There is a small recess, wide enough for two fingers to be used to lift the bonnet once the latch is released.  Pretty cool, huh?

Next you can see the backbone of the bonnet.  This backbone is also made from aluminum and is not welded, instead it has been bonded to the backside of the bonnet with automotive epoxy glue.  Finally, take a look at the third picture.  If you look close enough, you can see some of the hammer marks left from when Jim formed the headlight bulges.  Yes, all this was carefully welded and shaped just like it in the glory days of hand formed bodies.

The next gallery shown above, displays the hard top Jim made for the TR4.  This top is entirely made of aluminum and just like the bonnet, is extremely lightweight.  Again, many pieces formed by hand and on the English wheel, TIG welded and carefully finished.  If you look at the surface of the top (see second picture) you will see ridges formed by Jim’s Pullmax machine.  These ridges are there to add strength and to prevent the top from oil-canning.  Finally, to keep weight down Jim used thin Plexiglass in the windows instead of glass.  Oh and the side windows open; Jim made special hinges to allow the side windows to pivot.  The following collection of pictures shows what the top looks like from the back and from the sides.

The back third of the top has a small taper.  It is also formed in such a way to give the rear glass a curved look.  At first, one would think this would hinder visibility but the seats are very low in this car, and outward visibility is excellent.  I think it looks very cool!

Finally is this picture from the back of the car.  The bonnet is also different from stock.  Yep, you guessed it.  It is also formed from aluminum.  Jim made a similar backbone frame for it and it is extremely lightweight.  As if that were not enough, take a look at the rear bumper.  This one is not as wide as the ones Jim made for bowtie6, but is just as lightweight.  This bumper also is different from mine in that it’s finish is made by simply wiping it with ScotchBrite.  This gives the aluminum a muted, matte finish.

I hope you have found this interesting.  I’ll have more about Jim’s TR4 in future articles, so stay tuned!  😉

Alumakini on the TR4 – Part II

Last post listed the new modified “Surrey” top on my cousin Jim’s TR4.  Perhaps it is more of an “alumakini” but either way you look at it, it is a quick way to get the sun off your head and make the car a little more enjoyable while still being unique.  Granted, this is not everyone’s cup-of-tea, but if you are looking for “original” then you are in the wrong website.

The following pictures show the “wing” section now fully welded on.  Not only does it look trick, it is fully functional.  The new alumakini provides not only some needed shade but it has made the driving experience much enjoyable:  not as much buffeting and to boost a little downforce provided by the lip.  Nice.

Note the interior in the picture above.  The seats are not “original” Triumph issue.  These have been made from scratch, they are all aluminium.  A local upholstery shop made the covers.  That shop also made the door panels.

The following are closeups of the spoiler.  Sure the top has not been fully finished but you get the idea.  Since this is aluminium, it will need to be etched and then a couple of coats of sanding primer followed by paint.  I’ll have updates when they become available…

Comments?  Drop a line and let us know what you think.


Triumph TR4 Surrey Top – modified

Well – here’s a new one for you…

There is the concept of a Surrey top for a TR4/250.  OK – they are nice but they are hard to find.  They have glass and they are heavy.  They do offer a removable centre section and yes, they are pretty cool.  But here is a variation on the theme…

My cousin Jim’s TR4 has been an awesome car so far.  The ECOTEC has been magnificent providing plenty of power and lots of fun.  However summer is upon us and it gets a little hot to go topless the whole time.  What to do?  Order a canvas top and look like any other TR4?  Nah.  How about this:

Jim’s TR4 has a rollbar bolted to the bespoke frame on special mounts.  Off the hoop, there are two tabs offering a way to mount the hand-made aluminium “bikini top” shown on the picture at left.  The three “ribs” have been formed on a Pullmax machine.  All total this top is not heavy at all, maybe a couple of pounds.  Not exactly “stock” or “original”, but what the hell.  Jim is a master craftsman and this car is indeed unique.

Here is another shot of the new top.  It shows the mounts on the rollbar.  The front attaches to the factory mounts on the windshield frame.  Two bolts will hold that in place.  Jim has made this in such a way that the side glass can be rolled up and it will be perfectly aligned with the edge of the new “top” – and by doing so, the car could be driven with light drizzle and this would prevent one from getting soaked.  This is the inspiration to the new “top”.  Granted, this is not everyone’s cup of tea but what the hell.  It certainly looks trick!

I realize the top looks a little “crude” – it was only made today and has not been totally finished yet.  We were kicking around the idea of fully polishing this top – after all it is aluminium.  The idea would be to make it as shiny as chrome.  Then again, it might just get painted either body colour or some other contrasting shade.  We were also kicking around the idea of covering it with some convertible top canvas to give it a faux look.  One thing we can be certain of:  take a look at the following picture:

Check out the little tab…  That is a small proof-of-concept:  yes, the top is going to have a mild NASCAR “wing” on it.  This will not only look good, it will provide some downforce at high sped.  And believe me:  the TR4 needs it.  With the extra pop of the ECOTEC, the car certainly can use a few free pounds of downforce.  After all, all the pressure would be transmitted to the rollbar, mounted directly to the frame right above the rear axle…  Pretty cool, huh?

Engine Fitment in the TR4

A fact has been brought to my attention:  “Amazing that in the TR link, with all the hype about the engine, there is not a single pic of the engine in the car!”.  My bad.  Time to make amends; time to really document the engine in the car.  Some facts:

  • The engine is a 2.4 litre VVT ECOTEC from a Pontiac Solstice
  • The transmission is a five speed AISIN also from a Pontiac Solstice
  • The wiring harness has been lifted from the Solstice and modified.  It has been vastly simplified.  How?  RTFM.  Seriously, all the info is available in the Factory Service Manuals – trick is finding it.  😉
  • The ECM has been reflashed in order to disable VATS.
  • This ECM is fully programmable – in this case we have HPTuners on a laptop.  Right now, we are running the stock configuration – hopefully soon we will spend some quality time on a dyno and then tweak the thing.
  • The stock plastic intake has been replaced.  The intake you see in the pictures was all hand made from aluminium and welded to a flange in order to make the runners match the intake ports.  This is done for a reason:  the original plastic intake does not give enough room for the steering column in a TR4.
  • The stock throttle body with its fly-by-wire controls has been retained.
  • The exhaust manifold has been discarded.  Like the intake manifold, the header is all hand made from stainless.  This is also welded to a special flange in order to match the ports on the engine block.


As stated above, the throttle remains fly-by-wire.  There is nothing ‘weird’ about this.  Actually it is extremely fast and the throttle body reacts to small inputs as well as full throttle acceleration (done that many times).  Matter of fact, my wife’s HHR (it has a 2.4 Ecotec as well) has the same fly-by-wire setup and it is very responsive.  I have no problems running this furthermore this is the way more and more modern cars operate.

The intake and exhaust manifolds have been altered and this is done for a reason:  the body needed to remain intact.  There has been some work done to the tunnel though.  A new transmission cover has been made as well as the driveshaft cover between the seats.  I don’t have a way to show that since the TR4 is assembled now.  However when I put bowtie6 back together once his ECOTEC is in place, I’ll have better pictures to show of how that all fits.

If you have questions and/or comments, please make an entry here – I’ll try to answer back!  Keyword here is:  dialogue!  🙂