Tag Archives: frame

bowtie6‘s New Frame – Check It!

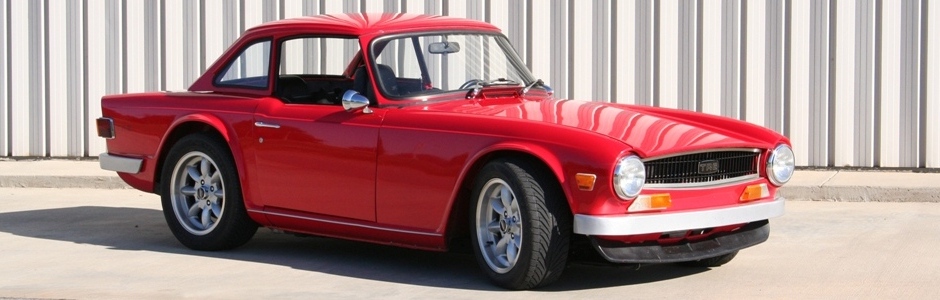
The new custom frame is done.

After much anticipation, the new custom frame is finished.  It has taken a lot of work by my cousin Jim and I could not be happier.  There are plenty of pictures – they are at the bottom of today’s entry in a gallery, but first here is what we have:

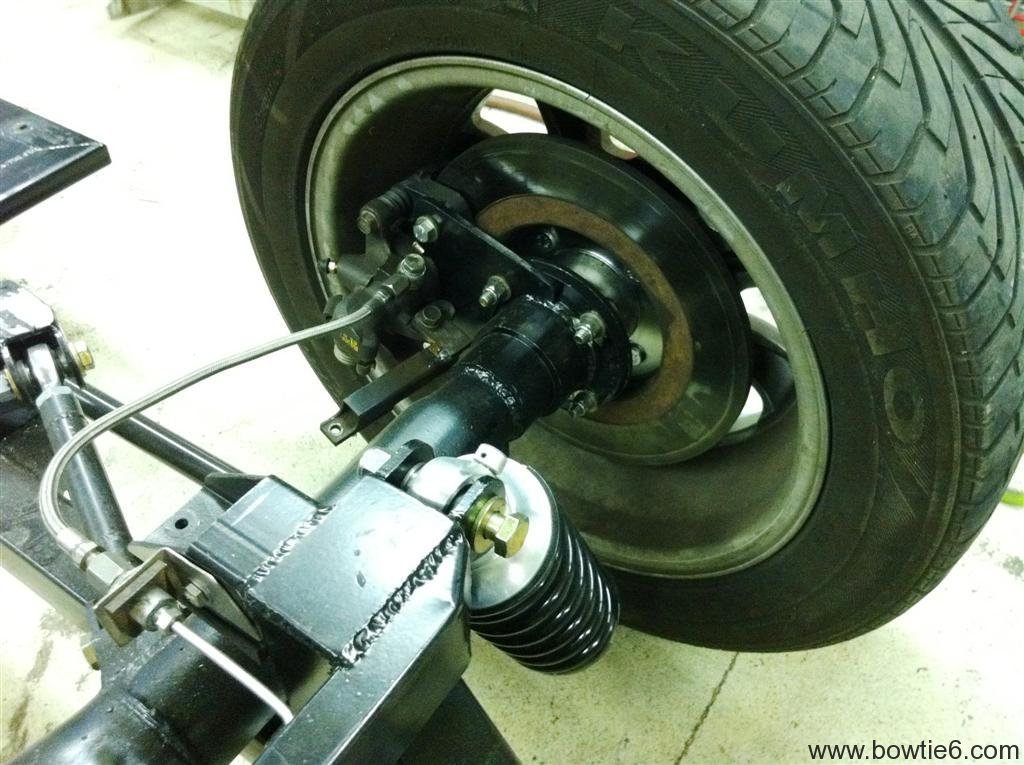
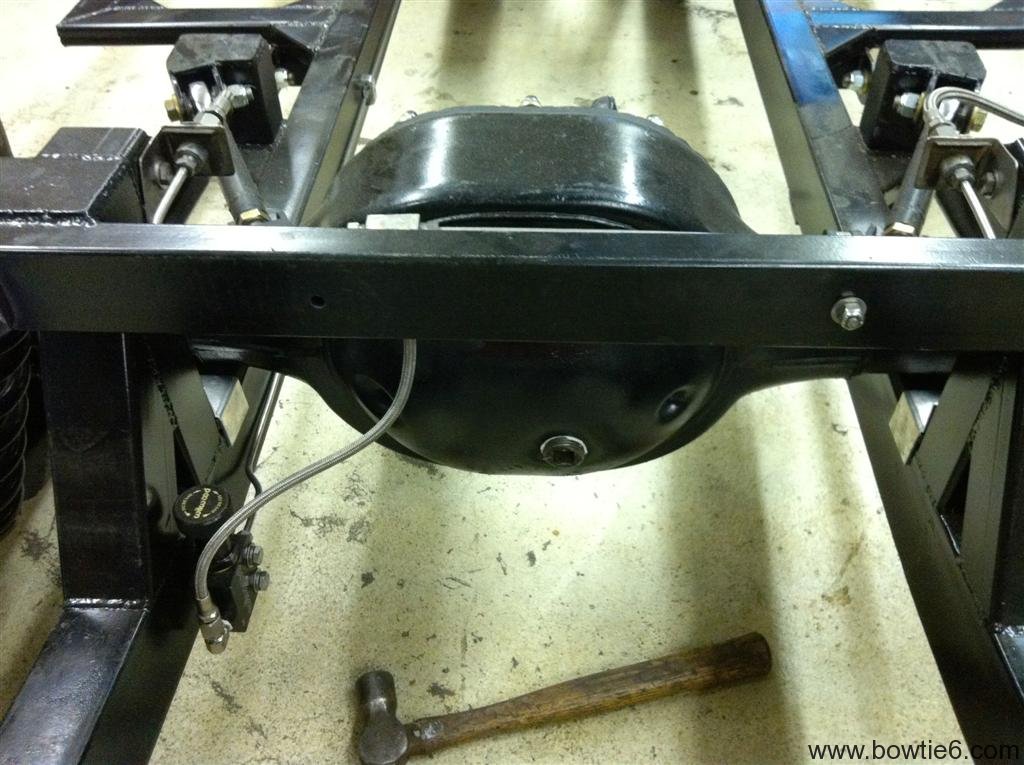
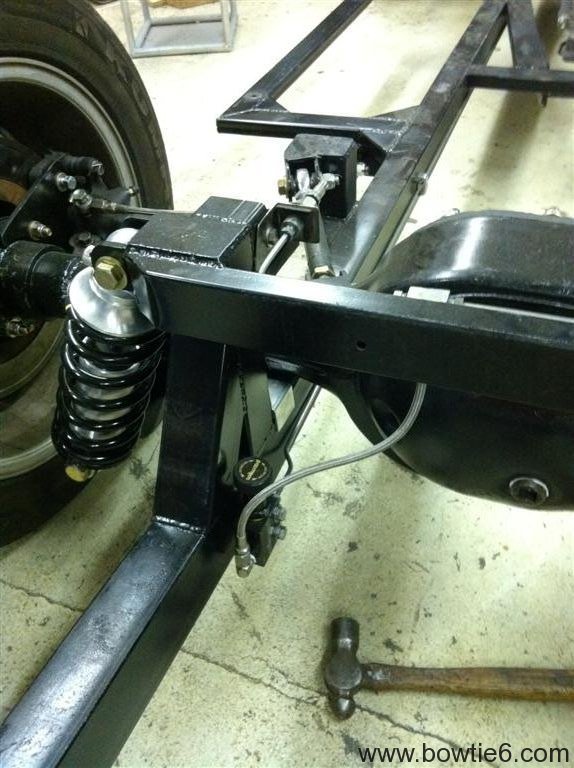
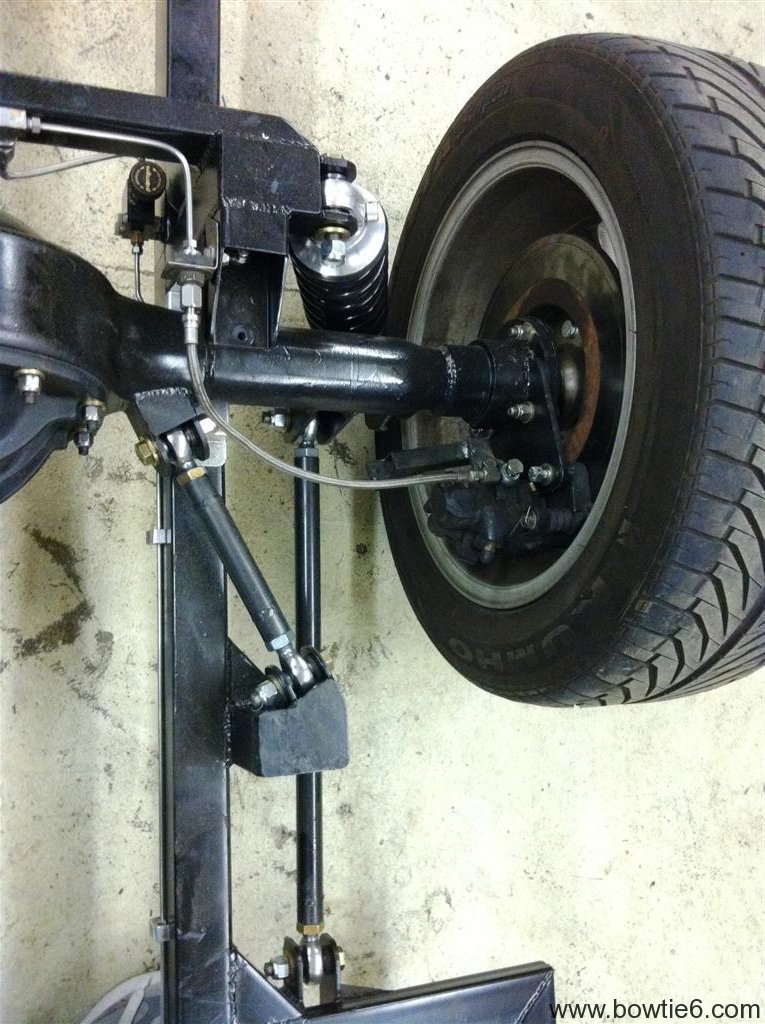
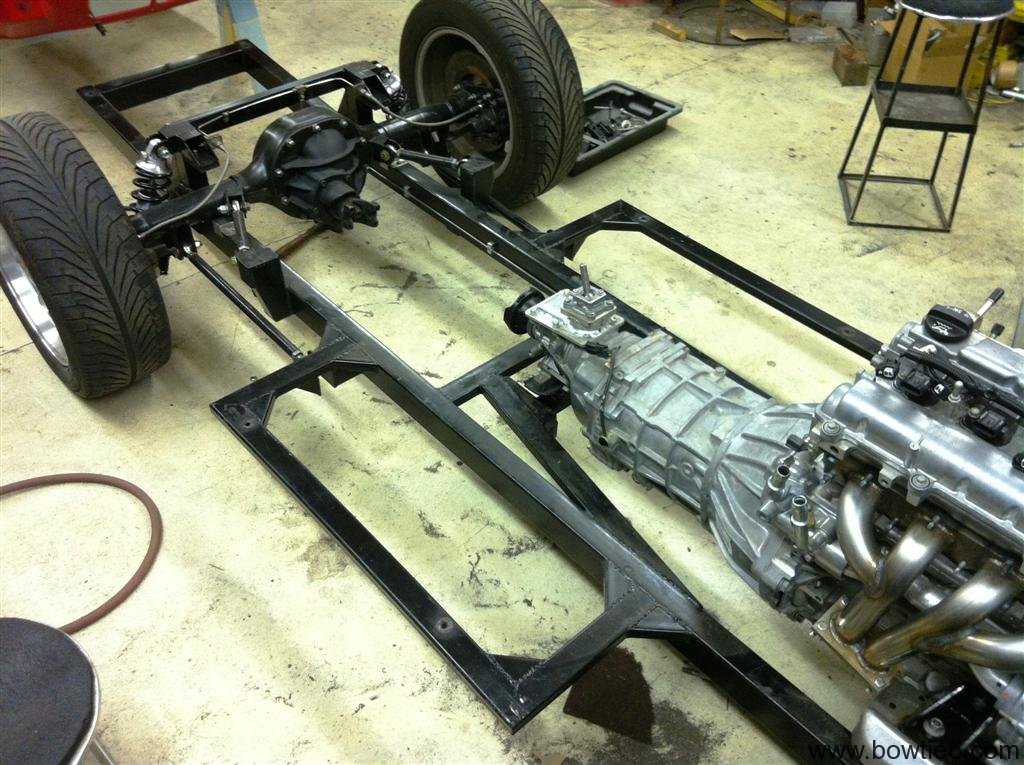
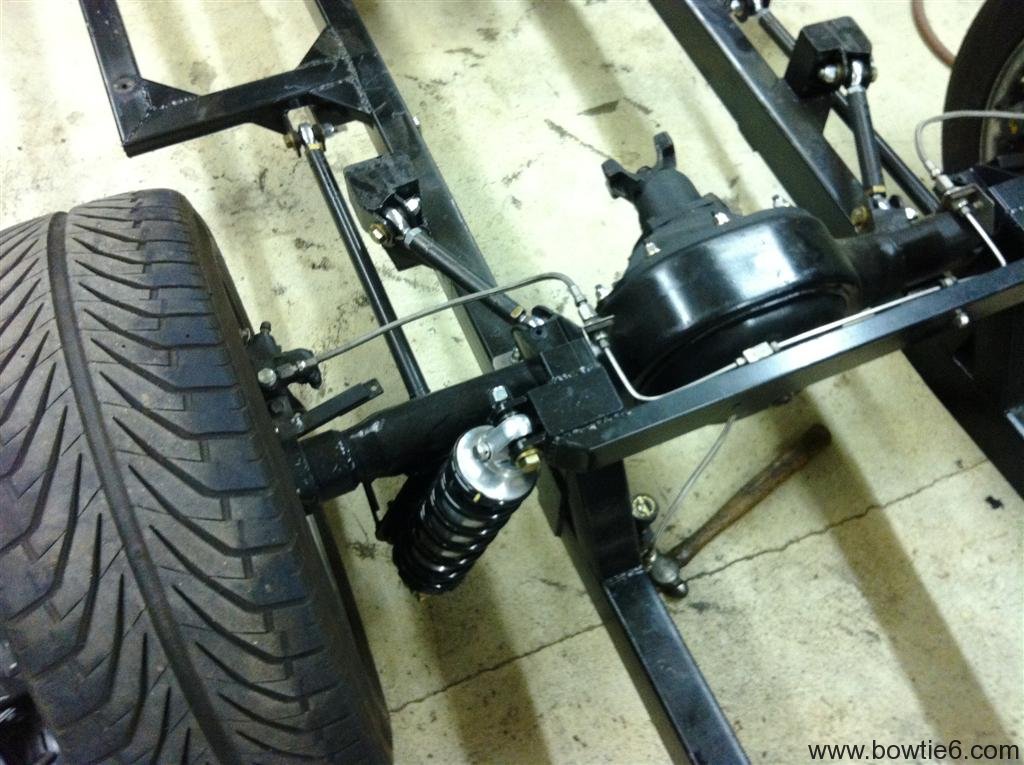
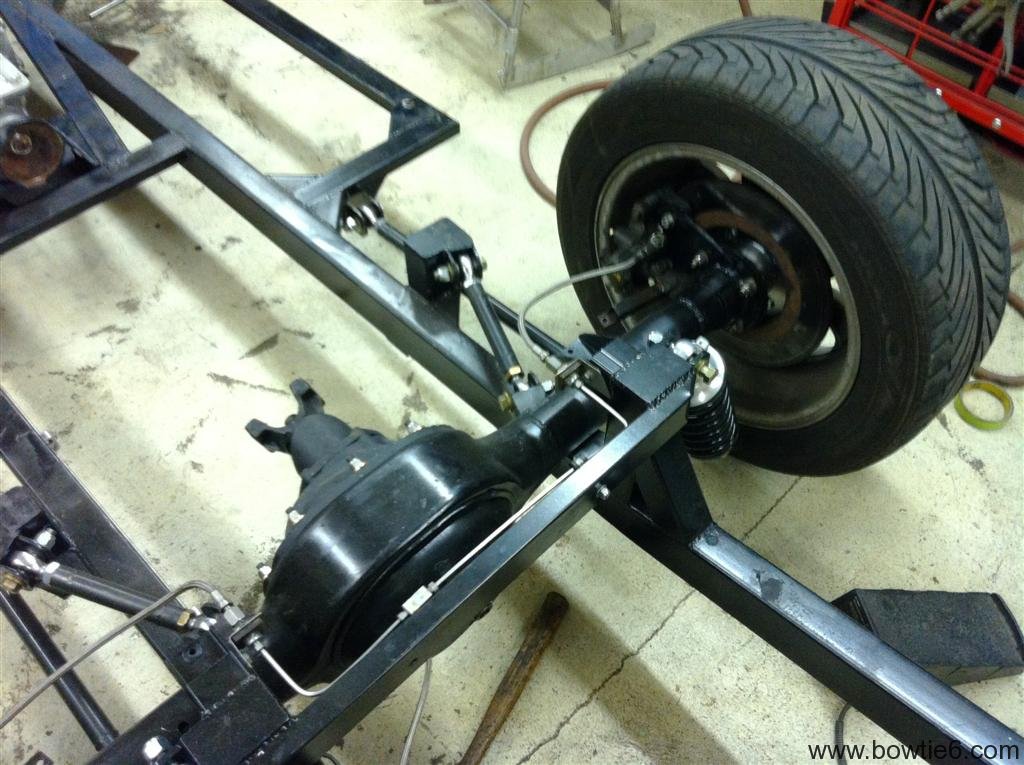
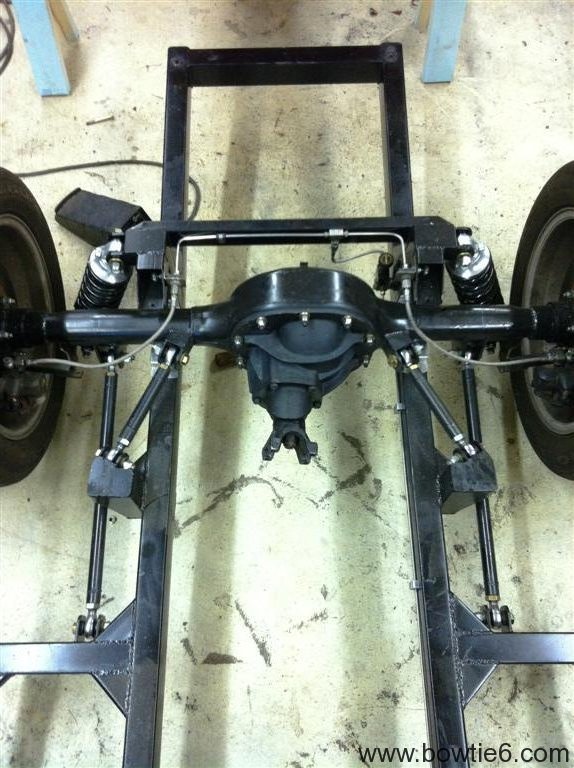
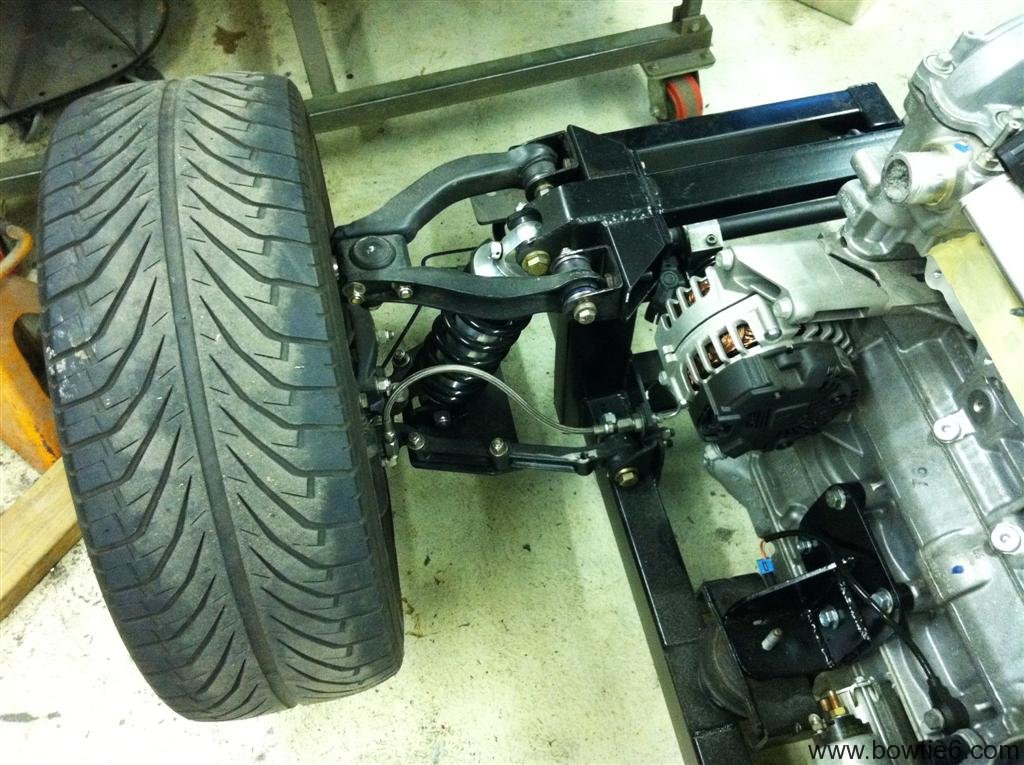
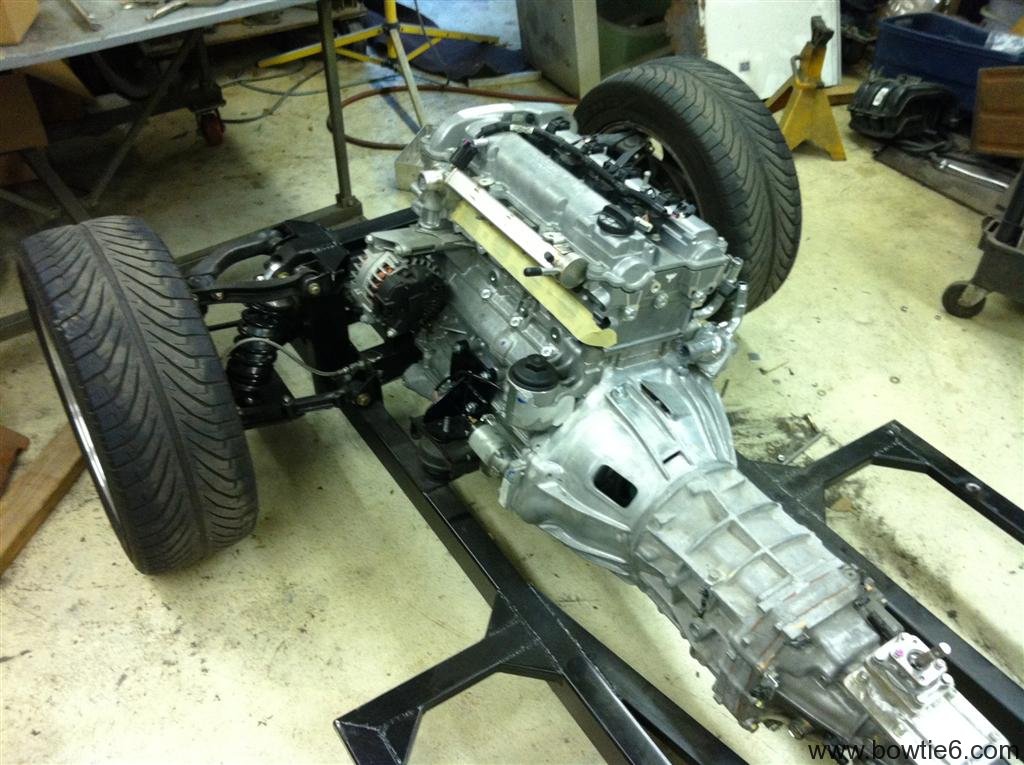
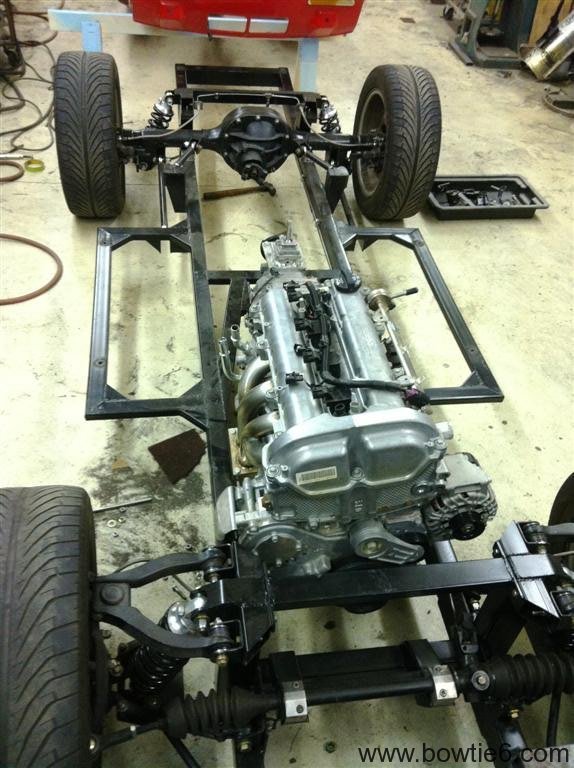
The frame looks different from the original setup.  This was done for several reasons, but mainly for strength.  The next was the ability to mount the rear solid axle.  One of the main concerns I always had in the back of my mind was whether the hubs/halfshafts would fail.  This time, the new axle will handle all the power on tap with no reservations.  This time, the diff is posi-traction with a 3.80 to 1 ratio.

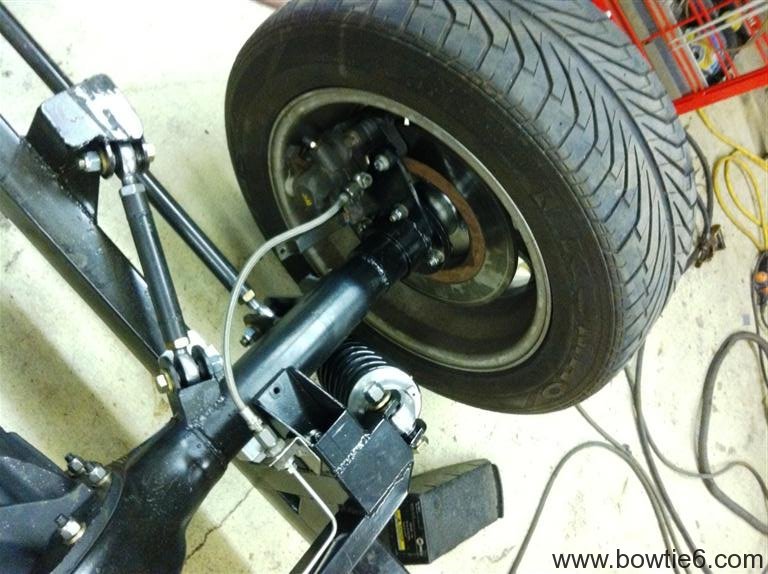
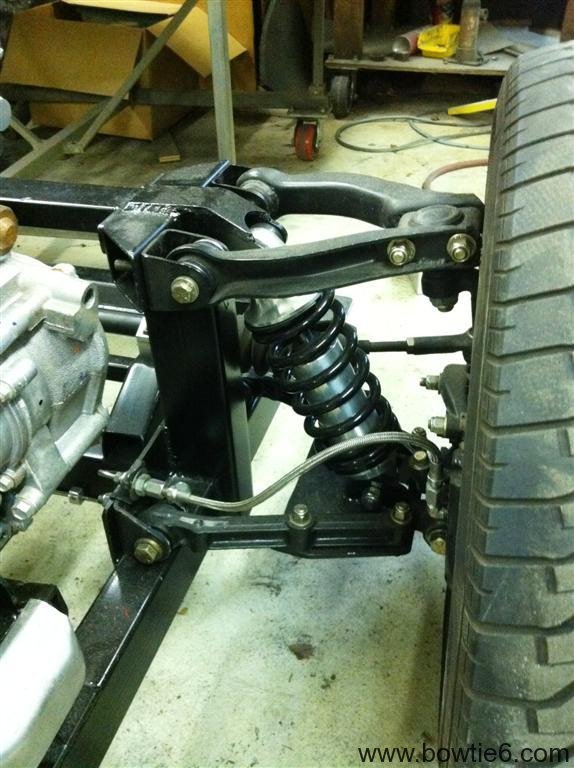
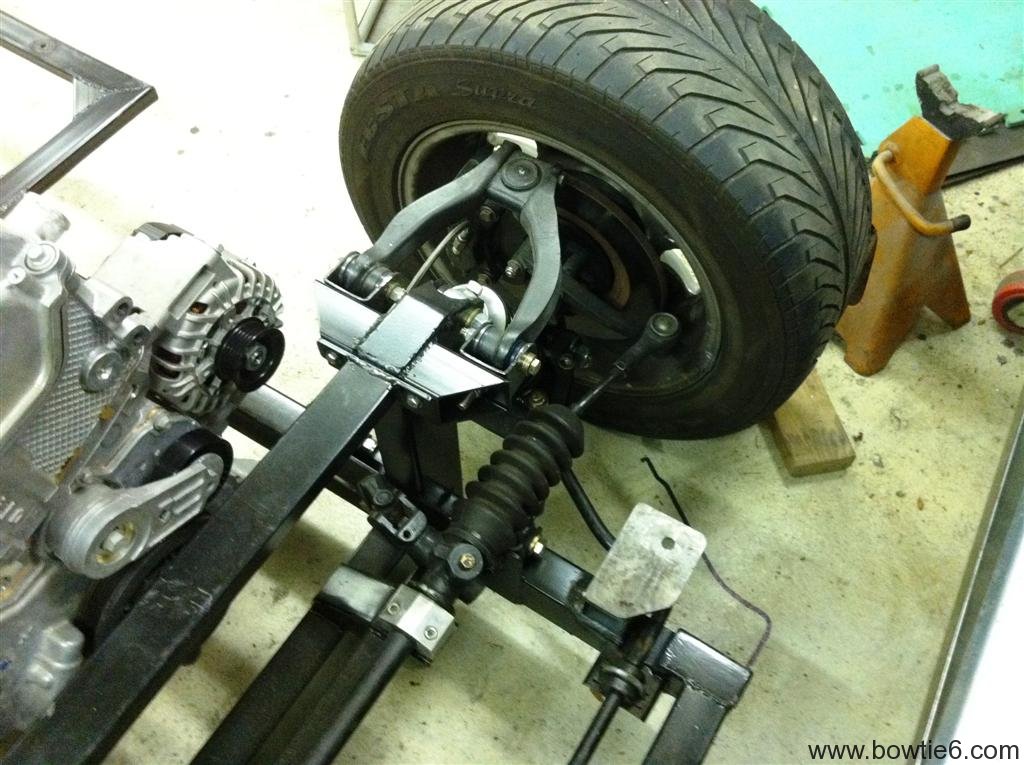
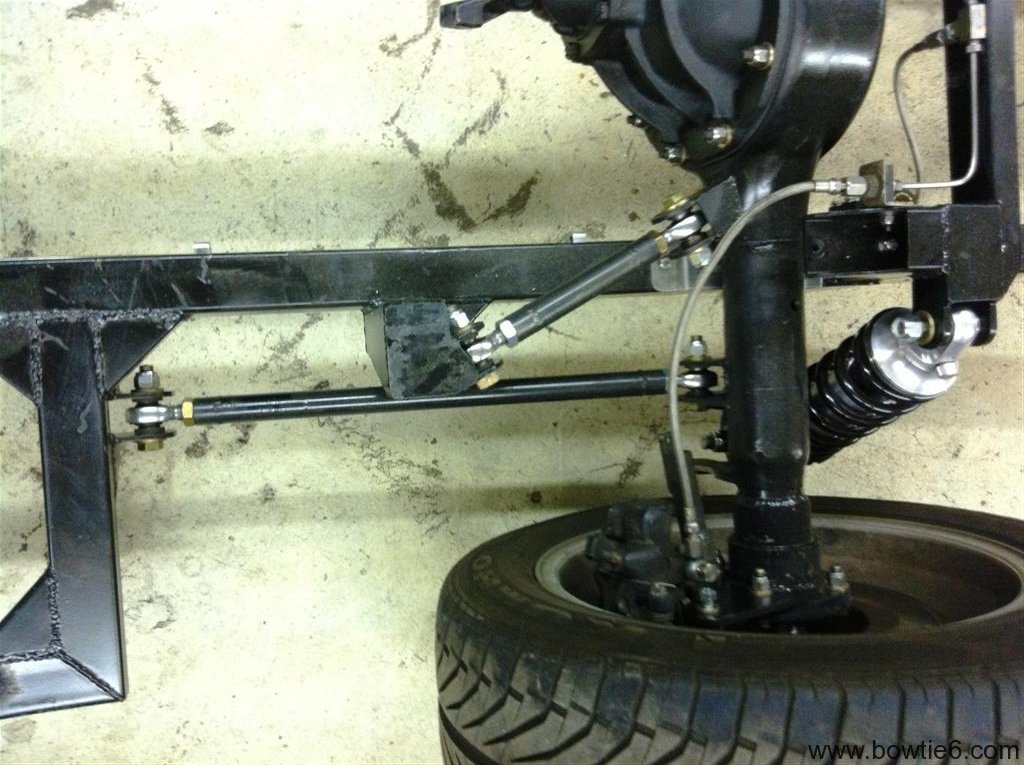
The rear calipers I had on the old frame have been adapted to work with the new axle.  As you will see, the front calipers are the same Wilwood’s from the original build.  The original mounts were retained.  All brake lines going to the calipers are the ones used in the past build – braided teflon lined.  And, there is also a picture below showing the location of the Wilwood proportioning valve.  All brake lines have been scratch made from stainless tubing fitted by hand.  They look killer!

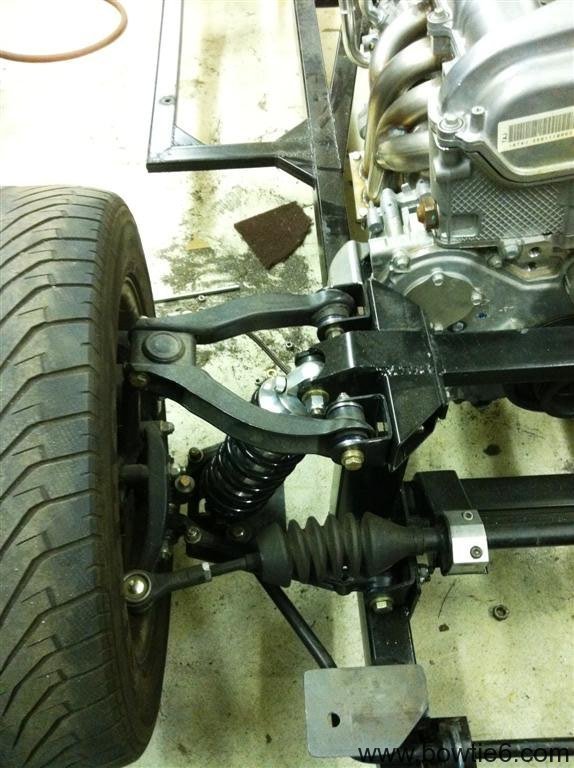
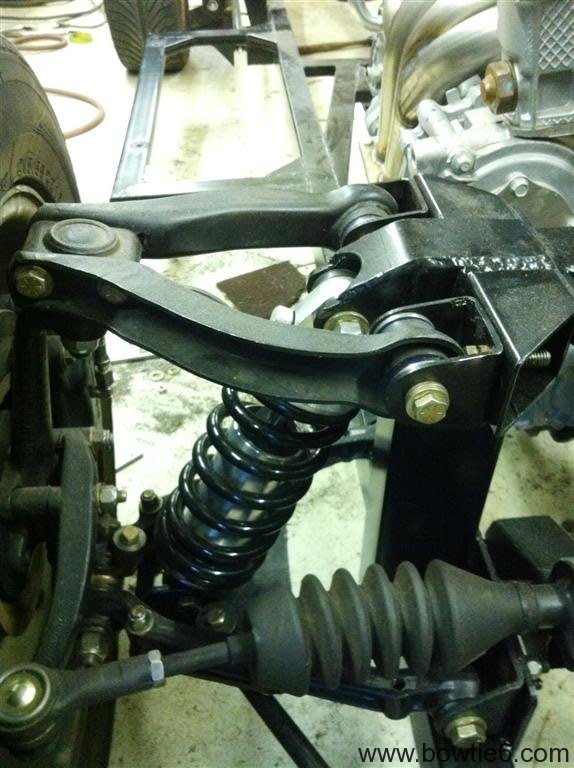
Coilovers have been used on all four corners.  This part took a bit of research and the spring rates took some careful consideration.  These are the same settings used on my cousin Jim’s TR4.  Not only do they look awesome but they perform equally well.  They are quite pricey but just the fact there will not be any more spring compressors involved makes it worth the trouble.

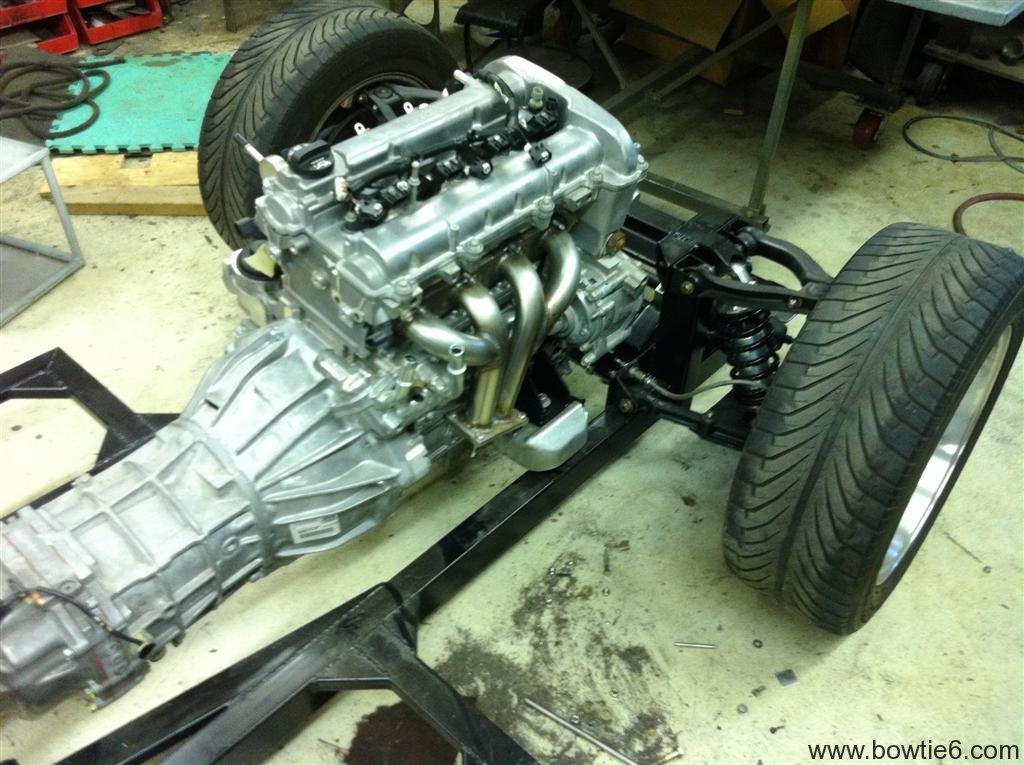
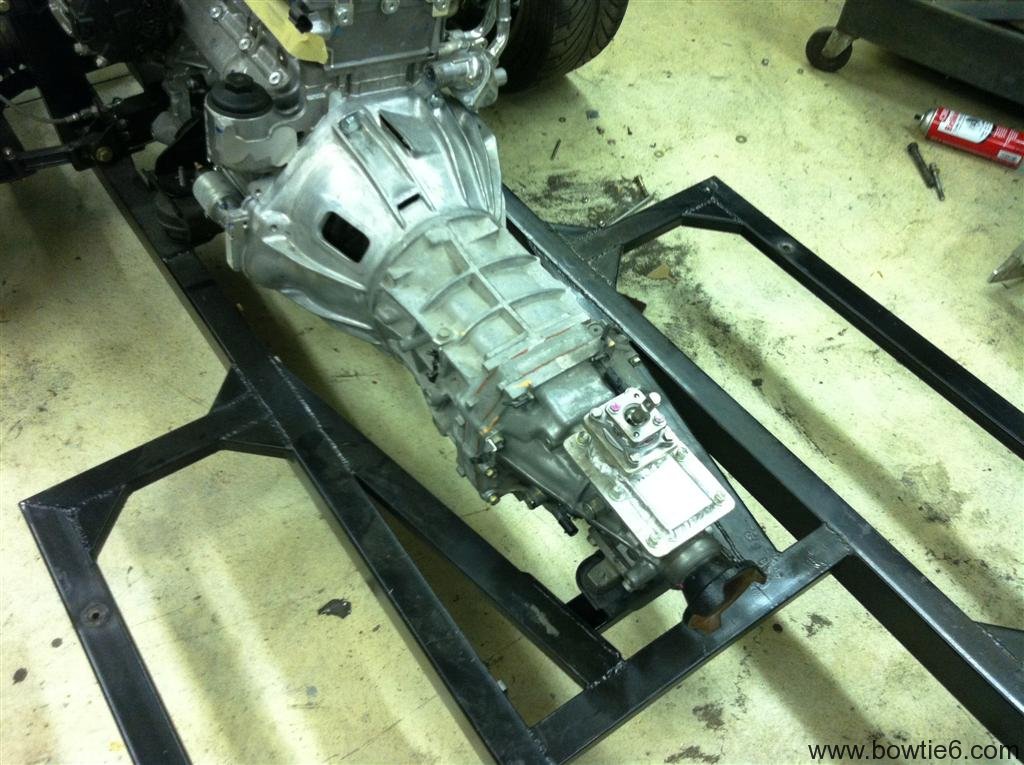
The ECOTEC 2.4 engine is now mounted using the original Solstice mounts.  Special pads were made to go on the frame and this is where the mounts anchor.  Ditto for the transmission mount.  This is all done with a very specific purpose:  to make room for the exhaust and have nothing ‘hanging’ below the frame.

There is a ton of more subtle details – I am sure you will find them.  If you have any questions/comments drop me a line.  Here is the new frame gallery.  Enjoy!

Painted Frame

It is done.  Took a few hours of work but the new frame is now fully painted.  I used a nice chassis black paint – should be nice and durable.  The stuff was not too terribly expensive so I shot a generous amount and now it is only a matter of time for it to fully dry.

Here are a couple of pictures – I had more but they just did not turn out nice enough to post.  I’ll have more next time…

Here is the rear section of the frame.  These are the rear towers that will hold the coilovers.  The axle sits ahead of this, over the frame.  The uprights brace should tie all this together nicely – the idea here is not to have any flexing going on.

Next is another shot of rear section of the frame.  The tower braces show the tabs where the coilovers will mount and also on the lower side, the ties for the control arms that will hold the rear axle in place.

Finally, the midsection.  This is where the transmission will rest.  The square sections off the frame will be used to hold the body in place.

I’ll have more pictures of the front suspensions next time…


A New Frame Ready for Paint

I’m chomping at the bit…  bowtie6‘s new frame is complete and ready for paint.  It is stunning.  Sorry – no pictures today but there will be plenty tomorrow.

I saw the frame yesterday and it is very impressive.  My cousin Jim took the frame to the fellow that does the media blasting for us and had the thing cleaned up.  The frame is now back at the shop, gray as can be and just begging for primer and paint.

Tomorrow should be a fun day:  I’ve got primer, a gallon of chassis-black (with the matching hardener) and my HVLP guns locked and loaded.  The goal is that by EOD tomorrow, the new frame should be thoroughly coated with paint and looking like a supermodel wearing a little black dress.

Another tasty morsels:

  • The new differential for the rear axle has been ordered and has arrived!  It was far from cheap, but it is the best money can buy  What ratio?  3.80 to 1, full posi-traction.  This thing rocks.  There will be more about this soon…
  • New bushings for the front suspension have been ordered from the UK.  The new ones are of much greater quality and more durable than the polyurethane bushes currently used.  Why?  After only 15,000 miles the ones I had bought have become ‘worn’.  Not good.
  • Adjustments to the steering column.  Ready for this?  bowtie6 will have full tilt steering.  Yes.  Tilt steering!!  Should be a nice addition – I’ll have more on this too!

Stay tuned…

The New Frame…

DONE!

The new frame has been completed and it is stunning.  My cousin Jim Thompson did all the final welds yesterday and the frame is now ready for media blasting.  Why?  I want to get a nice, clean surface so primer can stick nicely and then many coats of top quality chassis black paint will be applied.  I’m not doing this again, and I want to make sure the frame is 100% good to go.

Jim was able to make the pads on the frame so the factory GM Solstice mounts could be used.  This is a good thing:  they are double isolated as to not transmit vibration plus they have a special affair that if the rubber does fail, the mount locks and keeps the engine in place.  Granted, the engine-side mounts had to be custom-made.

So what does it look like?  Take a look:

The picture above shows the front of the new frame.  You can see the steering rack mounts as well as the two suspension towers.  The factory “A” arms will bolt right up and will be fully adjustable for caster/camber/toe.  All beauty of all this will be that all the factory components bolt right up.  And, last but not least:  note the brace at the top of the towers:  this ties the whole thing together.  No flexing.

On this picture you can see the mid-section.  I know – the picture is not sharp but I was so excited and the iPhone was not exactly ‘steady’.  On the top of the picture you can see the “U” shaped extensions which will have the body mounts drilled.  You can also see all the gussets that have been added for strength.  Still missing:  the transmission mounts.  There will be a mount added that will tie the back end of the tranny.

And finally, the back end of the frame.  This photo is not the best and there is a lot of details that can’t be seen.  Suffice to say, the tail end has a slope similar to the factory frame.  You can also see the mounts for the a) coilovers, b) the control arms and c) the bump stops.  Remember there will be a narrowed, solid axle with posi-traction mounted here with a four point control arm suspension.

I realize these pictures might not exactly make sense right now.  Soon (actually, very soon) I’ll have the frame fully assembled with the front and rear suspension in place.  I’ll have full documentation on how all that looks.

As a side note:  weather today was awesome.  I had a chance to ride in Jim’s TR4 today with the hard top off.  It was amazing!  I realize you the reader must be pretty fed up with me stating how great the Ecotec is, but honest:  it is an awesome engine.  We went for a ride today and Jim kept the revs up high.  This thing gets the job done.  We have been doing research on boost and that would really take things to the next level.   Seriously, if you are thinking of using an ‘aftermarket’ engine for an LBC you need to consider the Ecotec. It will honestly amaze you!

New Frame Update…

New frame update…  Last post I had pictures and talked about the new front suspension on bowtie6‘s new frame.  Quick post today…

The mounts for the front sway bar are done and the look trick!  The sway bar is stock,  mounted on poly bushings – it worked well on the prior setup, so this will be our starting point for the new frame.  This is what it looks like:

Front sway bar mounts.