Category Archives: 7. Miscellany

Just Because He Can

IMG_3846

Hands on the back of a Ford, because Fords must be pushed…

Today’s post falls in the class of “just because he can”…  You know, “just because he can” – you have the skillz; the artistic “gift”.  And my cousin Jim falls in that category.

In today’s featured image you see the trunk lid on the 1940 Ford that Jim is building.  Jim is a bit of an “artiste” and he wanted something unusual, something unique, something “just because he can” on the 40 Ford’s trunk.  How about those trunk hinges?

What we have here are “hands” made from a slab of aluminum.  Carefully machined, filed, trimmed, polished and etched.  No CAD mind you.  Just Jim’s trusted Porterfield milling machine and plenty of filing.  This, my friends, is “old school”…  Add to that the trunk on this 1940 Ford: it is all aluminum made from scratch.

IMG_3845

Helping push the Ford!

I realize this is not for everyone.  Matter of fact, who would want this, right?  All I can say, is “just because he can”!  Jim told me about the “hands”…

  • They are made from a slab of aluminum milled on the Porterfield, the “old-fashioned way”.
  • Lots of hand-filing…  A file!  What is that??
  • The “hinge” part was the most difficult part; the pin through the three-piece hing took some doing.
  • The trunk lid has curvature – it is not flat.  Therefore the entire “hand” has a bit of a curve to it and the pin mentioned before had to be made to fit.
  • Check out the fingernails.  Yes, there are fingernails on the tips of each finger!

And here you go…  Each “hand”!  Just because he can…

Happy Independence Day weekend, everyone.

Our finest moment; Happy Birthday America!!!

Our finest moment; Happy Birthday America!!!


1937 Railton Special Limousine by Rippon Bros Coachbuilders

1937_Railton_12
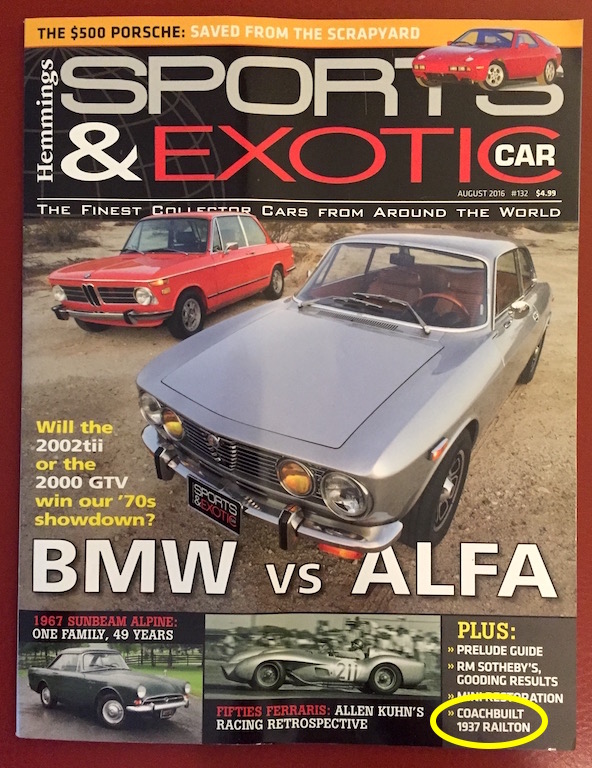
One of the featured cars in the August 2016 issue of Hemmings Sports & Exotic Car magazine is a 1937 Railton Special Limousine by Rippon Bros Coachbuilders.  I had to do a double take when I saw the article because several years ago, I was able to photograph this very car.

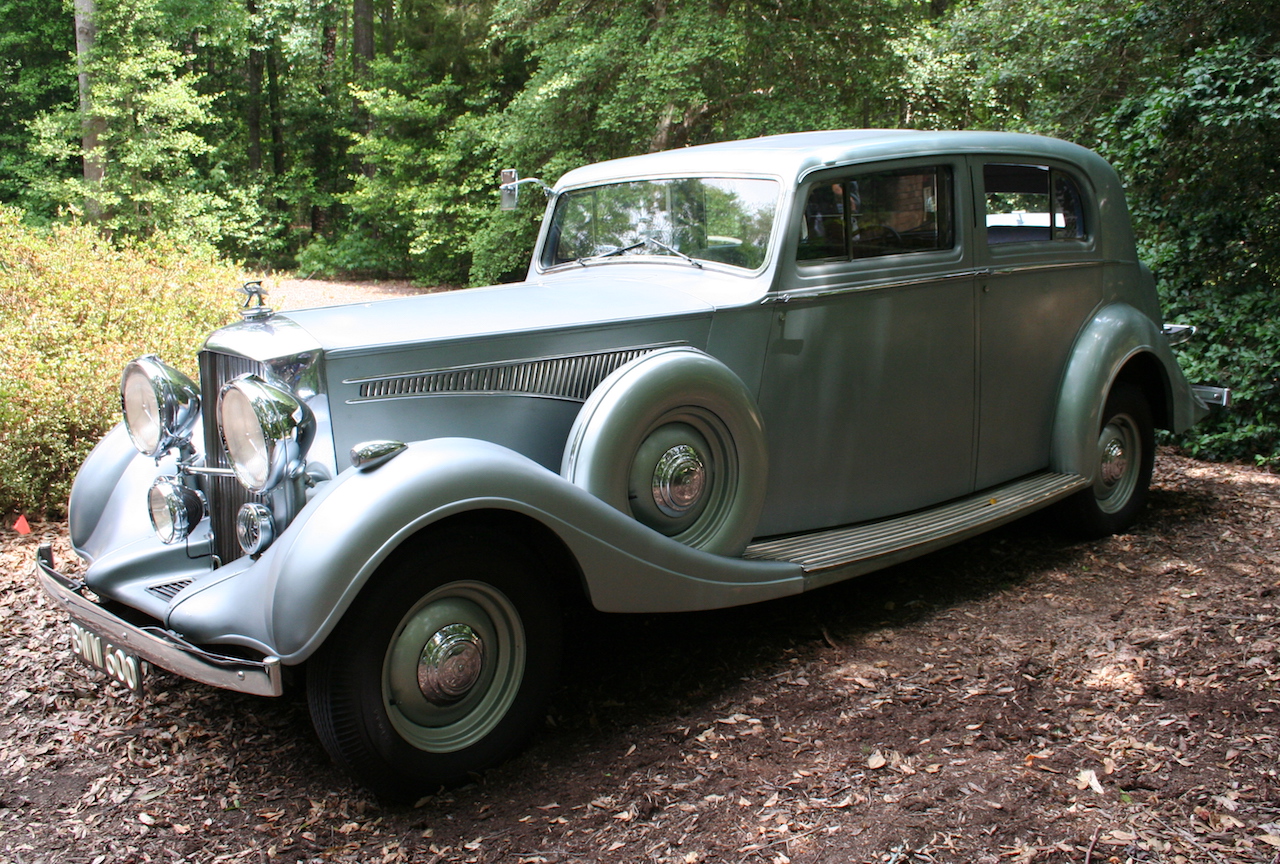
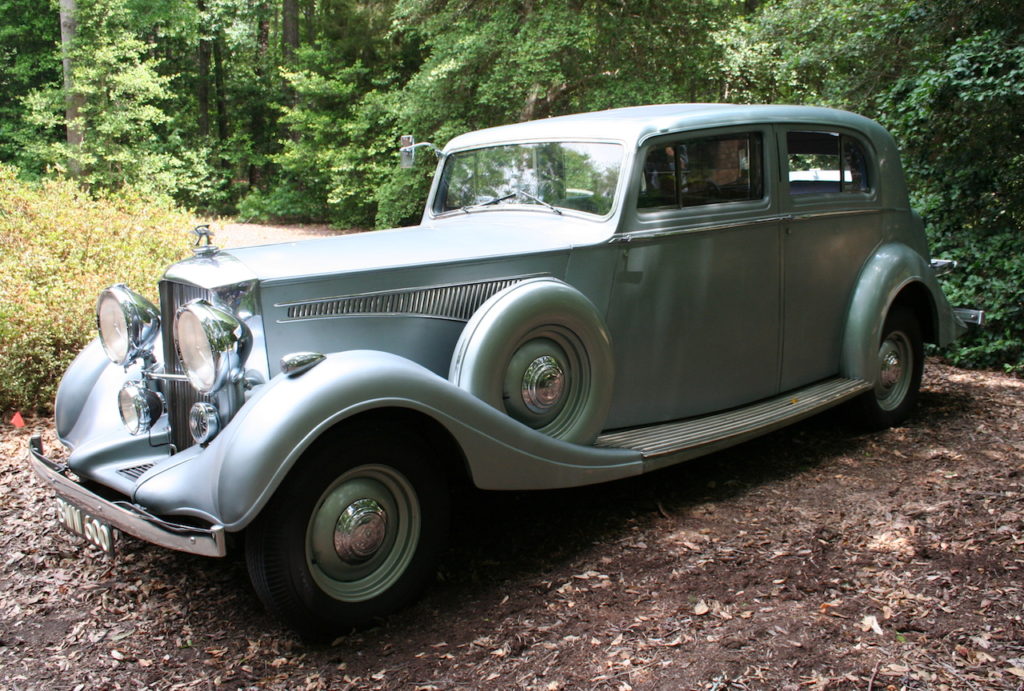
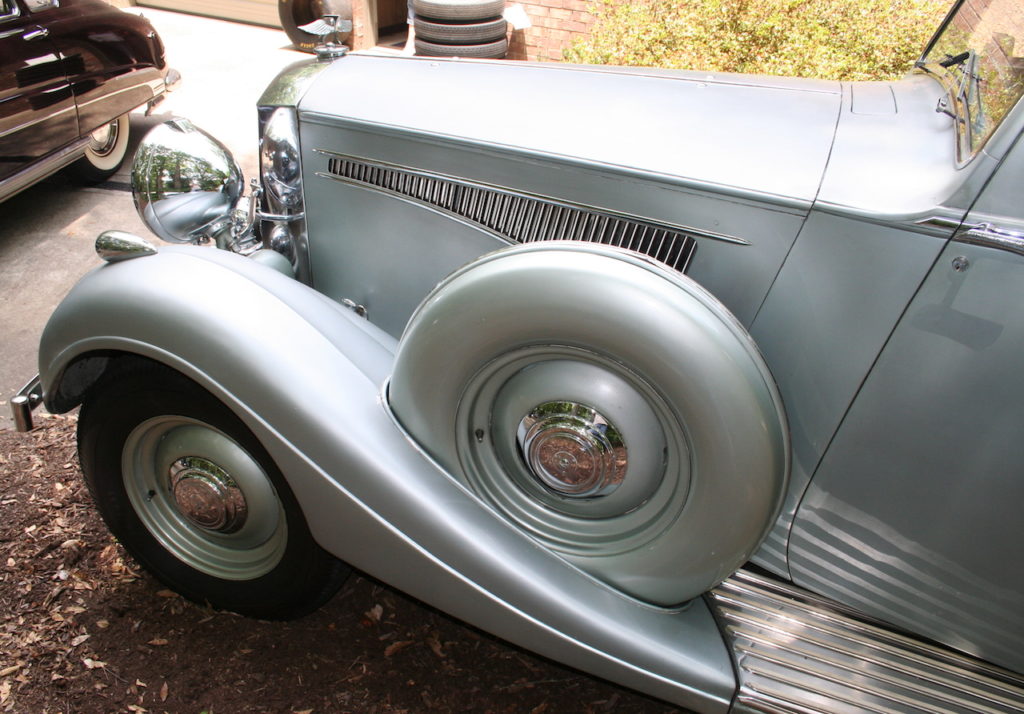
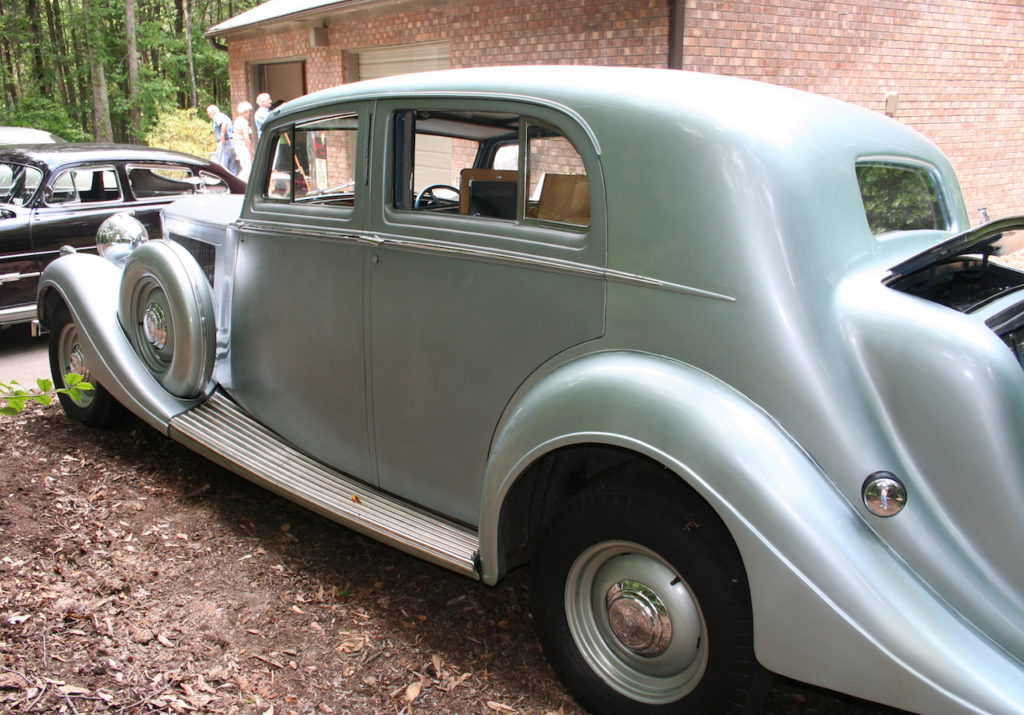
But first, what exactly is a 1937 Railton Special Limousine?  This particular car hails from an era where a customer could have a car built bespoke to their specifications.  This Railton’s body was aluminum, made by one of England’s premier coach builders – the Rippon Brothers.  Matter of fact, Rippon Bros also built bodies for Rolls Royce.  This car was built for Reid Railton who was at the time, a land-speed record holder.

1937_Railton_11I had a chance to photograph this gorgeous car at a gathering of Hudson automobiles.  The event took place at the then owner’s home and there were numerous Essex-Hudson-Terraplanes on display.  But… What does this have to do with a Rippon?  You see, this limousine is powered by a Hudson engine!  Matter of fact Rippon cars were powered by Hudson engines and this was not the only one in the collection.  I’ll have more posts about the others soon…

Back to the 1937 Railton Limousine…

1937_Railton_02
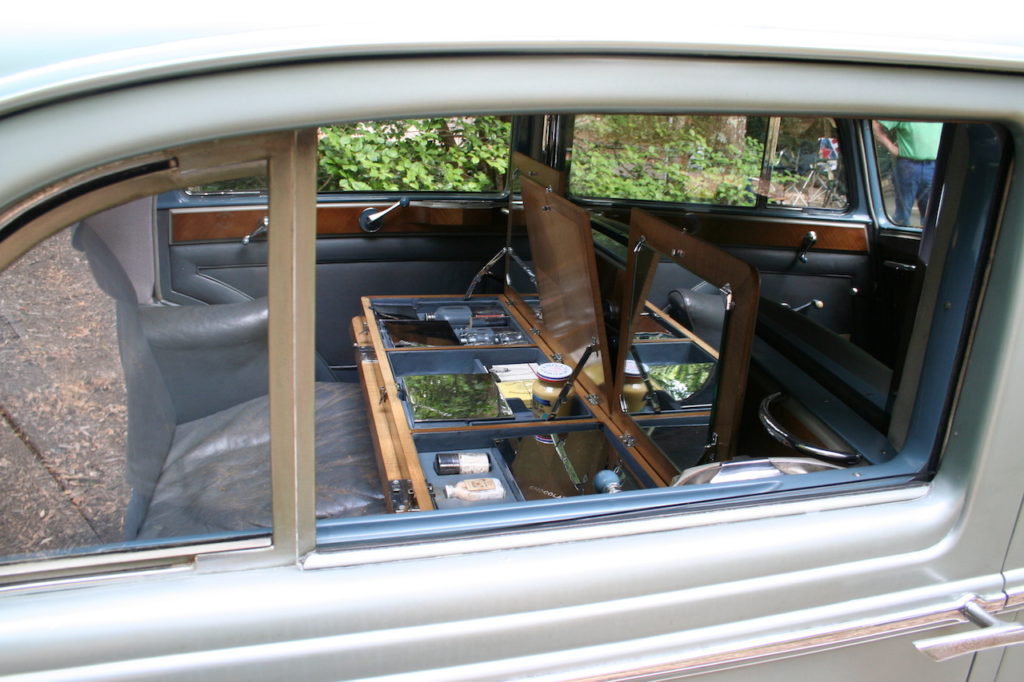
As you can see in this picture, the back seat has access to a pull-out table.  Each side featured a lift-top with compartments for many things…  On one side a fully stocked bar with crystal and barware necessary for making cocktails along with compartments for cigars ; on the other side a vanity, with mirror, hair brush, comb, and aspirin bottle.  There was even a center compartment with silver plated affairs to hold various snacks and sweets.  And that was just the start…

1937_Railton_03
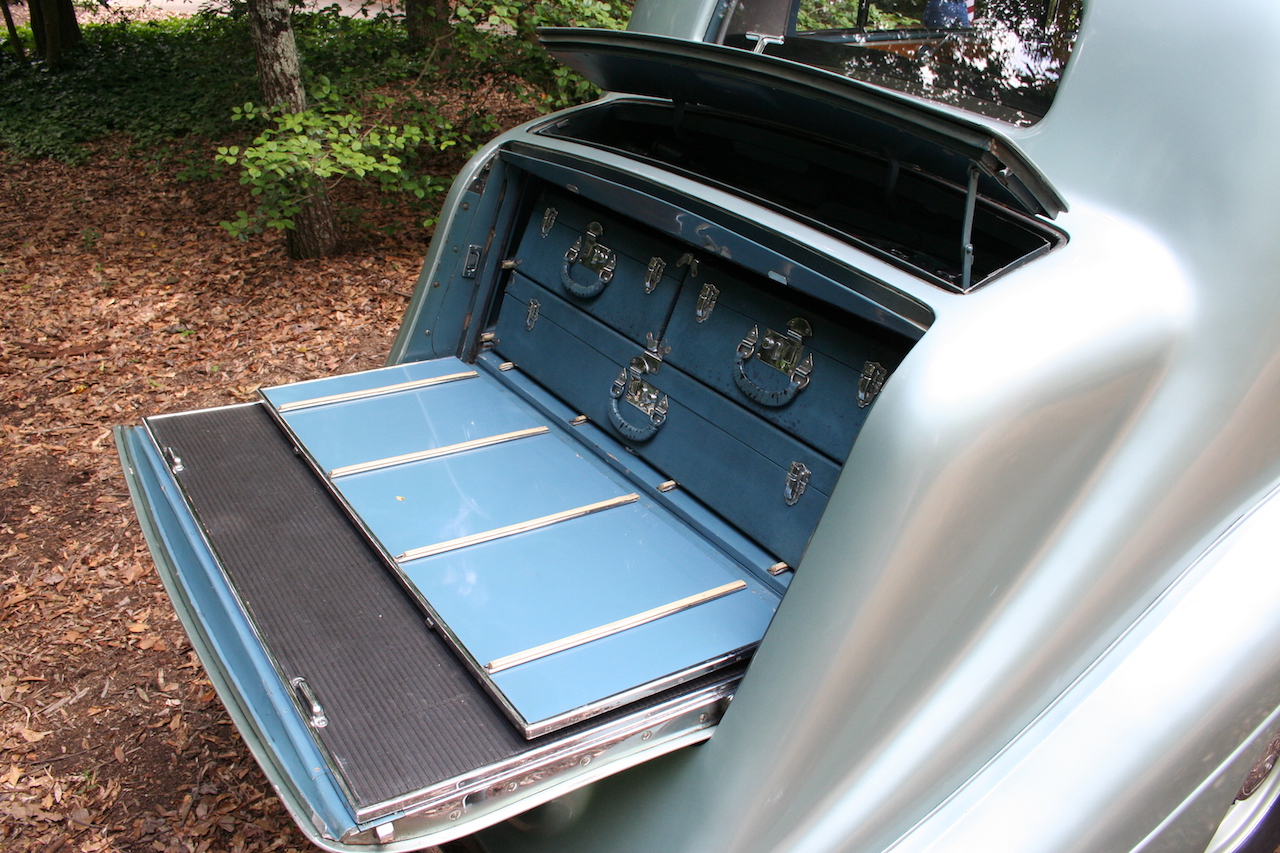
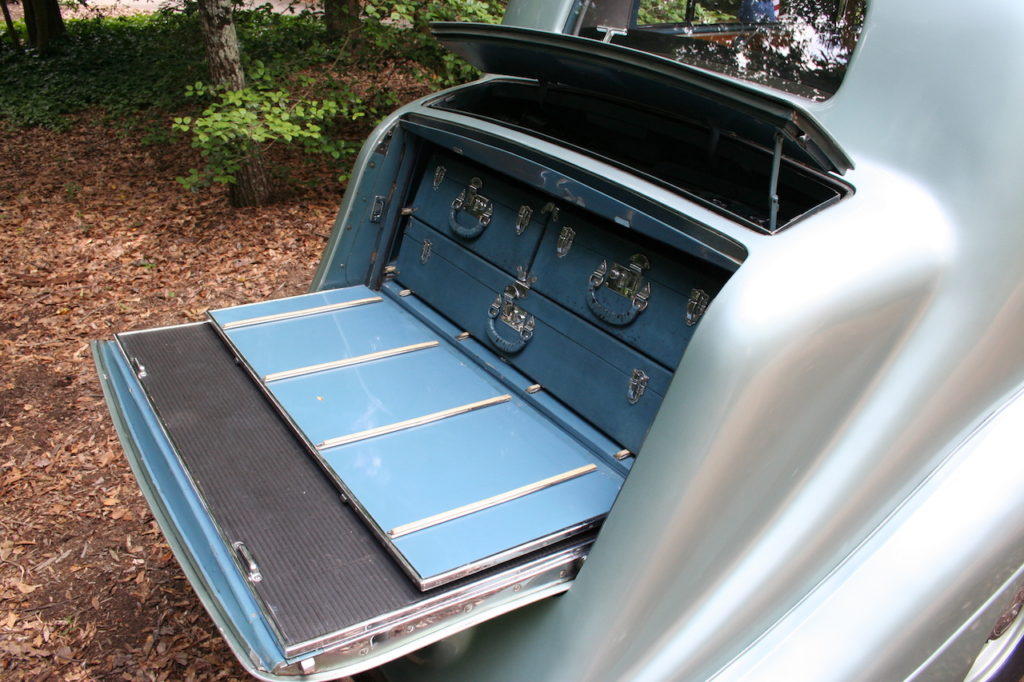
The rear trunk area includes custom fitted luggage!  That compartment at the very top, included plenty of tools all neatly arranged in their respective locations.  That trunk lid is special…  Note the part with the corrugated rubber – that is there for a reason:  it is designed for adults either standing or seated.  But why?  This car could also double as a shooting-brake and yes, it has a “secret”, water-tight compartment designed to hold shotguns.  I also remember seeing under the front seat several drawers containing an assortment of fuses, spark plugs, spare light bulbs, etc.  The dash also had a pull out map tray.  There was nothing left to chance here.

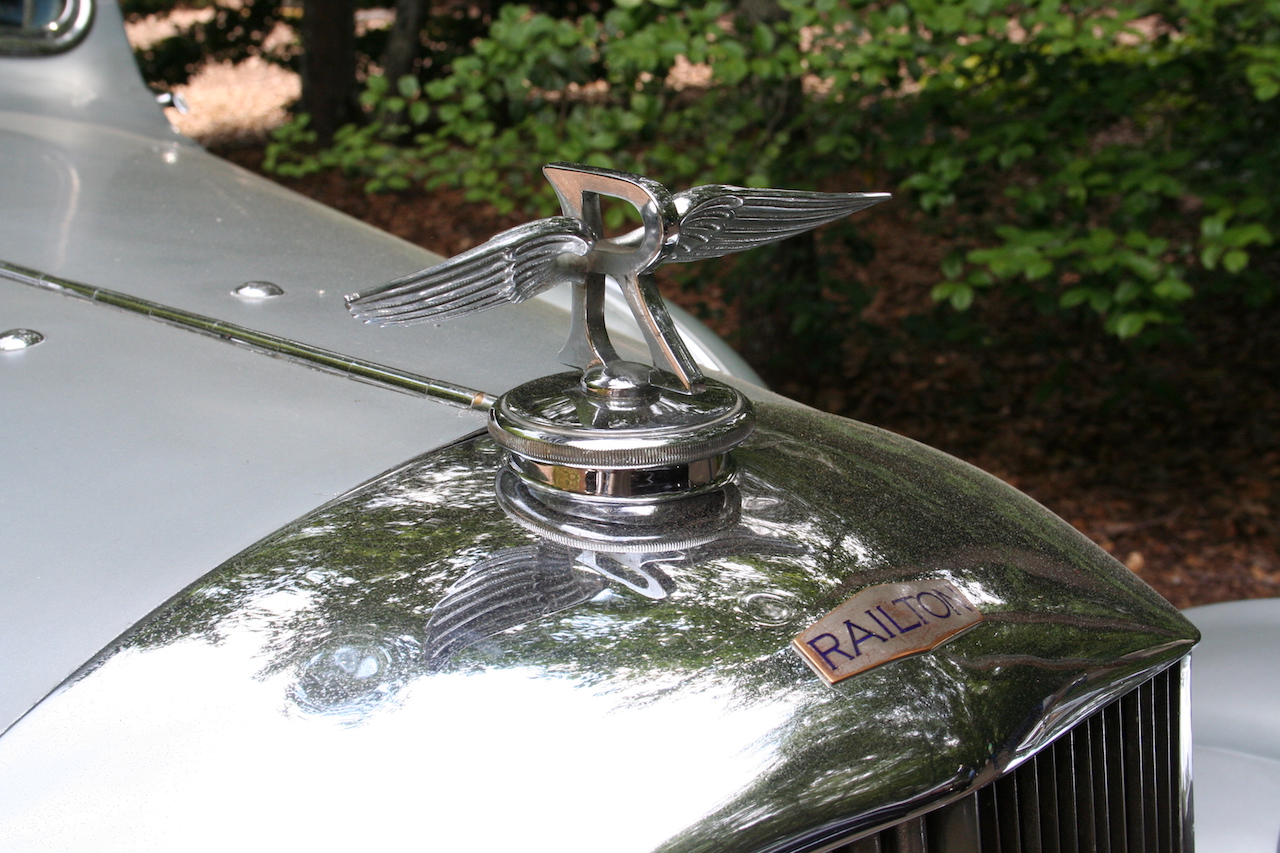
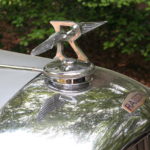
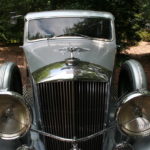
The chrome work around the front grille and emblem is something else!

IMG_3839The article in the issue of Hemmings Sports & Exotic car magazine mentions this car is now part of the Gilmore Car Museum (Hickory Corners, MI) and was transferred there by the car’s previous owner, a Hudson collector by the name of Eldon Hostetler.

These pictures were taken when the car belonged to the owner prior to Mr Hostetler at his residence in Greenville SC.  If memory serves me right, this was in the summer of 2006.

Finally, I do remember this car as being gorgeous but at the time was not in “museum quality”.  According to the article in the magazine, the limousine went through an extensive restoration and won numerous awards.

1937_Railton_081937_Railton_05

Further Reading

Conceptcarz.com article about the 1937 Railton Limousine – there are interesting pictures here.

LaVine Restorations article about the 1937 Railton Limousine – apparently the Limousine underwent restoration by this company and there are very nice pictures on this link.

1937 Railton Limousine at Pebble Beach Concours d’Elegance – this link opens to a beautiful photo collection from Ryland Scott Photography at the time the Limousine was shown a Pebble Beach in 2011.

Special Feature at Hemmings website – this link opens the article at the Hemmings website about the 1937 Railton Limousine.


1940 Ford – Rear Quarter Windows

IMG_3790

Rear quarter window openings…

On an earlier post I talked about how chopping the top on my cousin Jim’s 1940 Ford caused the rear quarter windows to lose proportion.  I also posted a couple of pictures showing how Jim changed the window opening and restored the size of the quarter windows to something more appealing.

As you can see in today’s featured image, both windows are damn near perfect in both size and shape.  So how did Jim do this?

Well today, I found this on one of the work tables at the shop:

IMG_3784

Wooden buck made shaping the opening consistent

And yes, this is a wooden buck.  Jim figured out what sort of arc needed to be reproduced to give the window opening the right “look”.  This arc was then transferred to a wooden buck.  The two openings on either side are there to secure the piece of sheet metal with a screw, washers and nuts.  Then, with a mallet, Jim slowly hammered the sheet metal to take the shape of the arc for the window.  The following two pictures show what the buck looks like compared to the end result.  Pretty cool, huh?

And here are two pictures side by side, of both window openings.  They are the mirror images of each other.

A few years ago I visited the Studebaker museum.  Among all the wonderful things to see there was a full size buck made from wood for a Studebaker pickup cab.  Yes indeed, this is the way custom bodies were made!  Having said that, can you imagine what it would be like to see all the bucks that must be stored in some special, secret vault in Maranello?

VW Buses

IMG_3763

VW Buses – imagine the possibilities!

On day way to lunch today, I saw a car transporter parked in the turn lane and it was hauling three vintage VW buses.  Why?  The driver was heading into the Mickey Dee’s – matter of fact, I pulled into their parking lot to take these pictures.

The white VW bus on the top left appeared to be a cobbled up affair – it had what appears to be homemade hinges on the side windows to make them swing out.  The next one to the left still had windows in their fixed positions.

IMG_3764

The green/white one was the best of the bunch…

The best one of the bunch was the one on the bottom slot.  It even had what appears to be some nice vintage mag wheels.  However I was not able to really tell if they were the real coveted VW buses with all the opening windows.  Suffice to say, somebody had 3 diamonds in the rough here.

Oh and to boot, check out what was at the very rear…

IMG_3766

The bonus 1963/64 Impala coupe

This appears to be either a 1963 or 1964 Chevrolet Impala coupe.  Again, plenty of potential there, don’t you think?

1940 Ford – Chopping the Top – Part 2

IMG_3679

1940 Ford top taking shape…

In the earlier post, I described the cutting and sectioning of the  top on the 1940 Ford my cousin Jim is working on.  Today’s post is a follow-up on the progress, which incidentally has been a lot!

As you can see from today’s featured image, the top has taken shape once again and looks more finished.  During this process, Jim found out there were alignment issues with the top itself.  Not from the alterations, but from the original stamping of the sheet metal.  As it turned out, the passenger’s side was not exactly symmetrical and required the use of a friction jack devise mounted inside the car while Jim welded the sheet metal inserts to make the top line up.

In the earlier post I described how a “filler” of sheet-metal had to be welded on the top to account for the material lost from chopping the top.  This section has been completely TIG welded, shaped and rough-sanded as shown in the following picture gallery…

If you look closely, you will notice the drip rails past the door opening have been cut off (more about that later in this post).  Also, you will notice the seam has some partial amounts of brass rod welded in.  This will eventually be filled all along the seam and sanded down to a smooth finish.  Think of this as a way of “leading” the seam.

And so we move to the back window opening…

As you can see, stretching the top required yet another filler, this time above the rear window.  Without the filler, the slope of the back top would not line up with the windshield and trunk area.  Amazing what cutting the top down by a couple of inches does to the geometry of the car!

Looking at the left picture above presented yet another problem:  the opening is out of proportion with the front.  But, that is the way it came from the factory, right?  Yes but that dimension made sense when the top was originally made.  With the “chop” the geometry went to hell and Jim decided – right or wrong – to make the window opening smaller.  Take a look…

A new section of sheet metal now takes up some of the space and makes the rear window opening proportional to the front.  And yes, this will need all new safety glass specifically cut to the new opening.  You can also see more details of the seam I mentioned earlier, with the brass rod filler.

Next, the following gallery shows a collection of pictures from the second section of filler…

What are all those black spots?  As it turns out, even with careful heat management during the welding of the filler strip, the top material warped.  What you see in those black spots is the result of careful heating followed by hammer and dolly work.  This method provides relief to the metal to shrink and expand, and thus remove the “oil can” effect introduced during the welding process.  I’ve seen Jim do this before and it takes careful application of heat otherwise it only makes the warping worse.

Here is a closeup of the area where the drip rail was removed:

IMG_3660

No more ugly drip rail over the rear window opening…

Only a small part of the drip rail was left over the opening of the door.  The rest has been cut off and the seam will be eventually filled with brass welding rod.  Why not just use Bondo?  Well, this is a stress area and as flex takes effect the Bondo filler will crack.  So in a case like this it is best to fill the opening with metal.

And finally, the rear glass opening…

IMG_3683

Note the side pillar weld has been filled in…

The opening has been left very large as to allow room for a “frame” that will eventually fit around a donor piece of glass.  One of Jim’s buddies has a junker Chrysler convertible with a nice glass rear window.  The plan is to cut the soft top on the Chrysler and remove the glass, cut all excess off and then make a frame to fit in this opening.  I’ll have more details on that in a future article.