Tag Archives: ecotec

bowtie6 and ECOTEC vs 3.4L V6

I put some 15,000 trouble free miles on bowtie6 powered by the V6 conversion we did several years ago.  The car performed flawlessly, surpassed my expectations and not once was it ever a disappointment.  Not even from the start, on the contrary:  from day-one I have been very proud of my car.

Not wanting to keep the engine ‘stock’, I started doing some research into performance improvements.  Don’t take me wrong, the engine had plenty of power and torque but I just wondered “what if?”  After all, what fun is there in leaving things alone?

This is no “mid-life” attempt to produce a firebreathing monster – if that were my wish then I would be building something else altogether.  I have the ability and resources to do it, but I decided to take a well preserved TR6 and improve it.  It has been a very fun project that I plan to continue to work on and improve.

bowtie6‘s 3.4 V6 came from a ’95 Camaro so out of the box it is a few years old.  I had it dynoe’d the first time and it produced 150hp at the rear wheels.  Not bad for a ‘stock’ V6 with fifty-some thousand miles on it.  I could have left it there and just driven the thing forever putzing around town like an old fart, but that would be no fun at all.  I had proven the concept was sound:  I had an extremely reliable TR6 that did not leak, had no “issue” to speak of and in which I could drive anywhere, anytime with no second thoughts and no assortment of spare parts in the trunk.

Modifications started with a hot cam and roller rockers.  I already had headers so we modified the intake in order to let the engine breathe as well as it let exhaust gases exit.  The car went to the dyno again, this time producing roughly 170hp at the rear wheels.  Then, we found a brand new set of heads which I had ported, polished and flowed.  I also ported the upper intake manifold and bolted an LT1 throttle body.  It was expensive but I wanted to break the 200hp mark.  Along with the ported heads came an adjustable fuel pressure regulator that helped fine tune the already larger injectors.

Third time to the dyno:  this time we produced slightly above the 200hp at the wheels mark.  I had achieved what I set my goals for.  The difference was indeed palpable and made for an even more fun TR6.  However, this proved to be too much for the tired factory Triumph frame made of 10 gauge materials.  This resulted in a frame failure (which I have discussed previously) and forced a review of the foundation beneath bowtie6.

I did not want to ditch the car because I have quite an investment in it.  The frame was un-repairable so we made the decision to make a new frame.  My cousin Jim’s TR4 was nearing completion with a similar frame.  Soon after I had a chance to drive it and see what a new frame and ECOTEC power would be like we had more data to allow a good decision to be made.

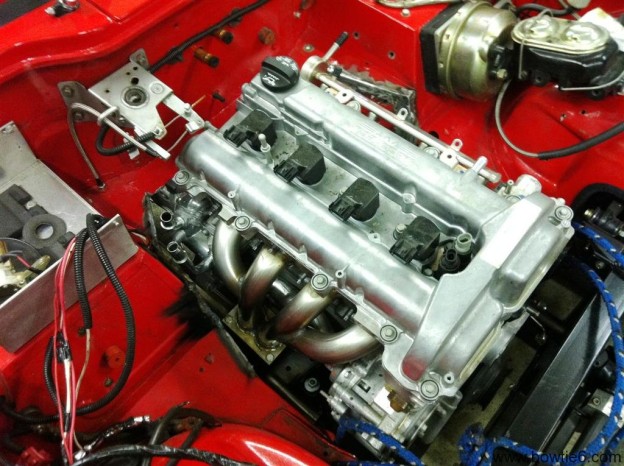
So what was it like?  No, it did not “blow the doors off” my V6 powered TR6.  Jim’s TR4 is lighter than my TR6 giving it an edge.  The ECOTEC is a fantastic engine and has way too many advantages over the V6, even with all the improvements we made.  For starters the ECOTEC is lighter and incorporates much more modern features.  The engine has a huge rev range and offers fully tunable ECM vs the opposite for the V6.  Power wise my fully tweaked V6 is matched by the stock 2.4 ECOTEC.

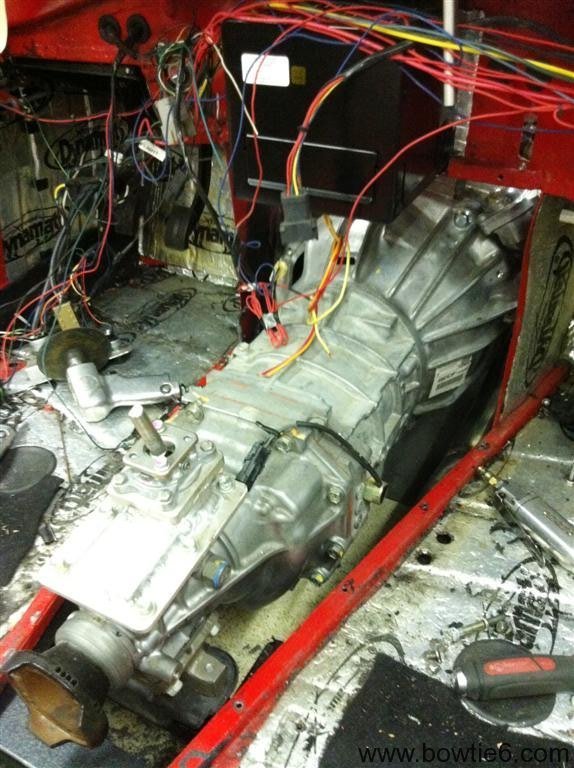
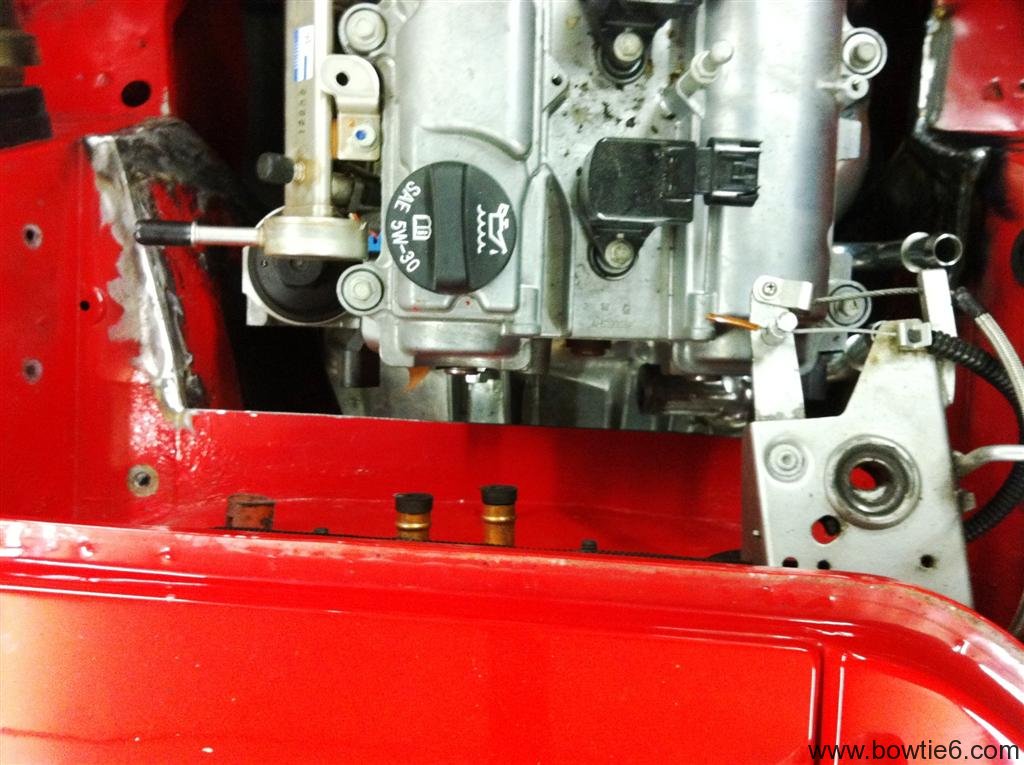
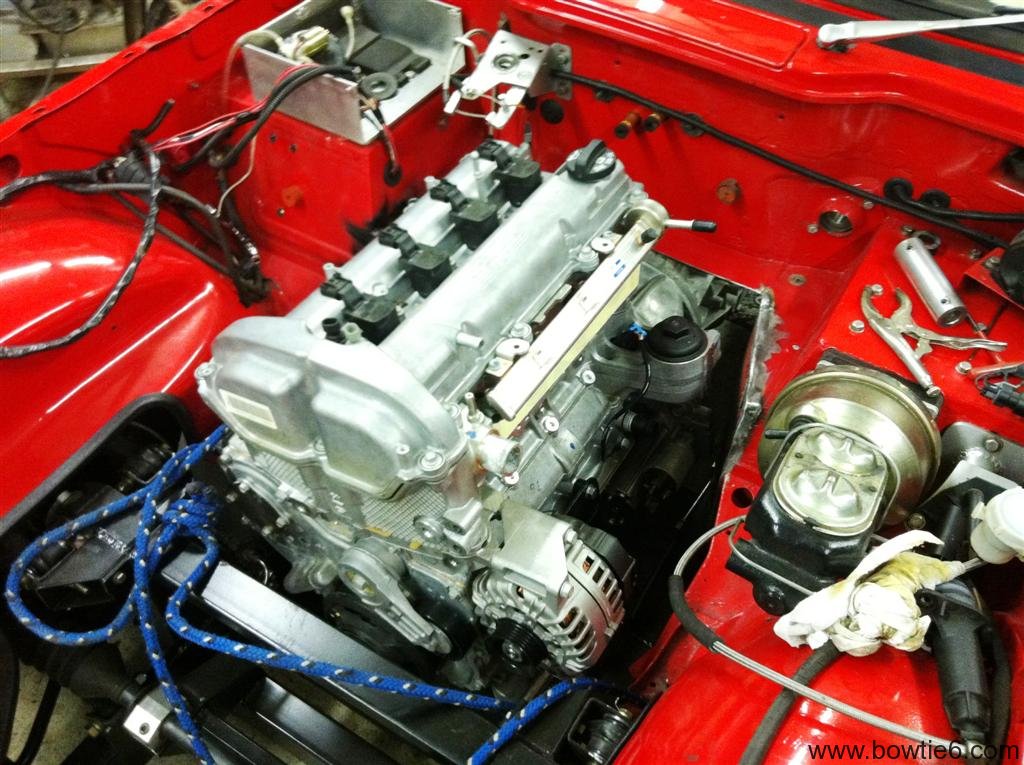
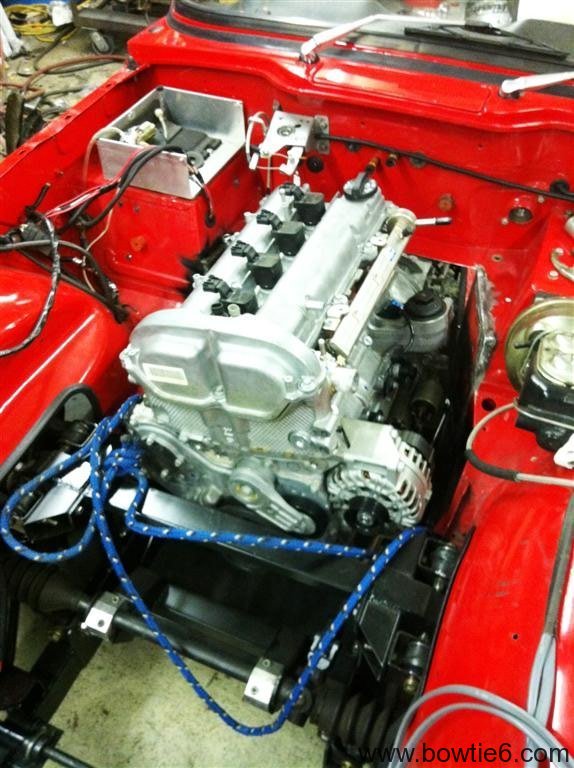
Back to the frame.  Again.  At first, I had a notion to use the V6 in the new frame.  Add that to a solid rear axle with positraction and a robust frame and I would have been in business back on the road.  But no.  The V6 had reached the end of what I could do with it.  Furthermore, I found an ECOTEC with only 4 miles on it (I’ve written about this here before) so using that over the V6 was a mute point.  There is no compelling reason to go with the V6.  Also, supply of V6’s in junkyards getting smaller yet I am told new crate V6’s can be had for $1980 delivered to my house.  Point taken.  Then again, I have $2000 in a 4 mile 2.4 ECOTEC and that includes a 4 mile AISIN five speed gearbox (last time I checked, crate engines don’t come with gearboxes).  I also own a 2.2 ECOTEC that I paid $500 for and will be in my next project.  Truth be known, Jim’s car was initially powered by  a 2.2 ECOTEC but we realized the 2.4 would be a better choice.  So no matter how you slice it, the ECOTEC proved to be my best choice.

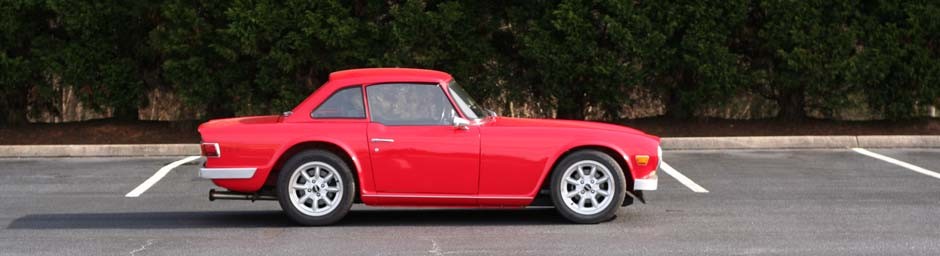
Very soon I’ll have bowtie6 back on the road.  It has evolved through the years.  It has been featured in magazines, won awards and I have received a huge amount of compliments which I am very grateful for and I graciously accept.  bowtie6.com has been hit from every state of the Union as well as from many countries around the world which shows me there are some folks that find this collection of words somewhat entertaining.  Along with the good, I have also had many negative comments ranging from “why did you do it?”, “it is ugly”, “it is not original”, to “your car is a complete abomination”.  I am very grateful for those too.  I fully accept this is not everyone’s cup of tea (that seems to come up a lot too, I guess it is a polite way to say “I really don’t like it”) and that is all good.  Bottom line, latter comments are the ones that make me grin and reinforce the fact that I did the right thing!!!

It is funny though, that I have taken my TR6 to non-LBC events (read street rod events) and not once has it ever been looked down upon.  Matter of fact, folks not only know what they are looking at but also compliment our efforts.  The LBC folks though are something else:  many turn their noses up and walk away, others shrug their shoulders and walk away and others give me strange looks and walk away.  But, in fairness there are some that do appreciate the work, don’t walk away and ask questions.  I’ve met many folks that way that have been very gracious.  The ones that are not gracious, well…  They are fun to meet too.

The truth is in the pudding.  My friend Mike likes to restore TR’s back to stock form.  We have a nice “agreement to disagree” thing going on, but it is all in good fun.  I’ve driven his stock TR’s and see why folks would want to keep them that way.  But then, when I get behind the wheel of one of ours…

…and suddenly I get a big grin on my face and know this is the only way to go.  If only folks could ride in our cars before they make “remarks”, they would see why we like them so much.

For what I have in bowtie6 in time, resources and effort probably I could have a newer car (I’ve been told that too, “why didn’t you just go buy an brand-x or brand-y car?”) but that would not have given me the chance to experience all that I have written about bowtie6.  I know the answer is a bit of a cliché:  it is priceless!

The New ECOTEC is Alive!

It has been quite some time since my last post.  The bowtie6 Ecotec project is alive and well:  this weekend we fired up the Ecotec for the first time!  Needless to say this was quite an awesome event!!

First, here is a quick recap:

  • The engine compartment has been fully wired up.  There is a new engine control fusebox containing circuit breakers, relays and the ECM.
  • Inside the car there is another small panel with relays and fuses controlling turn signals, park lights and main light circuits.  The dash is all back together along with all gauges.
  • In the trunk I have the battery mounted in a special enclosure.  Yet to be done is a separate set of relays and fuses to control the stop lights and fuel pump.

We hot-wired the fuel pump for this weekend’s engine start.  With the aid of my laptop and software, we disabled the VATS system by reflashing the ECM.  We removed the spark plugs, turned the engine a few times and sure enough after a few seconds we had oil pressure.  All good so far.

Next was fueling up and priming the pump.  After running the fuel pump for a few seconds it finally “primed” itself and started pumping fuel.  We attached a fuel pressure gauge and pressure looked very nice indeed.

The next step called for re-installing the spark plugs and re-installing the coilpacks.  Turned the key, and pushed the button.  It took a few tries but finally she fired up and ran.  I hooked up the laptop again, this time to check for DTC’s.  There were a few.  Not good.

Turns out we had a few “issues” with the wiring.  The 2.4 Ecotec has VVT on both the intake as well as the exhaust.  There are two cam sensors on the top of the engine and two more on the back of the engine.  The two on the back of the engine are identical to each other, and I had made the mistake of hooking up the wrong plug to the wrong sensor.  This is something very unusual for GM harnesses: all plugs are unique; in this case the camshaft sensors are identical and share the same plugs.  My bad.

We tried again.  This time the engine ran fine but the scanner on the laptop read we were having fuel delivery issues.  We tapped the throttle a few times.  Coolant temps started to normally go up and we let the engine run for a few more minutes.  Then things started to settle down.  The fuel delivery issue went away and the engine started running better.  We have encountered this issue before when re-starting an engine that has been sitting for a while and this can be attributed to an injector sticking.  Once it has fresh fuel flowing, it loosens up any gummed up fuel and all is good.

We let the engine cool down and this is where things got interesting.  On cold re-start the Ecotec sputtered and coughed.  We noticed we had quite a few more DTC’s.  This type of behaviour is to be expected.  Suffice to say, that after many hours of debugging, changing a few parts around and a lot of tracing of the wiring harness all checked out.  There is no issue with the ECM – we swapped the one in my cousin Jim’s TR4 and the engine behaved in the same way.  So we ruled out wiring, ECM and sensors.  We started looking closer…

As it turns out, the new fabricated intake had an issue.  No, not a leak!  We re-used the rubber intake from the donor Solstice.  However, the housing for the MAF sensor is all home-made in order to allow the low restriction air cleaner element to be mounted.  The size of the housing was the culprit.  This was giving some false readings and this caused the ECM to make erroneous calculations regarding the air flow into the engine.  After correcting the offending intake tube we fired the engine back up, and now it runs smooth as silk.

Next will be to start plugging in new values for engine run-time parameters.  We’ve done some of this on my cousin’s TR4 and this along with some other tweaks will enable my TR6 to finally be back on the road.

So what is next?  Now that the engine is fully operational, we are going to start hanging fenders and doors on the body shell.  We anticipate having to make some special shims for the body since the frame is all new.  However, the frame is perfectly level so we are hoping not to have to shim it too much!

I have some final wiring to do and once that is all complete the next step would be the maiden trip down the road.  Still a few weeks away from that, but the engine runs and this has been a great weekend!

Stay tuned…

Wiring Harness

Tonight I started working on the engine wiring harness.  Doing an engine swap requires some sort of engine harness to be used along with the computer (ECM) in order to make the engine work.  This is the part where “old school” hot-rodders shudder and panic about.  This is also the part the trips up many folks attempting to run electronic fuel injection (EFI).

I’ve worked with my cousin Jim for the past 15 years perfecting the fine art of transforming a stock wiring harness into something that can be used to fully run a modern EFI engine in a classic car.  At first we worked on “throttle body” engines – basically a glorified carburetor but with the advantage of electronics.  These were the early EFI setups that offered much better economy than a plain carburetor but had a long way to go.  Throttle bodies evolved into individual injectors feeding each cylinder and more sophisticated ECM’s.

Through the years, we were able to adapt the L98 Tuned Port v8 with it’s distinctive intake with eight runners going to each cylinder.  As the L98’s became scarce we moved to LT1’s and LT4’s.  During this time, we also mastered the L32 V6 as originally fitted to bowtie6.  The next step was the LSx family of engines.  Currently we’ve focused on the ECOTEC engine as fitted in Jim’s TR4 and now my TR6.

The throttle body harnesses were the simplest.  No much really to figure out.  When we started using L98’s and LTx’s in Jaguar XJ6 and XJS conversions, at first we sourced the harnesses.  They were not cheap, so we took a stab at using original GM harnesses and cleaning them up.  If done properly they make an excellent harness however it takes some effort to figure them out.

This photo shows the harness from a wrecked 2.4 ECOTEC powered HHR.  The harness is basically all there; however it must be modified to work with the ECM and placement in the engine fitted to bowtie6.  This photo shows the harness after I had removed all the plastic casings protecting the harness.  This is done for several reason, among them exposing all circuits and it is easier to trace the wires to decide what needs removal.

We don’t use the original GM fusebox.  We also remove redundant ground wires and hot feeds, thus allowing the harness to be much simpler and easier to deal with.  Depending on what donor harness you use, certain pinouts on the ECM connectors must be relocated.  This is all done by using original GM Factory Service Manuals.

I’ll have more as the process takes shape.  This is actually a lot of fun however it is a little time consuming.  At the end of the day, it is a very rewarding feeling when the harness allows the engine to run.

bowtie6‘s ECOTEC Custom Intake

Lots of new progress to report this weekend.

  • Solid axle & Posi-Traction differential – check
  • Disc brakes (on all four wheels) plumbed with hand-formed stainless lines – check
  • Handbrakes using original TR6 cables – check
  • Wilwood proportioning valve – check
  • ECOTEC using custom/factory mounts – check
  • Fourth Gen Camaro hydraulic clutch – check
  • AISIN 5 speed gearbox on custom mounts – check
  • Tilt steering on a Triumph TR6 (I’ll have more on this later) – check

And the pièce de résistance for today’s post:  a hand formed aluminium intake.

The factory ECOTEC comes with a very intricate and quite impressive composite intake manifold.  The thing has a very unique shape, with a convoluted “S” shaped intake that splits the aft of the throttle body into four runners feeding each intake port.  With the longer runners, lower torque is improved.  Too bad we could not use this intake.  Why?  In the TR6 the steering shaft is in the way and the front fender would just not allow the factory intake to fit.

So what is one to do?  Answer:

GM makes these cool plates for the exhaust and intake ports that are intended for exactly this type of application.  The exhaust plate has already been used to make the exhaust headers on bowtie6 (if you haven’t seen that, CLICK HERE).

Now the intake plate along with my cousin Jim’s serious welding and fabricating skillz yields the following:

The intake is fitted for a trial fit and the all-aluminium body is yet to be fully finished.  Here is another set of pictures:

The photo above shows the front section of the custom intake.  The fly-by-wire throttle body will bolt to the flange on the front.  Not shown on the picture above is the port for the MAP sensor as well as the bung for the vacuum line going to the brake booster on the right.  Which, by the way is from a Vette along with the mastery cylinder.  What are those blue thinggies on both of the brakes lines?  Hmmm…  Wonder what that is all about??

Last but not least, another view this time towards the front of the car.  Yes, that is an all aluminium radiator up front.  The fan is SPAL (the same kind used by the boys from Maranello) mounted on an aluminium shroud.  Why the shroud?  I covered that in my original explanation in my original website.  Want to read about that?  CLICK HERE.

Pretty cool, huh?

ECOTEC in a TR6

Today was  a milestone.

bowtie6 had a trial fit of body, new frame and ECOTEC engine.  The following pictures show what this all looks like.

Yes, there has been some “shaping” done to the body.  The area past the firewall was in need of change to make room for the oil filter (on the driver’s side) and the thermostat housing (on the passenger’s side).  For anyone thinking about doing this to a “stock” TR6:  beware.  There will be some work required on the firewall as well as the battery box tray on the stock TR6.  Since bowtie6’s firewall had already been modified, this was a small change.  Under the experts hands of my cousin Jim Thompson, there was some welding involved and voilà – the engine fits.

Once all that work was completed, I mixed up some of DuPont ChomaOne single stage urethane red paint and the bare areas were re-painted.  This took some doing but the result is awesome.  Tonight the new areas are drying and the plan is to bolt the new frame to the body permanently tomorrow.

Well… Here is what an ECOTEC looks like in a TR6 with a custom frame underneath it.  Note how far back the new engine sits.  This change is highly desirable in moving the weight back.  This is indeed a great day!