Tag Archives: bowtie6

bowtie6 Ready for Disassembly

DST starts today and we are ready for disassembly.  Should give me some extra time to work on bowtie6. Watching the last stage of Paris-Nice on Versus right now – they are riding in some crappy weather.  The attrition rate has been quite high…

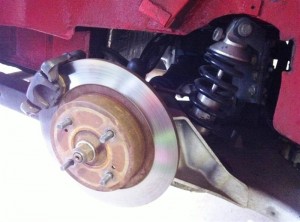
Anyways, today I was able to get bowtie6 over to my cousin Jim Thompson’s shop.  We started further tear down in preparation of the body removal.  We were able to get the front suspension apart for the last time.  The SPAX adjustable shocks and Richard Good competition front springs came out and will be soon be up for sale.  The replacement coilovers have been purchased and they will be nice.  No more hassles with spring compressors and that alone is worth the price of the coilovers.

Don’t have pictures yet, but the new frame is coming along very nicely.  The front suspension towers are fully built and now that we have the “A” arms apart, the new attachment points will be made.  The steering rack will come out next and its location will be found so there is no bump-steer.

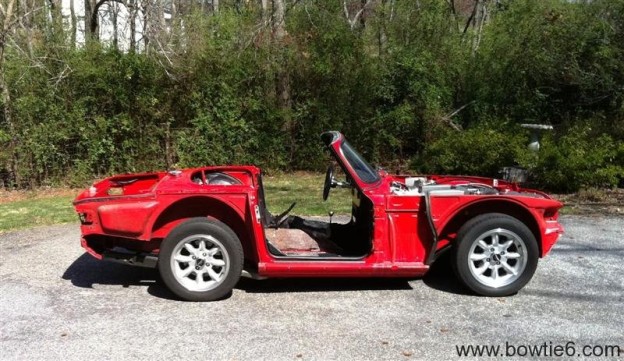
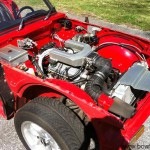
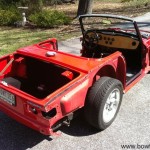
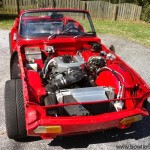
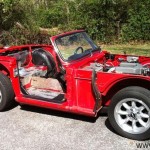
Here are some pictures right before we loaded what is left of bowtie6 onto a trailer….

bowtie6‘s V6 Engine

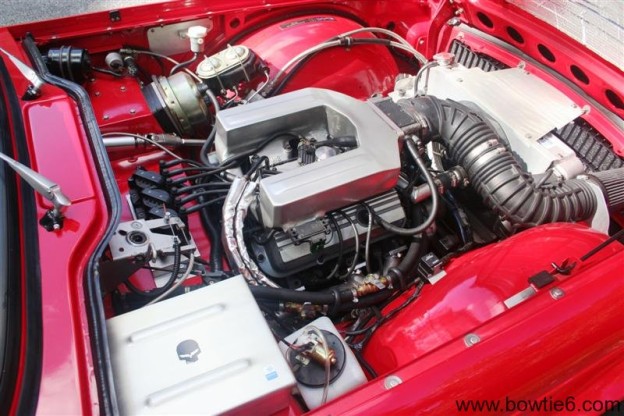
The engine formerly installed in bowtie6 was a 60 degree 3.4 litre V6 as originally fitted to 1994 GM F-bodies (Camaro/Firebird).  The engine was in its stock configuration to begin with, however during the 4 years I’ve had it installed I’ve done a number of “improvements”.

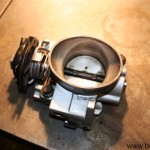
I’ll start by describing the unusual intake manifold.  The original manifold on the stock 3.4 V6 is very restrictive.  The throttle body and runners are very small.  My cousin Jim Thompson is a professional machinist and he can do wonders with a milling machine, lathe and a welder.  So we decided to do a little experiment…

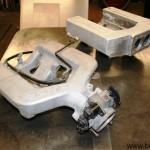
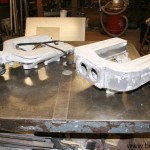
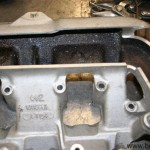
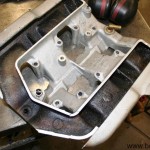
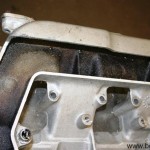
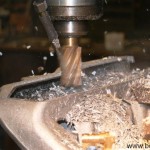
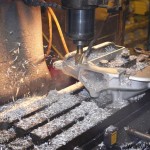
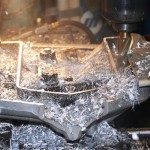
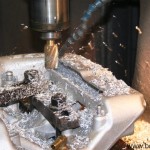
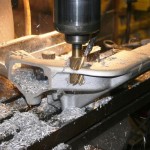
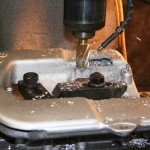
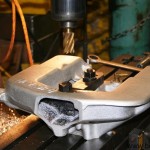
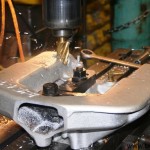
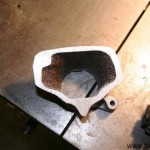
First, we cut off the nose of the original stock intake manifold.  Then, the manifold was chucked on a Bridgeport milling machine and a few passes with a large endmill were made.  This exposed the intake runners and we were finally able to see just how small and restrictive they are.  So, the runners were further machined and cleaned up.

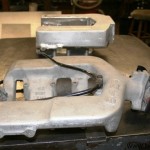
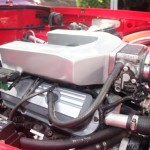
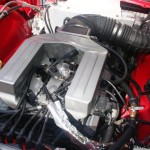
Basically what we ended up with was the bottom half of the stock intake manifold.  Pieces of aluminium sheet stock were cut and carefully tacked to the bottom half of the intake manifold.  Soon, a more even and much larger upper plenum was formed.  Seams were welded up and some trick work was done with a file to shape the edges and make it all look seamless.  I think the end result turned out really nice.

Then we replaced the small throttle body with one from the legendary LT1 V8.  The LT1 throttle uses twin buttlerflies and thus can keep up with the extra volume of the new intake.  Fortunately, the LT1 throttle body also uses the same type of throttle position sensor and idle air motor as the V6 does, so the ECM recognized all this without throwing codes.  The intake is also made in such a way that the MAP sensor still mounts to its original location and is connected to the intake via a small rubber hose.  Finally all vacuum lines are located in their factory locations.

The intake was then cleaned very carefully and several coats of high-temp silver paint were applied.  While tacky, I sprayed several coats of high-temp clear.  The end result functions as good as it looks.

So why go through all this trouble?

  • We wanted to experiment what would happen with a bigger intake and throttle body.
  • The engine needed the extra air volume.  This engine is running larger injectors, a hot cam, 1.6 roller rockers, headers and fully ported and polished heads.
  • Last but not least, because we can do it.

The end result is pretty impressive:  Throttle response is amazingly quick.  With the collection of engine modifications, the engine does not run out of breath as much as it used to.  Also, the engine revs in a much smoother way with a higher redline.  One could argue that some lower end performance was sacrificed for a much nicer middle and upper range.  Sure.  But when this engine pulls a 2200lb car (instead of 3500 as in the F-Body) that is a very acceptable trade off.

Frame Failure – Continued

In an earlier post, I described bowtie6‘s frame failure.  Today, I have some pictures of the “issue”.  First, a little background…

Rear suspension

Rear suspension closeup

Soon after bowtie6‘s initial dismantling the frame was carefully inspected.  Although the frame was in excellent shape the rear differential mounting pins showed typical TR6 wear and tear: two of the four differential mounting pins were cracked.

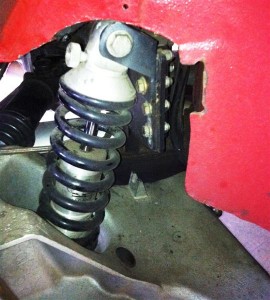
Since a bigger engine was to be installed, we reconfigured the rear suspension.  A completely redesigned mount was made to hold the Nissan R200 differential as well as the coilovers that would replace the lever action shocks and springs.

The pictures on the right show the rear suspension from the passenger’s side.  You can see the coilovers, rear disc brakes and the suspension mount holding the top coilover perch.

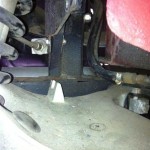
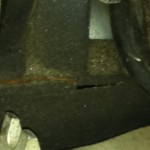
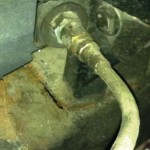
This brings us to the following photo gallery showing the frame damage.  The frame rail has suffered a serious, unrepairable stress crack.  I have inspected the driver’s side and there too, I can see a stress fracture although it is not as severe as the one on the passenger’s side.

I’m sure there will be plenty of critics analyzing the frame failure from these pictures and coming up with all kinds of root causes for the failure.  Quite frankly, the thing is what it is.  I got 15,000 from what I thought was a very good frame but this endevour has proven to be more than this frame could handle.  The extra power the engine gained from the cam and head work plus the stress of getting hammered by the control arms caused the frame to eventually expire.  Since the rear failed this extensively, I have reason to believe other parts of the frame have also suffered stress.

As soon as the frame comes out again to see the light of day, I plan to do a full autopsy by cutting it up and documenting stress points, failure points and basically show where the frame held up and where it did not.  I’ll have that in a future article which should be very interesting to read.

And now for a little reflecting…

These frames are now 35-40 years old.  These frames are also marginal at best.  Sure, with the anemic tractor engine on the stock TR6 the frame will probably last, but not by much.   However, if anyone is thinking of adding any real horsepower then really think what you are planning to do.  These frames can be reinforced to hell and back (done that), boxed-in (done that), have gussets added (done that) and have every weld reinforced (done that), and yet they will fail.  Quite frankly, I am very happy this thing gave up the ghost – now a new frame is being built to last and handle the new ECOTEC engine with no “issues”.

Frame Failure!!

All good things come to an end.  In this case, the “original” (and I say that loosely) frame has endured a frame failure.  Yep.  There is a tear several inches long on the passenger side along the rear suspension mounts.  Upon closer inspection the driver’s side has stress marks and I’m sure it is not far from failure too.

I noticed the problem back in November of 2010.  While driving, I started hearing some unusual sounds and sure enough after putting the car on jackstands a close inspection revealed the tear.  No pictures yet, but I’ll have some soon.  Suffice to say, the frame is toast and there is no way to repair it.

Unfortunately, the TR6 frame is extremely flimsy and quite frankly it is poor at best.  And no, I’m not saying this  because mine failed.  I’m saying this for the benefit of those folks that think they can put larger or modified stock engines and the frame will be able to withstand the extra power.  Well, if you believe that you are fooling yourself.  These frames are made of 10 gauge material and is not of the best design.  It is a “U” shaped affair with an extra plate, spot welded.  Add to that years of rust from within the tubes and you have a recipe for failure.  My frame was in excellent shape when I started the project and was reinforced and properly prepared.  Even after all that attention, it failed.

I’ve had several people ask why “original” frames have held up with V8’s and mine failed.  I guess it boils down to the fact that I have put 15,000 miles on my frame and have actually stressed it enough to cause it to fail.  So if you are considering something like what I have done with bowtie6, I would highly recommend thinking all your options.

And so the next step in the evolution of bowtie6 begins…

A new, bespoke frame is in the works.  The new frame is being made of square tubing with fresh stock.  No expense is being spared on the materials.  The frame will use the factory stock front suspension components with one big difference:  the springs/shocks are being replaced with true coilovers.  The great advantage of this will be there is no more need for a spring compressor since the coilover is not only adjustable but fully encapsulated and there is spring under tension to worry about.

As far as the rear suspension?  The crappy factory trailing arms will be ditched along with the Nissan diff currently in bowtie6.  Instead I will be using an 8 inch solid axle, with four point suspension, coilovers and swaybar.  Why?  Well, the IRS is really not an option.  For the expense of new halfshafts, new diff, and all the extra “stuff”, I can have a fully posi-traction custom built solid axle that will withstand plenty of horsepower…

Which leads to the next major improvement…

Yes, bowtie6 is getting a new engine.  The 3.4 litre V6 currently in bowtie6 is pretty much maxed out.  There is no more I can do to it.  Plus the ECM is not programmable.  So what are my options?  A brand new ECOTEC 2.4 litre 177hp crate engine and matching 5 speed gearbox has been sourced.  ECM reprogramming?  No problem – this engine’s ECM is fully re-programmable.  Needless to say, the sky is the limit…

I’ll have more info on my ECOTEC in the next installment.

Catching up…

The past four years have been great in the life of bowtie6.  The car has performed flawlessly logging almost 15,000 miles.  Several major improvements have been made:

Cam & Rockers

The stock cam has been replaced with a high-lift ratio.  The specs on the cam explained the change would take effect in the 1200-1500rpm range and last until redline.  This was to give a much smoother powerband.  In additiont to the high lift cam, a set of roller rockers has been installed along with a set of matching performance valve springs.

Heads

I was able to find a set of lightly used heads for this engine.  They were taken to a local machinist and he ported, polished and flowed the heads.  A three angle valve job was also performed.  The intake ports on the stock heads has a ‘sharkfin’ to help promote air flow.  While this improves low-rpm flow, it restricts flow at higher rpm ranges.  The fins were completely ground off and this made a huge difference.  All intake ports were matched to the lower intake manifold and the exhaust ports matched to the custom headers.  There is definitely truth in the statement that “horsepower is in the heads”.

Intake

The stock intake had been re-worked once by installing the throttle body from an LT1 V8.  This basically replaced the single butterfly with two large butterflies on the intake.  However, the rest of the intake was still very restrictive.  So, the intake was re-worked yet again making it handle a large amount of air volume.  To improve airflow as much as possible an airfoil for the throttle body was installed.

Conclusion

The cam and intake modifications made a great difference.  Soon after that was all done, I took the car to a local dyno for measurements.  The total figures produced 153hp at the rear wheels with 189ft/lb torque.  Quite respectable numbers.

Then came the heads.  Wow!  What a difference.  The upgrade bumped up power to 188hp at the rear wheels and 226ft/lb torque.  At the dyno, the exhaust gas was analyzed with an O2 sensor and was found to be spot-on.  On the first dyno session the ECM was not making things very efficient at higher RPM’s.  With the new heads, larger injectors and an adjustable fuel pressure regulator we were able to get much more efficient results.  This made the extra power at the wheels.

Unfortunately this is the end-of-the-line for the 3.4 litre V6.  The ECM on this engine is OBD1 and not tunable.  That is why we had to fiddle with the AFPR and run bigger injectors.  The powerband on this engine is very smooth and redline can be achieved right quickly.