Author Archives: bowtie6

Lane Rhythm Midcentury Modern End Table

I’m trying to stay sane during our new “normal”, so I’ve been working on a Lane Rhythm midcentury modern end table.  It is  finally finished and it turned out quite nice.  But first, a little background…

Ever since my wife and I visited Palm Springs CA (been there twice!) we have been on the lookout for nice midcentury modern (MCM) furniture.  We have quite a nice collection thus far, essentially replacing as we go.

So, where do we find these pieces?  They come from MCM stores local and online, and also from estate sales.  Estate sales can be hit or miss; there is a lot of luck involved but that is what makes it fun.  In the case of this table, my wife picked it up at an estate sale just a few weeks before this COVID-19 changed our way of living.  

This table was made sometime in the mid 1960’s by furniture maker Lane as part of the Rhythm collection.  The table is walnut, and was in fair shape with a number of stains on the top.  “Stains” as in when somebody puts a flower pot and moisture makes a ring.  That might be why nobody wanted it, and why my wife picked it up for a song. 

Other than the top, the rest of the table was in remarkable nice shape considering it is 50+ years old.  I started with some light sanding and this removed some rough spots from the wood.  The top took a little more effort, and fortunately the stains came out…

While I was doing all this work, I removed the drawer and flipped the table upside down.  That is when I found it was loose in a few joints.  All it took was a little patience, some strategically placed wood glue and some clamps.  Now the table is solid and stable.

Sanding this table reminded me of body work and that is why I found it so much fun.  The trick is in attention to detail.  The cleaner and accurate you make the prep, the nicer the project will turn out.  In this case, I used several grits of sandpaper, finishing out the prep with steel wool.  Then, wiping the entire table down with spirits and a tack cloth to remove any dust and/or debris.  Finally a couple of very carefully applied coats of General Finishes Arm-R-Seal satin finish.  Arm-R-Seal is very thin, and I applied it with good quality foam brushes.  Letting it dry thoroughly and then gently following up with steel wool.

And yes, that is Jimi Hendrix in that photo – I thought it complimented the table quite nicely.

As you can see, the two chairs on either side are far from midcentury modern.  I can kick myself back in January:  my wife and I visited Knoxville TN for a wedding and we found an MCM store.  They had a pair of very period correct lounge chairs that would have been perfect with this table.  I should have bough them.  If you notice, you can see what I mean in the lounge set used to introduce movies on Turner Classic Movies network.

So, a request to anyone reading this entry, if you have a lead on two MCM lounge chairs, let me know.  It makes no difference what kind of shape they may be in, provided they are not too far gone.

Stay safe.

Coping with COVID19

Greetings and salutations to the loyal readers (albeit small) of this blog during this unprecedented time, hoping you are doing well and being safe, while coping with COVID19.  I’ve been working from home for the last 2 1/2 weeks and it has been quite an experience.  Don’t take me wrong, I am very grateful that the company I work for, has the necessary resources for us to work from home, but it has been quite an adjustment.

I”ve lived in the United States for 40 years and never, in my wildest dreams would I have thought things would get this dicey.  And according to Drs Fauci and Birx, things are going to get even dicier.  My heart and admiration goes out to all the unsung heroes of society:  the health workers, the UPS/FEDEX drivers, truckers, grocery store employees and the list goes on.  I heard a story on NPR the other morning,  that explained the extreme sacrifices being made by utility workers and water treatment plant operators (click here).  Like standing up RV’s so they are not too far from their plants.  Why you ask?  Because there are not many folks willing to specialize in that type of work – but yet, they are the foundation to our “civilized” society.

This blog is not political; neither is it about parties.  I just wish these dunces we call politicians would set aside their personal agendas and do the right thing for the good of our beloved America.  My father (who would have been 98 years old today) – member of the Greatest Generation and a decorated WWII veteran – would have been appalled to see what is happening today to the nation he so selflessly defended.  Dad was alive for 9/11, and I remember he wept.  I honestly don’t know how he would have reacted to what is happening now…

Bill Withers passed away today.  An American treasure…

Sometimes in our lives we all have pain
We all have sorrow
But if we are wise
We know that there’s always tomorrow
Lean on me, when you’re not strong
And I’ll be your friend
I’ll help you carry on
For it won’t be long
‘Til I’m gonna need
Somebody to lean on
Please swallow your pride
If I have things you need to borrow
For no one can fill those of your needs
That you won’t let show
You just call on me brother, when you need a hand
We all need somebody to lean on
I just might have a problem that you’ll understand
We all need somebody to lean on
Lean on me, when you’re not strong
And I’ll be your friend
I’ll help you carry on
For it won’t be long
‘Til I’m gonna need
Somebody to lean on
You just call on me brother, when you need a hand
We all need somebody to lean on
I just might have a problem that you’ll understand
We all need somebody to lean on
If there is a load you have to bear
That you can’t carry
I’m right up the road
I’ll share your load

Restored Vintage Stereo Console

The restored vintage stereo console is finally complete.  I’ve been working on this thing on and off for way too long.  I am very happy with the results and the console is working as it was originally intended albeit with much more modern components.  Let me show you what I’ve done…

If you are interested, click here for the prior article about the vintage stereo console.  But essentially that article talks about how I removed all the original components and ended up with an empty cabinet.

Speakers

The original console had raw drivers inside each compartment on either side of the cabinet.  I was going to try to source new drivers but instead, my friend Jeff gave me a pair of vintage Polk speakers he no longer used.  They took a little finagling to get in but they couldn’t have been a better match.

The speaker wires are cheap; this is not a reference system so I did not splurge on exotic oxygen-free copper wires with silver soldered ends.  However, I did get some nifty banana plugs from Amazon.  They have a screw-on design and worked very nice.  They were super easy to install, without the need of a soldering.  Those are two-way Polk speakers by the way.

And from the image above you can see I put the original backing material back on.  This did two things:  it improved bottom end on the speakers a little bit and it also makes the console look finished.  So both sides of the rear of the console are covered.  Here is the other side:

And the side and center back panels…

The Components

Now let me show you what runs the whole shebang…

I cut a piece of MDF to serve as the new shelf for all the goodies shown above.  I used MDF because it is cheap and I had some left over from when I built my new nifty worktable (i’ll have more about that in a later post).  There is a brace you can’t see in the photo above so the new MDF shelf had to be cut about 1/8 inch short on all sides in order for me to get it in the console’s cavity.  This left a rather ugly gap on each side, so in order to cover it all up, I just used adhesive-backed cork drawer liner.  I bought that from Amazon too and it worked out just fine.  It was easy to cut and since it bends easy, I could cut it as long as I needed.

The Power Supply

So what do we have here?  At the very top is a Furman power supply.  I wanted this to look as slick as possible and the Furman power supply does the trick.  On the back side of the power supply are a number of power outlets all fed from one heavy gauge wire that plugs to the wall outlet.  This way there is only one plug to deal with.  Another cool feature is the single power button that if needed, shuts power off to all plugs.  It is all fused and overall it is very well made.  Mounting the power supply required cutting a hole in the shelf and then sliding it in.

The Amplifier

Next is a Yamaha WXA-50 Wireless Streaming Amplifier.  I chose this because it has a built in amplifier, bluetooth, digital input, optical input, remote control and has its own app that can be used from an iPhone or iPad.  However all this does not come cheap.  The WXA-50 is rather pricey, but it is the perfect fit for what I wanted to do here.  The WXA-50 sits vertical as you can see.  I had originally mounted it flat but it took up too much space and did not look good.  To get the WXA-50 to stand vertical, I had to build a small box underneath the shelf.  This took some effort because it had to be done around the ventilation panels of the amp.  Once I figured it out though, the amp slid in place and all is good.

The Media Server

Finally, I have my old macMini acting as media server.  I have my entire music library stored there and it is accessible from either my iPhone/iPad or from my macBook via remote desktop.  This means that I can play my entire iTunes collection from the macMini through the WXA-50.  I suppose the macMini could have been installed underneath the shelf but that proved to be problematic in case I need to access it.  Plus it just looks cool in the current configuration.

Remember I said there is an app?  The app is called Yamaha MusicCast.  Once you get that all configured, you can link it to your SiriusXM account, play any radio station on the internet and many other sources.  The WXA-50 is a very nice piece of equipment indeed.

I had originally wanted to slide a vintage amplifier (say, something like an old Marantz) but there is just not enough space.  And, there would be no bluetooth, XMRadio, etc.  Instead, what I have here is just perfect.  The system is not overly loud and serves exactly what it was meant to be:  a very pleasant way to have background music playing in the background.

Finally, if you notice on the featured image above, there is a small framed key…  It is special and fits nicely with the mid-century theme going on…

This is a legit Playboy Club key that used to belong to my father-in-law.  Good times!

Ecotec Intake Manifold Upgrade

Been a long time since I’ve done any work on bowtie6.  This little car is just like a trusted Timex watch – it takes a beating and keeps on ticking.  This weekend I installed an upgrade:  the other day, I came across a vendor that offered a phenolic intake spacer for the Ecotec.  The advantage of a phenolic spacer is to help reduce heat transfer from the head into the intake manifold.

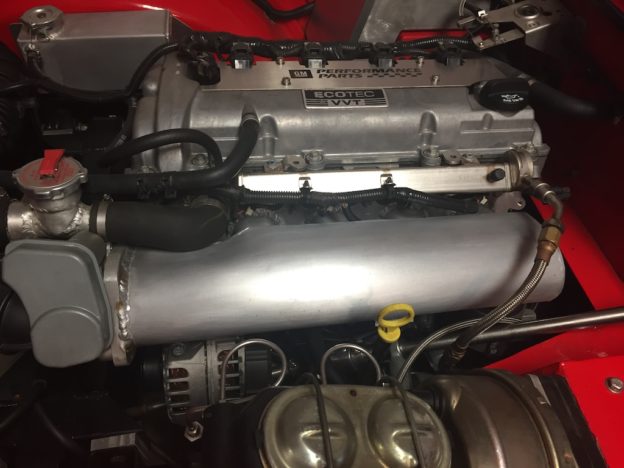
The intake manifold my cousin Jim made when we installed the Ecotec in bowtie6 is all aluminum (in case you want to know more about it, here is the link to a previous article with details about the custom intake).  We did this because the original composite intake from the Solstice was just too large and would not fit because the steering shaft lives where the factory intake is attached to the head.

You can see the intake in today’s featured image above, and as you can imagine it gets a bit warm.  I suppose the amount of time air hangs around the intake manifold is minimal, but any improvement would be helpful.  So, I sent the $99 plus shipping for the phenolic spacer and a couple of days later, one of the brown trucks delivered this:

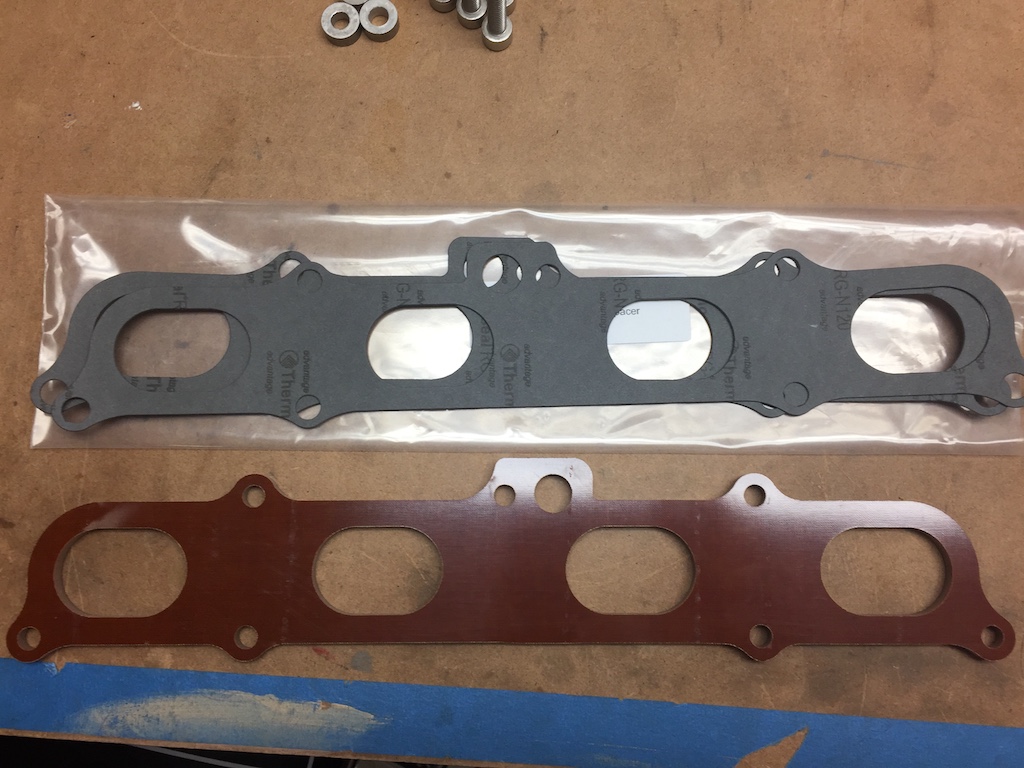
The phenolic spacer matches perfectly the GM intake manifold plate Jim used to build the custom intake and is exactly 1/4 inch wide.  The “kit” comes with new gaskets and several replacement bolts.  Sadly the bolts did not fit the head of the LE5.  When I trial fitted all this, I noticed the factory bolts were about 1/4 inch too short (duh!), so I had to go find replacements.  Fortunately the local NAPA store not far from home had them in stainless, no less.  Torque settings on these bolts is not high, so the NAPA bolts worked just fine.  Not bad for $8 and change.

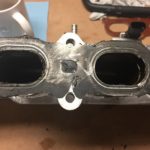
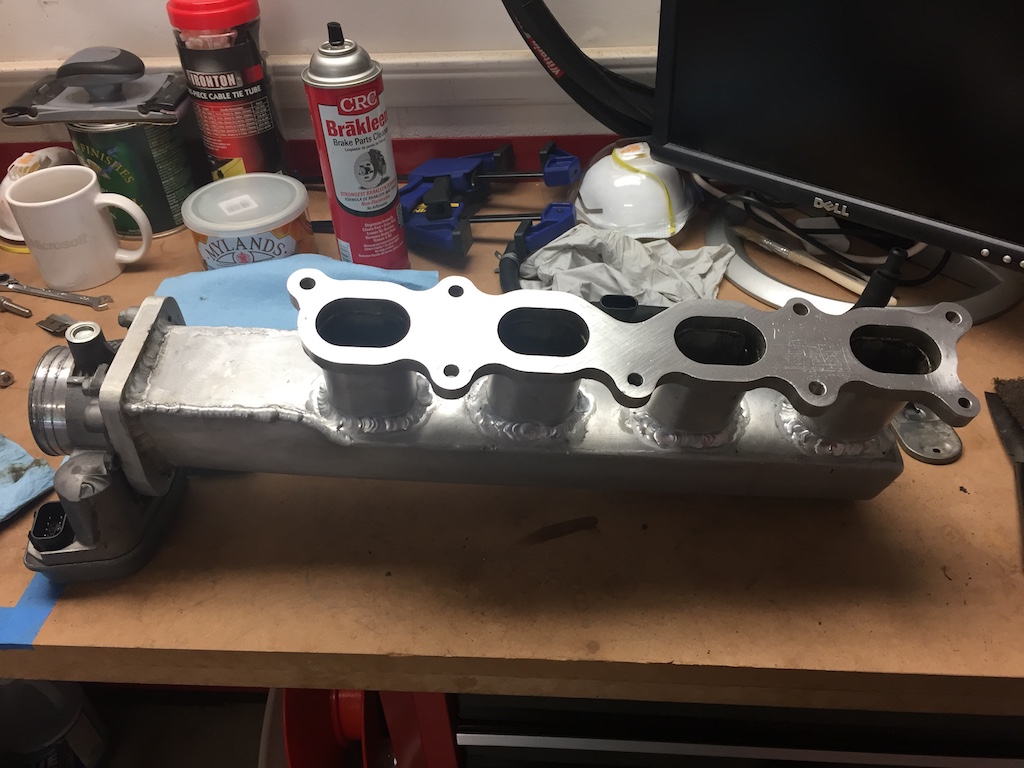
Taking the bolts out was a job!  There is just no room.  But, with a little patience and a few curse words, the manifold finally came out.  I remember I had used RTV on the original metal gasket and was left with quite a bit to clean up.  This is the intake manifold minutes after I had removed it.

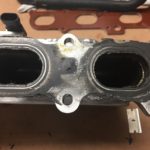
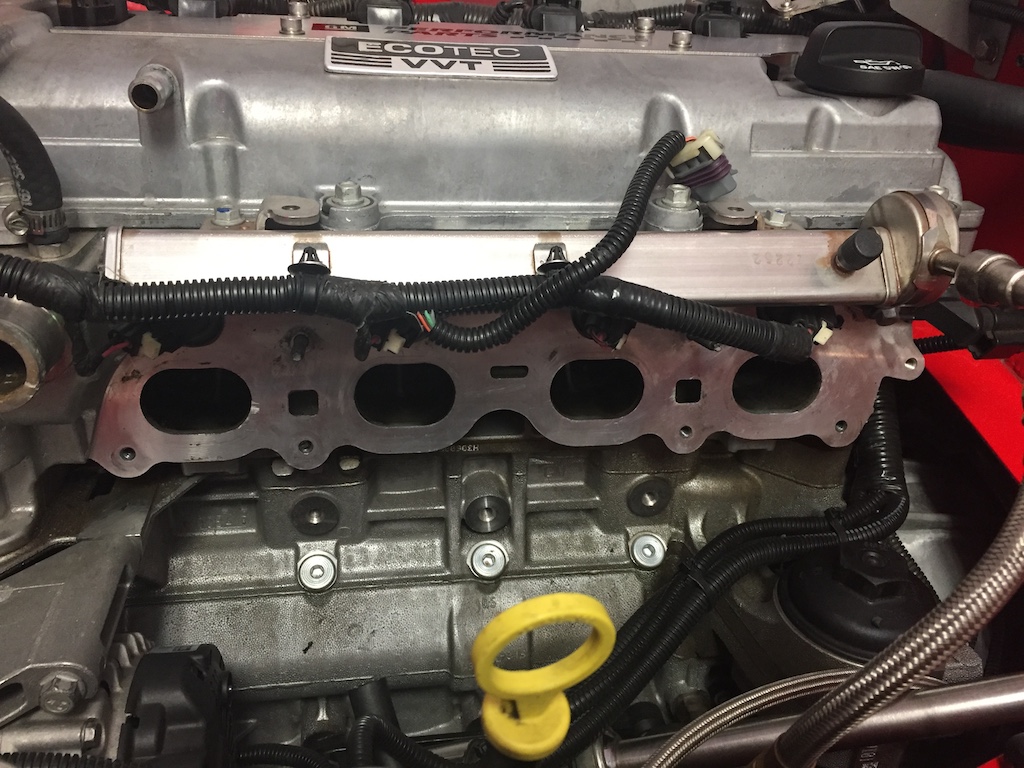
And here we have the other side.  I had to remove the valve cover breather hose and the coolant hose.  You can also see the alternator is still bolted to the block (more on this later).
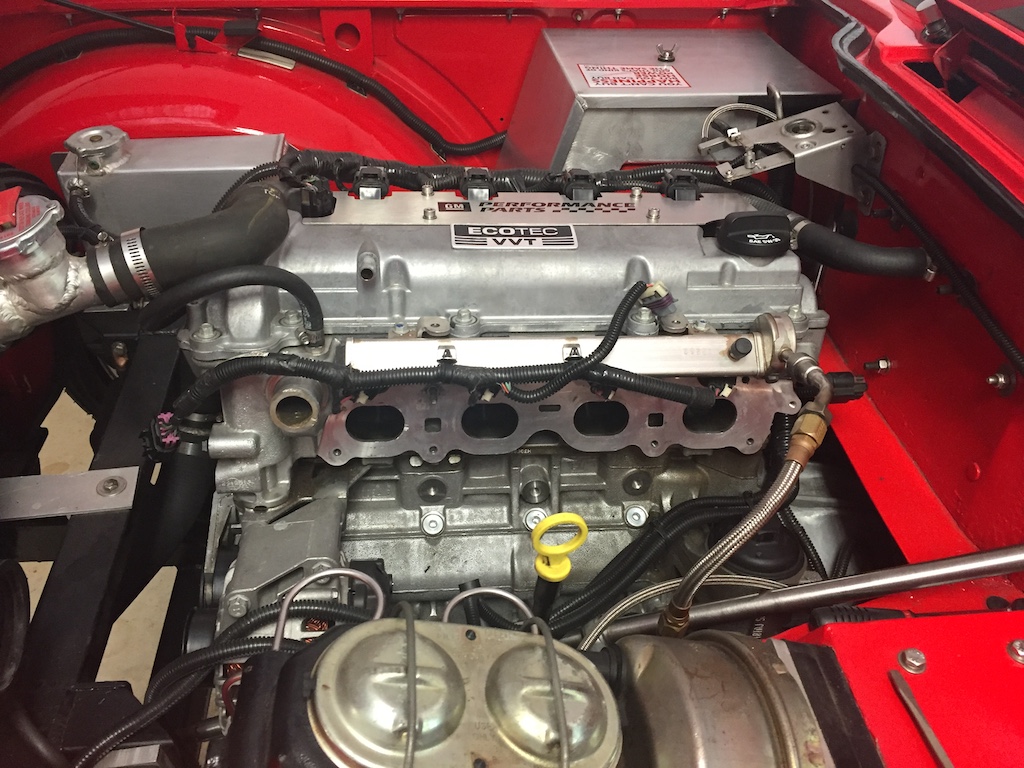
After a little elbow grease, the head and the intake came clean.  From the mess in the the photos above, we have this:

Remember I mentioned the alternator being mounted?  Well, after trial fitting the whole affair, I found there was no way in hell the bottom bolts could be reached without dropping the alternator.  Here is what the phenolic spacer looks like in its new residence…

And here is a closeup…

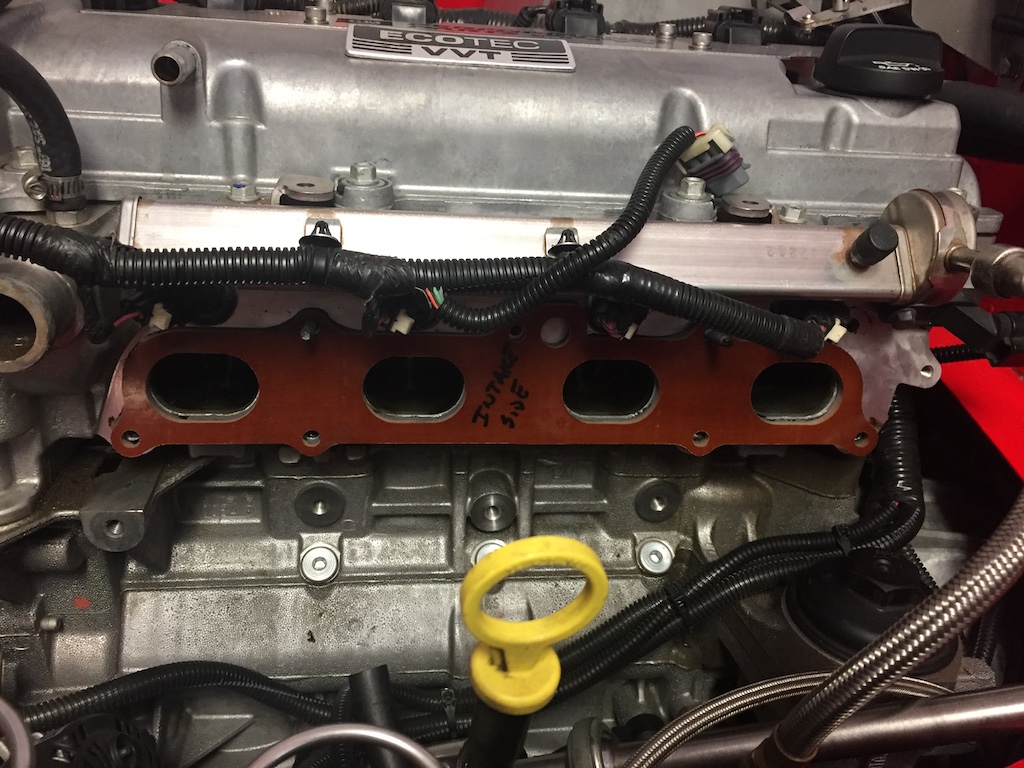
I had to mark the spacer with “block side” and “intake side” so I could line up the new gaskets in the right direction.  Yes, they have a “side” – you can see that in the first picture above.

Then, the fun part:  getting it all back together.  As I mentioned the new bolts are about 1/4 longer, so it took some fiddling to get them lined up just right.  I had to pay close attention to the gasket orientation and used a bit of gasket adhesive on the gasket face next to the block and intake.  I left the faces that come in contact with the phenolic spacer dry because I did not want to risk damaging the phenolic material with the gasket adhesive material.

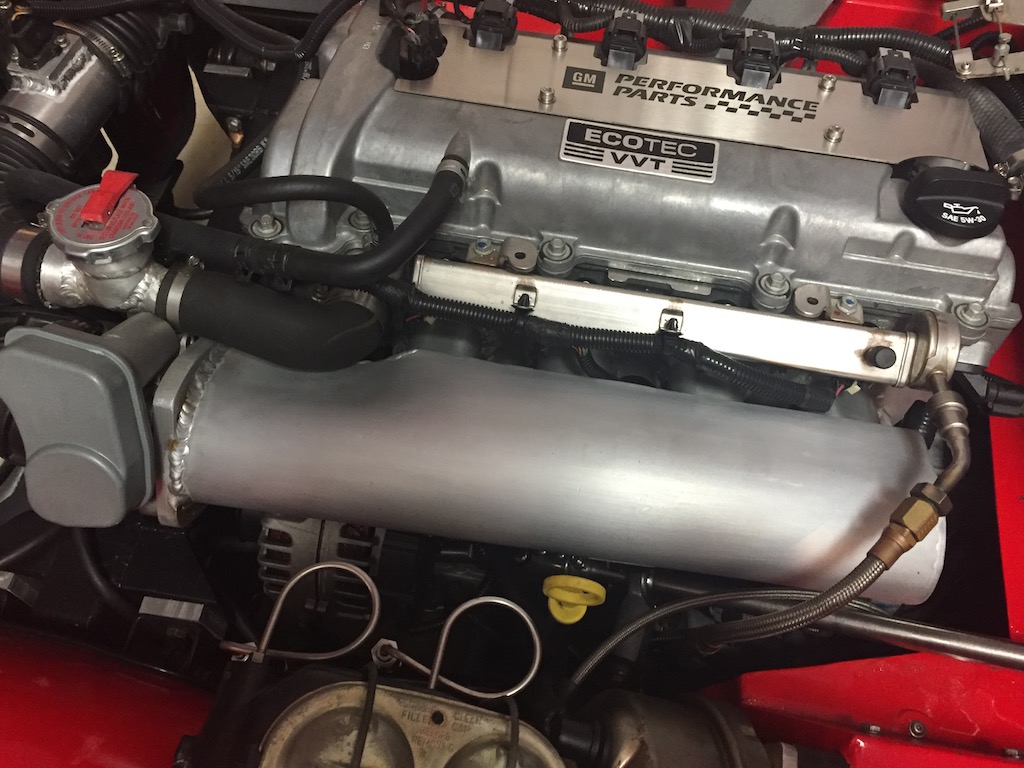
All that hard work, and you can’t even see the spacer!  So much of bowtie6 is like this too.

And so, it is time to start the engine and go for a ride.  But, we can’t have a good automotive project without the proverbial “oh shit” moment…

  • gaskets lined up – check –
  • bolts all accounted for – check –
  • no extra parts (yeah!) – check –
  • wiring connectors plugged up – check –
  • alternator properly bolted – check –
  • serpentine belt on – check –
  • engine coolant hose – check –
  • valve breather hose – check –

Get the keys, jump in and hit the ignition button.  Nothing.  Engine turned and turned, no fire.  Strong smell of fuel.

Damn!

I retrace steps.  Had to be something simple.  Turns out the plug for the injector harness is the exact same size as the one for the electronic throttle body.  I had them switched.  No wonder.  After swapping the electrical connectors, I tried to start the engine again.  This time, a cloud of smoke came out the exhaust – she was pretty flooded so I decided to let the engine idle for a few minutes.

Finally, backed the car up and went for a short drive.  I noticed no seat-of-the-pants improvement, but I did touch the intake when I returned and it felt much cooler.  I have no idea if all this is going to make a difference but there is no big investment here.  And yes, I would agree if you say that heat will still make it into the intake just by heat transferring through the bolts.

We shall see how this little experiment goes…
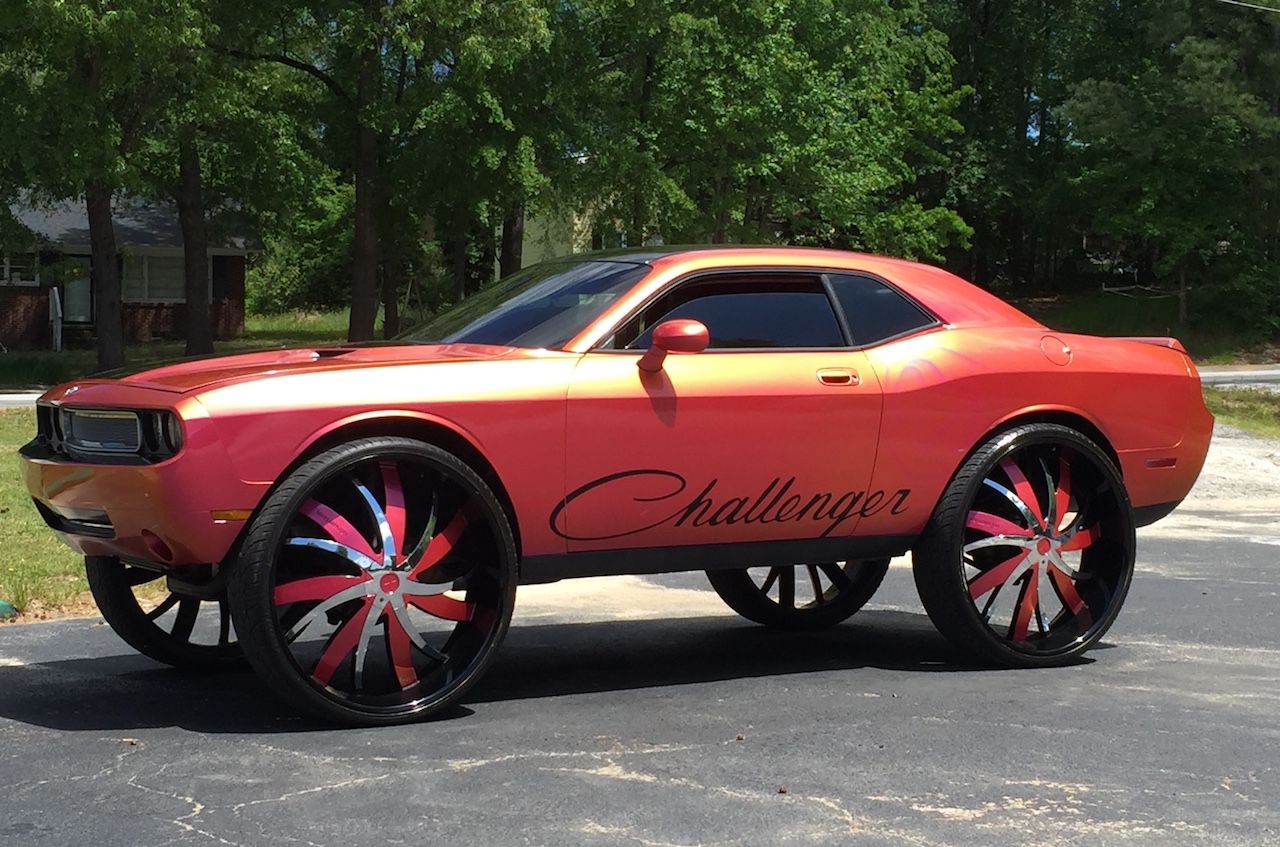
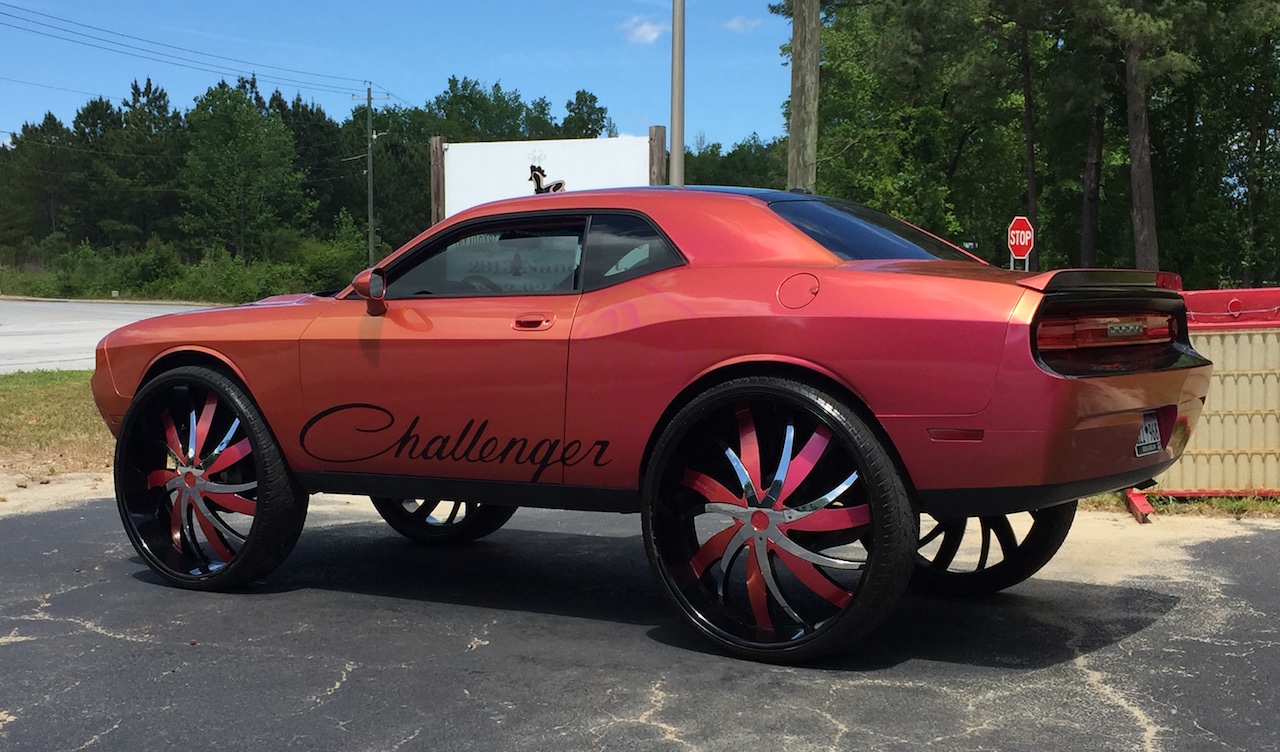
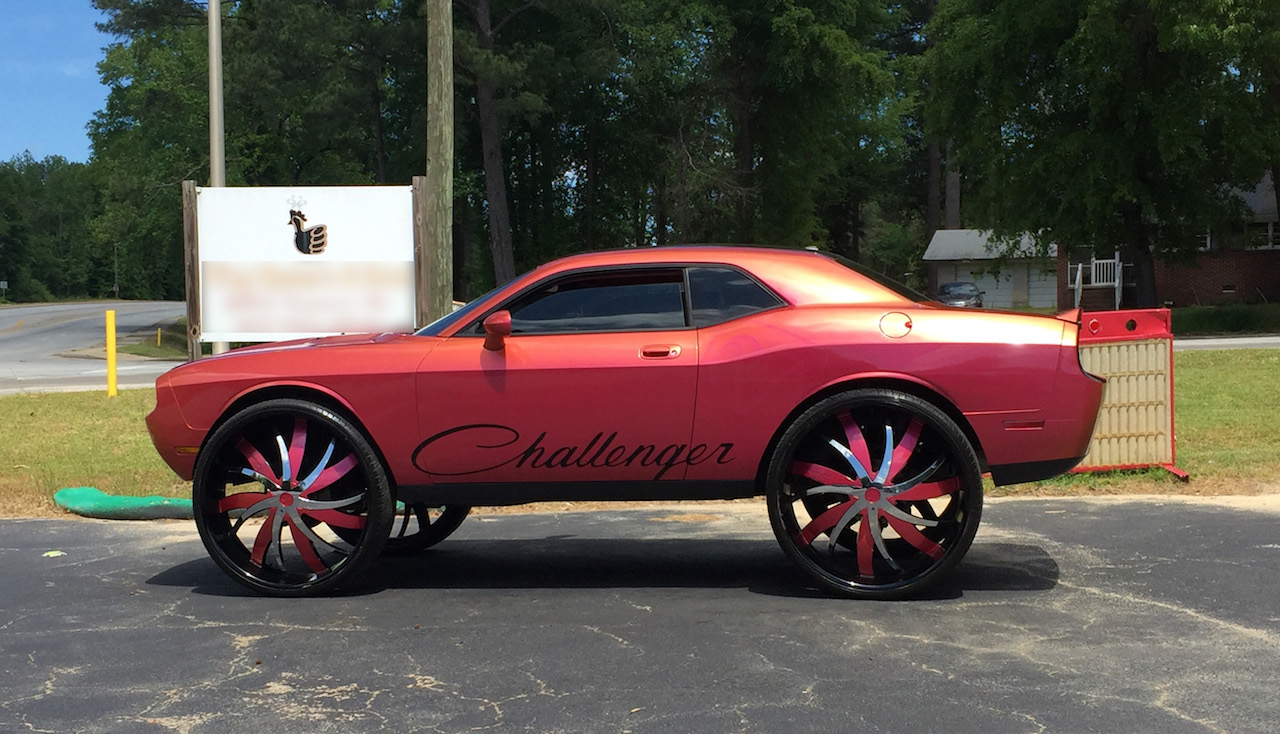
 

My Honda S2000, Six Years Later…

I’ve owned my 2003 Honda S2000 for six years now.  Hard to believe it actually.  I remember six years ago in April of 2012 when I drove to Russellville, Kentucky to make the purchase from the estate of its former owner.  You can click HERE to see the post I made, with details from when I made the trip to pick the car up.

One of the blogs I read regularly and highly recommend belongs to a fellow car enthusiast like me.  His name is Tyson and he has a thing for Acuras.  His blog is named drivetofive – as in drive to 500,000 miles!  I thought about him when I started putting this post together because Tyson documents how many miles he logs on his fleet of breathtaking Acuras.  And yes, he is lucky enough to own the Holy Grail:  an Acura NSX.  So Tyson if you are reading, take a look at this:

Yes, that is a picture of the dash of my 2003 Honda S2000 taken this past Friday, April 6, 2018.  The S2K had a milestone:  the sweet sixteen!  Doing the math, I’ve owned this car for six years, and have put just a tad over 11,000 miles on it.

Even though this car is 15 years old, I get looks and comments as if she had rolled out the dealership recently.  I have gone out of my way to keep this thing as clean as possible.  Matter of fact, I can’t say I’ve ever driven this car in the rain during the past six years.

The first major purchase for the S2000 was a new set of BF Goodrich summer-only tires.  Well, I need to get a new set of rears because 11,000 miles later, they are down to the wear markers.  I’m not surprised.  From my research the S2000 is similar to Tyson’s NSX in that the rear tires wear prematurely in exchange for optimal handling.

And so, there you have it.  My 2003 S2000 has been an amazing car.  It has its shortcomings in the torque department but what a joy it is to drive with the top down, revving up to the 9000 rpm redline.  This thing has F1 DNA.

Expenses have been negligible.  Other than the previously mentioned BFG’s, all I have done is replace fluids and filters. And, oh yes, I did buy a titanium factory shift knob and the factory front air dam and rear spoiler.  Honda (ahem, Acura) dependability I suppose!  😉