Author Archives: bowtie6

TR6 Bonnet Rod

After installing countless sheets of Dynamat Extreme all over the place ($$), thick sound proofing carpet backing, new carpet, plugging up the firewall for any small holes, modifying the exhaust and misc other improvements, bowtie6 is very quiet now.  While this is a great thing, it also brings with it the ability to notice other smaller aggravating sources for noise. I started noticing a very annoying squeak from underneath the bonnet (the hood).

This darn squeak would happen on bumpy roads as well as smooth blacktop.  Since it was coming from under the bonnet I started adjusting stuff.  I made sure the two rubber bumpers were up to snuff, made sure the latch was nice and centered and double checked all bolts.  Fender bolts, hinge bolts, grille, the works.  Still – squeak city.  Damn.

While visiting with a buddy of mine that works on TR6’s – Mike Richardson – over the holidays, I discussed the annoying squeak.  We went for a ride, and Mike laughed and said, “It’s the bonnet rod!”.  Duh!

Mike suggested a couple of things.  The first was to tighten the nut holding the rod in place.  Mike reached into his toolbox and pulled out a 7/16″ wrench and tightened the nut just a tad.  Since Mike restores TR6’s back to “original” I figured this might do the trick.  Well after chewing the fat for a while, I headed back home.  Damn squeak was still there.

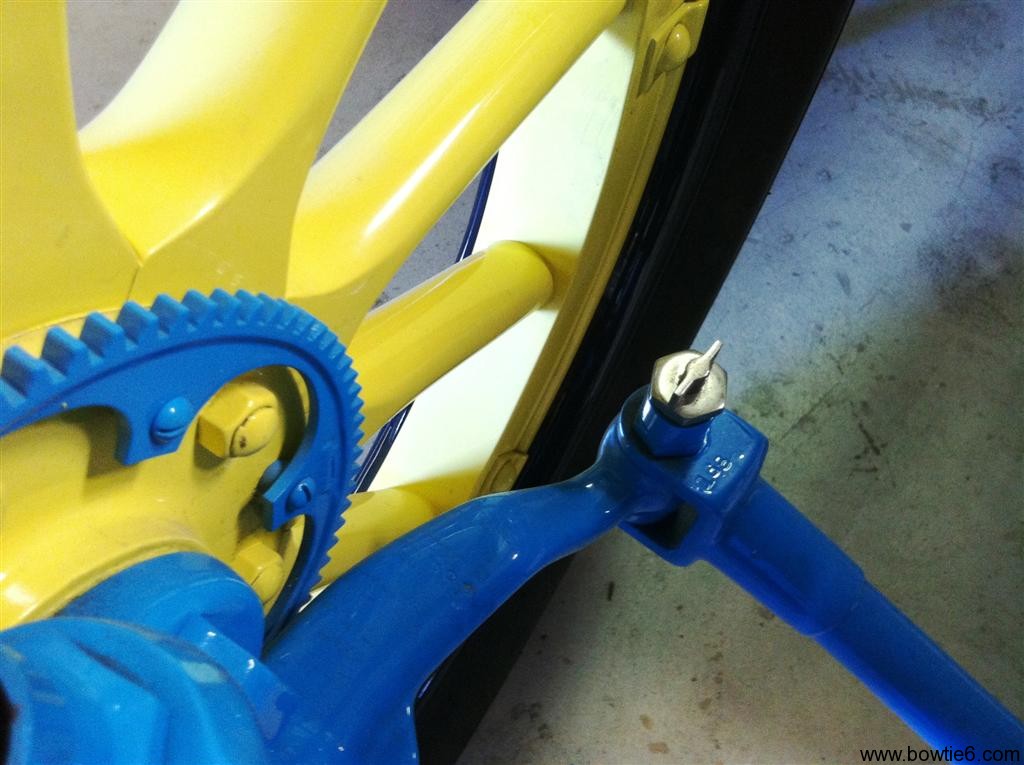
Remember I said above he suggested two things?  Mike suggested that if after tightening the nut it still squeaked, to take a closer look at the rod and see if there was any evidence of it rubbing on the rod guide on the body.  Sure enough, there was a shiny spot on the rod where it touches the guide.

Properly mounted the rod nut should be a loose fit.  This enables the rod to fall in place into the recess on the rod guide when the bonnet is lifted open.  If the nut is too tight, then gravity cannot let the rod fall in place and one has to manually intervene, which is not good.  Mike said this is out of the “Original Restoration Handbook”.  Hmmm…  I guess I never read that book.  Shame on me.

However, leaving the nut a little on the loose side – according to Mike – the rod has a tendency to bounce and move around.  This is how that shiny spot forms on the rod and thus the source of the squeak.  Hmmm.  I guess the “purists” know a thing or two I don’t know.  Imagine that.

“So, how do I fix this?”, I asked Mike.

Mike looked at me and said: “Get some shrink wrap and cover up any shiny areas.  This will solve your squeaks”.

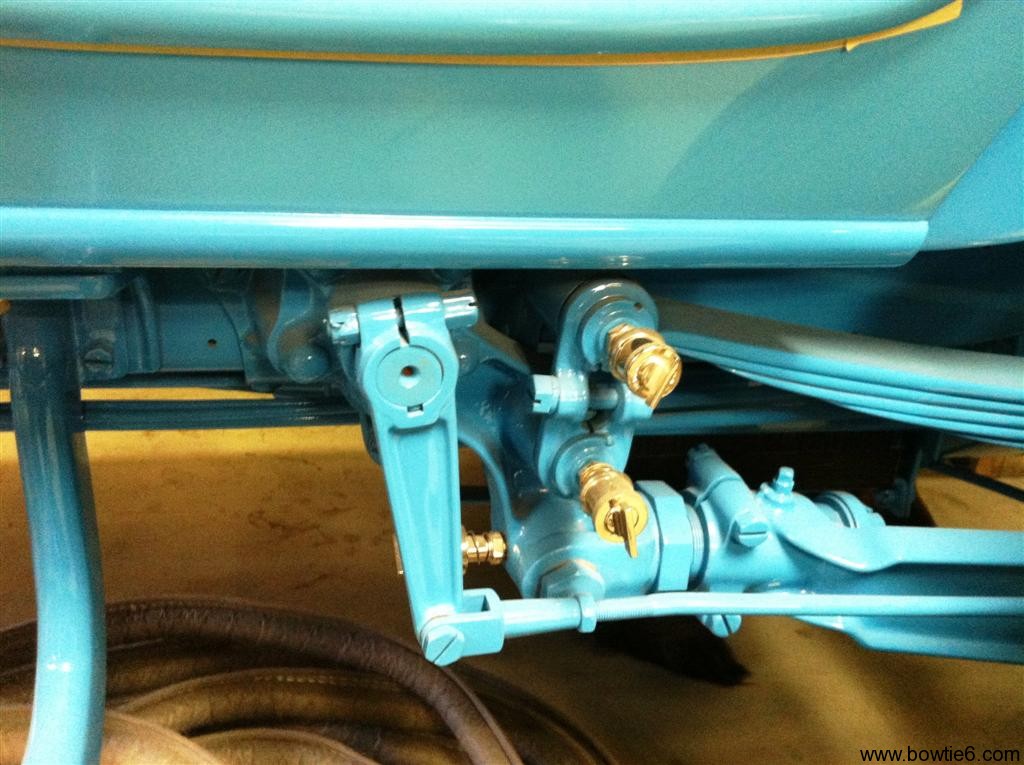
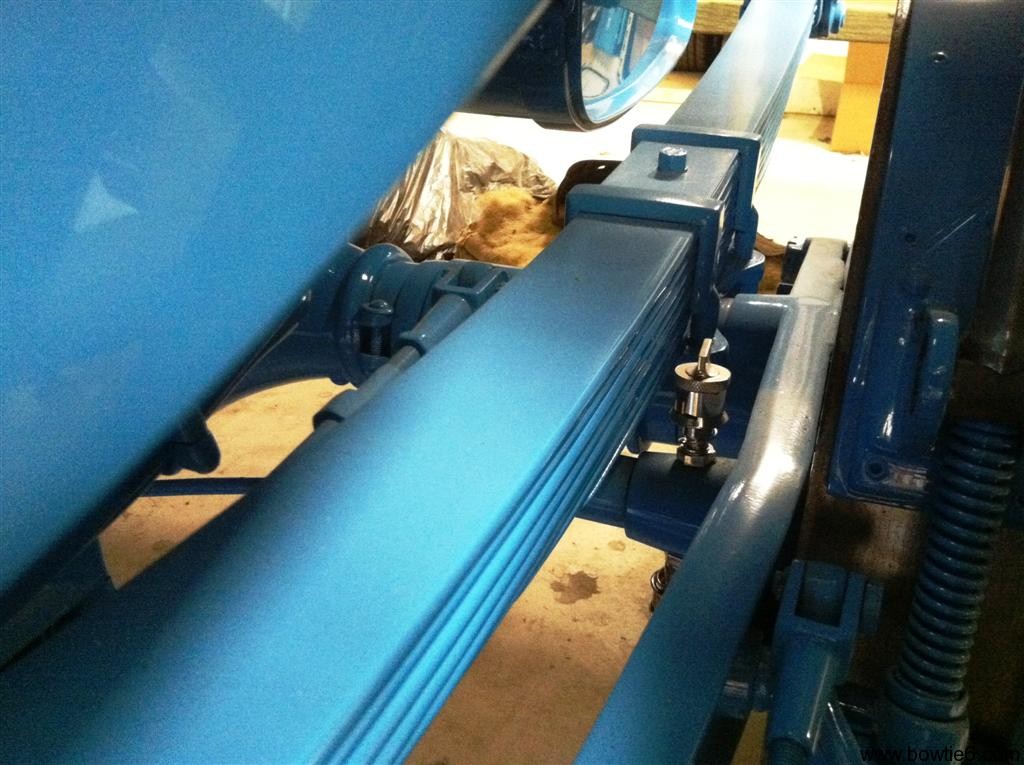
So when I got back home, I opened my toolbox with all my ‘lectrical stuff in it and found the appropriate size shrink wrap.  I cut an appropriate length, aligned it over the shiny areas and let the hot air gun do the rest.  This is what it looks like:

I put the nut back on, careful not to tighten it too much (in accordance to the “Original Restoration Handbook”) and went for a ride.

Well folks, that did the trick.  No more annoying squeak.  Imagine that.

So if you have an annoying squeak under the hood that is driving you nuts, you might be able to do a similar fix as shown above.  Mind you, it will not score you many points with the judges but I can’t stand squeaks.  Of course, in my case…  who cares what the judges say!

Thanks Mike!!!  🙂


Intake Repaired

After careful inspection and a thorough cleaning, the intake was repaired by my cousin Jim.  We did find another small crack that had developed on the outside of the plenum – not a leak, but more of a stress crack.  At any rate, with some new weld beads, the runners are all repaired now.  This is what things look like, after the repairs:

Here is a closer look at the affected area:

The face of the flange was found to be ever so slightly not 100% flat.  With a little machining, it is now level and flat.  I started putting this all back together last night.  Should have it all running today…


Backfire!

Looks like 2011 ends in a bang.  Literally.

Yesterday morning the sun was out so I decided to take bowtie6 to work.  Unfortunately, I did not press the “Start” button long enough, the engine turned for just a split second and backfired when I let go of the button.  I’ve had this happen twice before with no serious consequences but this time, we had a problem: the “bang” cracked the intake.

There is nothing wrong with the design of the intake or with anything else.  This was my mistake 100%.  I just call this a risk of running non-factory parts.  The new intake is all aluminium; this is what the intake looks like:

We had to make this intake up because there is no room for the original plastic intake.  Actually there is, but it would have required the steering column to be relocated bigtime and it was just not worth the trouble.  The intake you see above is made in several pieces.  The flange that bolts to the head came from GM Performance Parts and is water jet cut aluminium.  This all has to be made in pieces and welded in place as such.  The four intake runners are aluminium tubing, cut and bent to fit the oval ports on the GMPP flange.  They were welded to the flange from the outside otherwise there would be a lot of machining to make the flange perfectly flat again.

The runners then were fitted to a flat piece of aluminium which made the intake side of the long plenum on the top.  There was a bead ran on the inside of that plate.  Then, the rest of the plenum was shaped and welded in place.  The seams were filed smooth and it all looks like one solid piece.  Finally a flange was made and welded where the throttle body gets bolted with four screws.

All good, except that the four runners ended up with a delicate bead around them, on the inside of the intake plenum.  So, when the backfired occurred it caused the seam on number 4 runner to assplode.  Take a look:

Obviously, it doesn’t take much for the thing to have a major vacuum leak and cause the engine to fail to run.  Needless to say, with this crack RPM’s went through the roof!  One interesting thing about all this is the ECM was smart enough to figure this out, and basically shut things down.

The outside of the runners needs to be welded again (duh!).  Had we not had the backfire, this would have not been a problem.  The seal has been flawless but unfortunately the thing just could not cope with the force of the assplosion.  As you can see, the intake has been removed and will be welded back today.  I hope to be back on the road hopefully tomorrow.

Here is a picture of engine-side of things:

Sorry for the picture being so dark, but you can see there is not much distance between the intake valves and the actual intake itself.  Not at all.  Also, the gasket seems out of place because it is not pushed all the way up against the head – in reality it fits perfectly with the intake opening.

No worries though – this should be a quick fix…  🙂


1917 Locomobile – Part 2

The rest of the Locomobile is pretty awesome too.  Here is a collection of pictures showing the interior and many other details on the Locomobile.

No, no ABS here.  This is the speedo sender.  Also notice the absence of front BRAKES!  The only brakes on this machine were on the back and they were these huge band affairs.  I don’t think this car would stop on a dime.  Matter of fact, I bet it took quite a long time to get it stopped.

Check out the flywheel on this machine!  It is not enclosed, the gear is helical cut so the starter has a better chance at engaging.

Take a look at the shine on the radiator surround.  This is not chrome, by the way.  This is nickle plated.  The entire car’s shiny parts were all nickle plated.  This stuff is amazing!

Next is a gallery of a few more details.  For you on the mailing list, do check out this post online – you will be missing out the photo gallery!

  • The springs on the rear suspension are twofold: 1) on the bottom is a full length spring, 2) on the top is a quarter elliptical.
  • Check out the fuel tank! Fuel gauge is mounted on top.
  • The fuel cap is screwed on.  The system is pressurized by a small hand activated pump on the dash.  Kinda like an old Coleman gas lantern.
  • All the doors are wood.  The frame is wood, has a turnbuckle on a cable to make them “fit”.  There is a metal skin folded over the wood frame.
  • The exhaust muffler is huge.  The thing is covered in what looked to be an asbestos blanket of some sort.

I mentioned above there are no front brakes.  Take a look at what stops this car.  These are the rear brakes…

Good Times…

I hope Santa was good to you all…

Santa was very good to bowtie6!!  Just had dinner, opened one of my Xmas presents and watching “To Catch a Thief”…  That blue Sunbeam was pretty darn awesome, but Grace Kelly in the white outfit and diamonds…  Dayum!

At any rate, this is what Santa brought me…

Good times indeed!