Tag Archives: suspension

400 Miles and Counting…

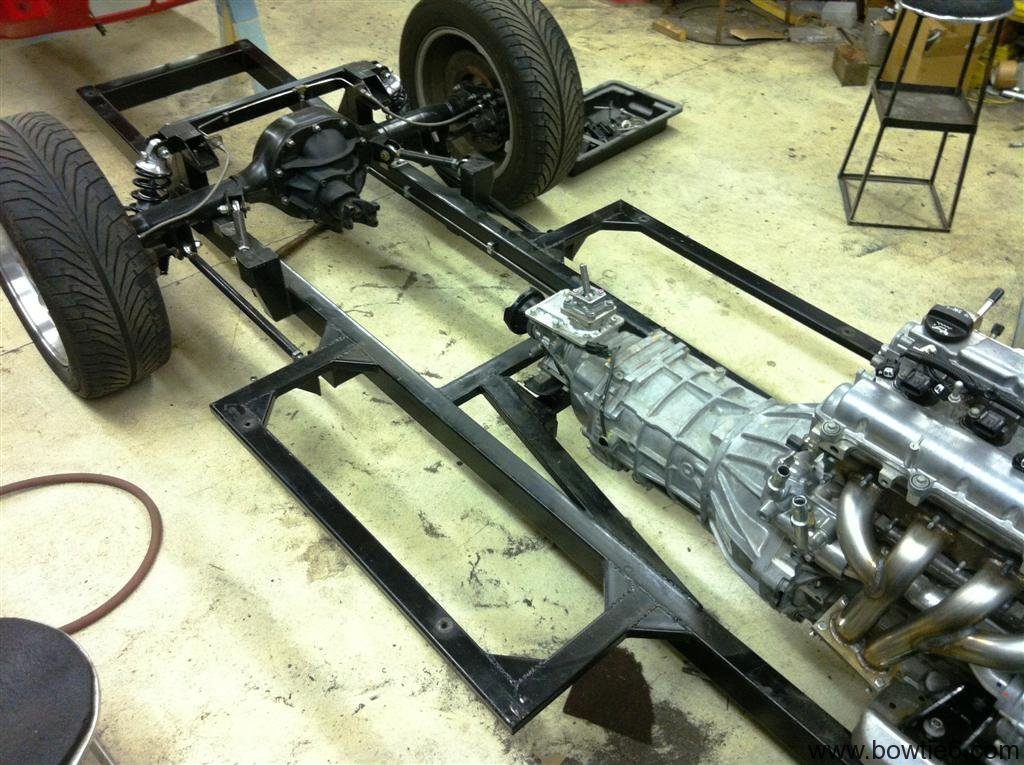
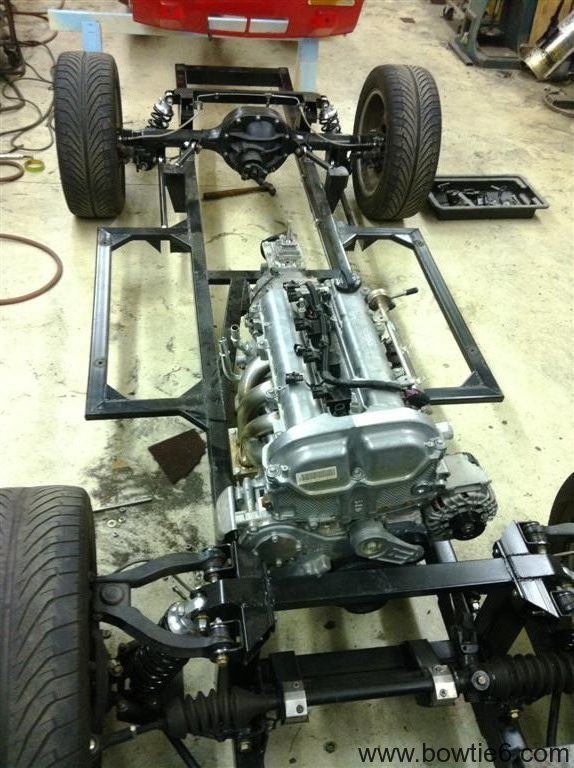
Well, I’ve got about 400 miles on bowtie6 with the new frame and the Ecotec.  Simply put, this thing rocks.  I expected an improvement, but damn!  This thing is awesome.  And I have only scratched the surface.

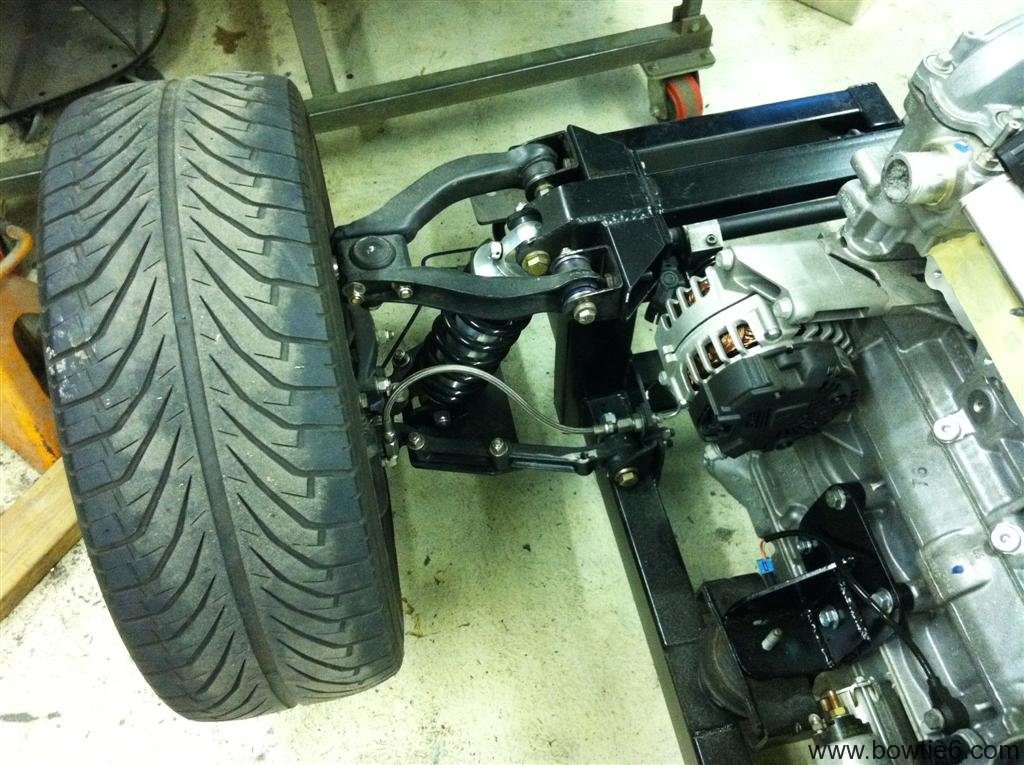
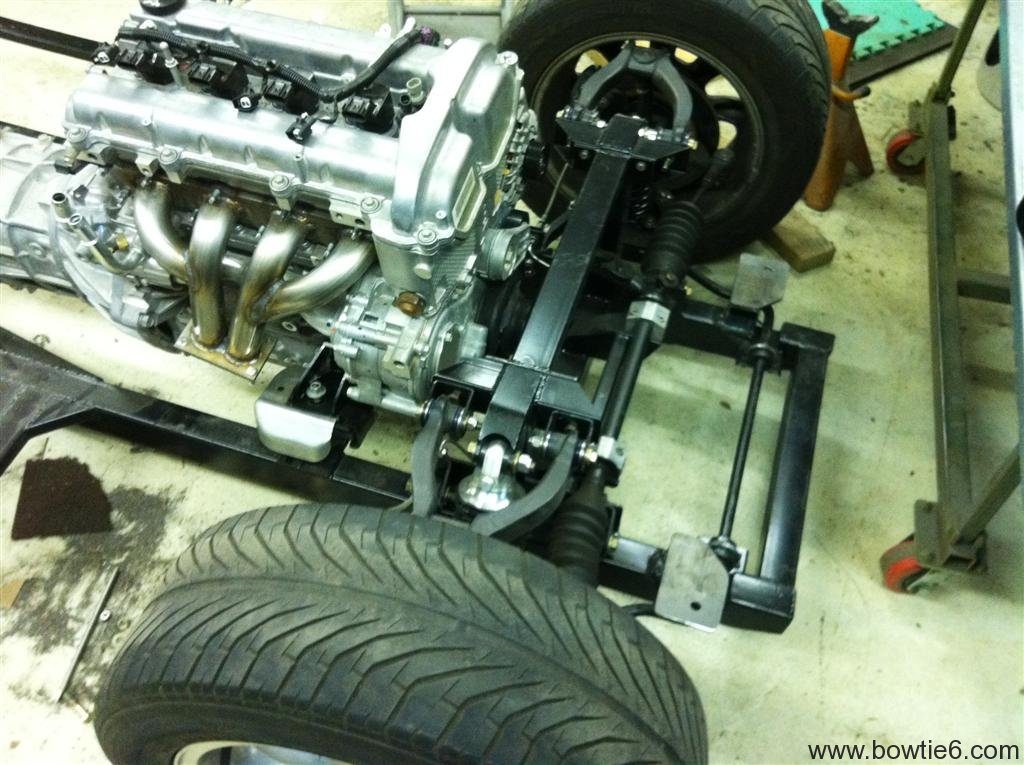
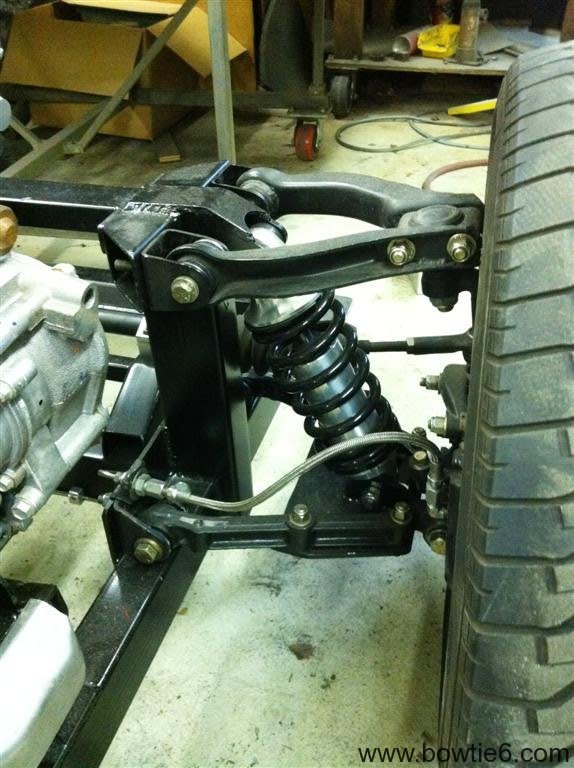
Where to begin?  Well, the coilovers are amazing.  The front coilovers have made an incredible difference in the steering “feel”.  Before, with Richard Good uprated springs and SPAX adjustable shocks the steering was very “heavy”.  At parking-lot speeds it took quite some effort to turn the wheel.  Perhaps it had something to do with the 205/55-16’s up front or the extra heavy springs but now, this thing turns as if it had power steering.  At speed, the steering response is very quick; point and shoot actually.  What does this look like?  Take a look:

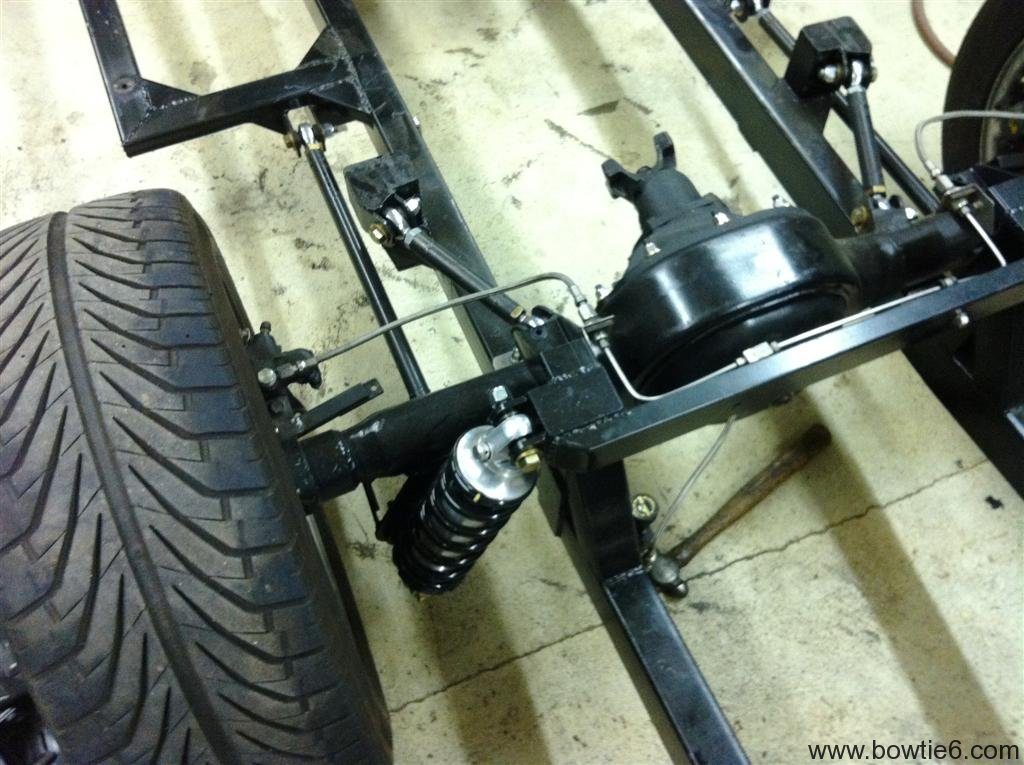
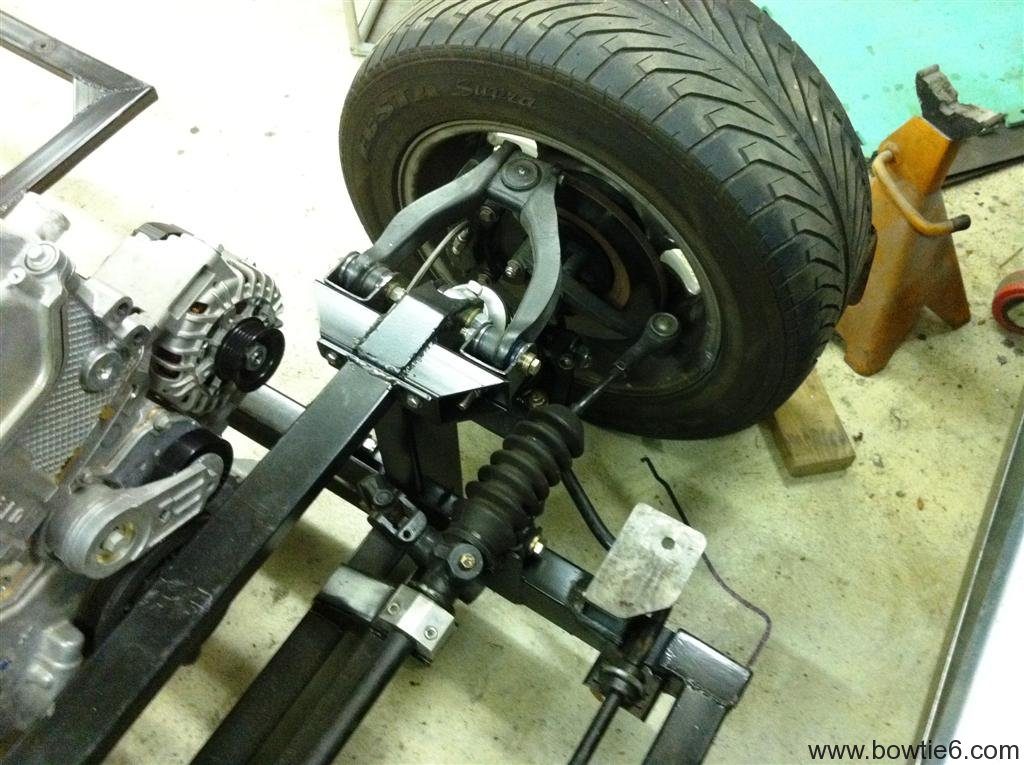
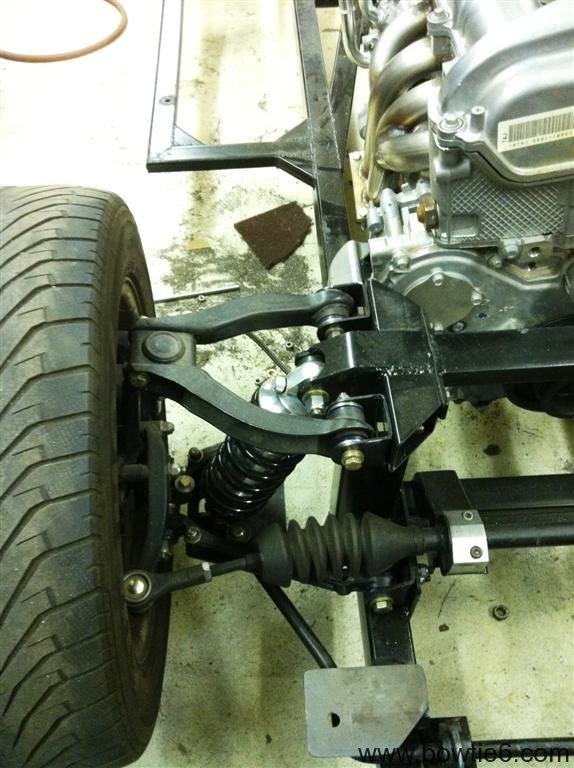
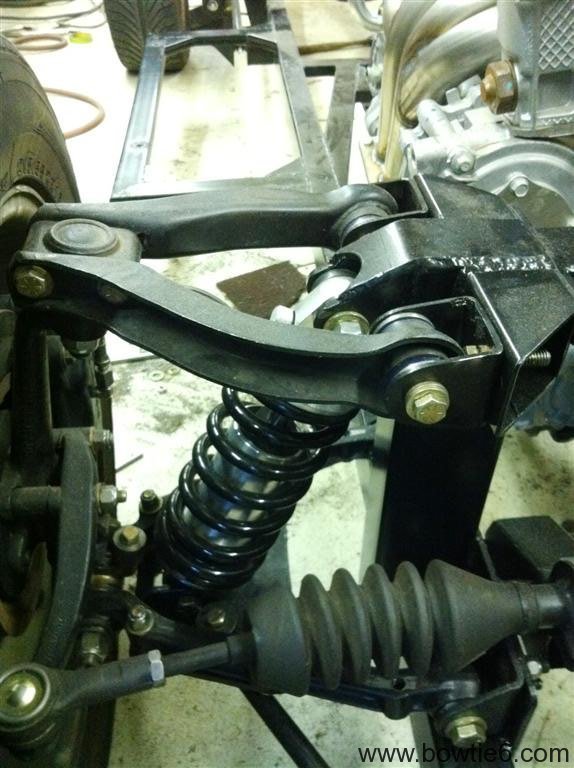
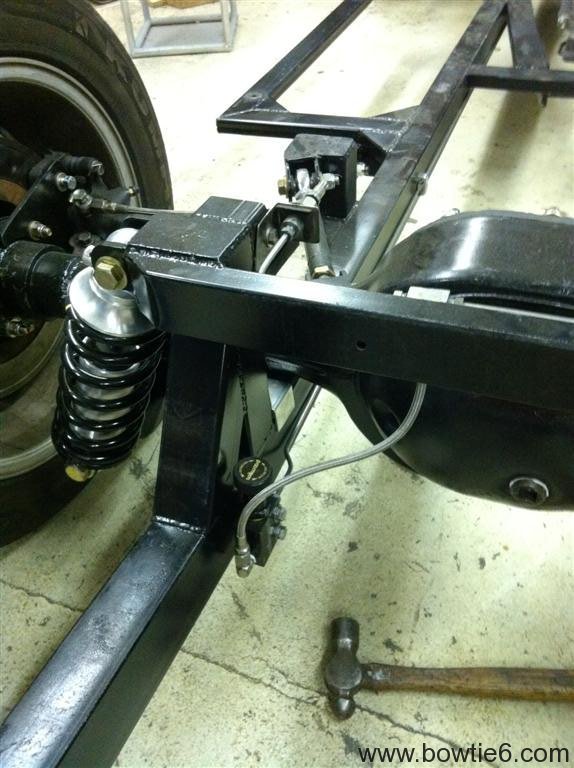
The front suspension towers were designed in such a way to accommodate the TR6 front suspension pieces but also the front coilovers.  Some things to note:

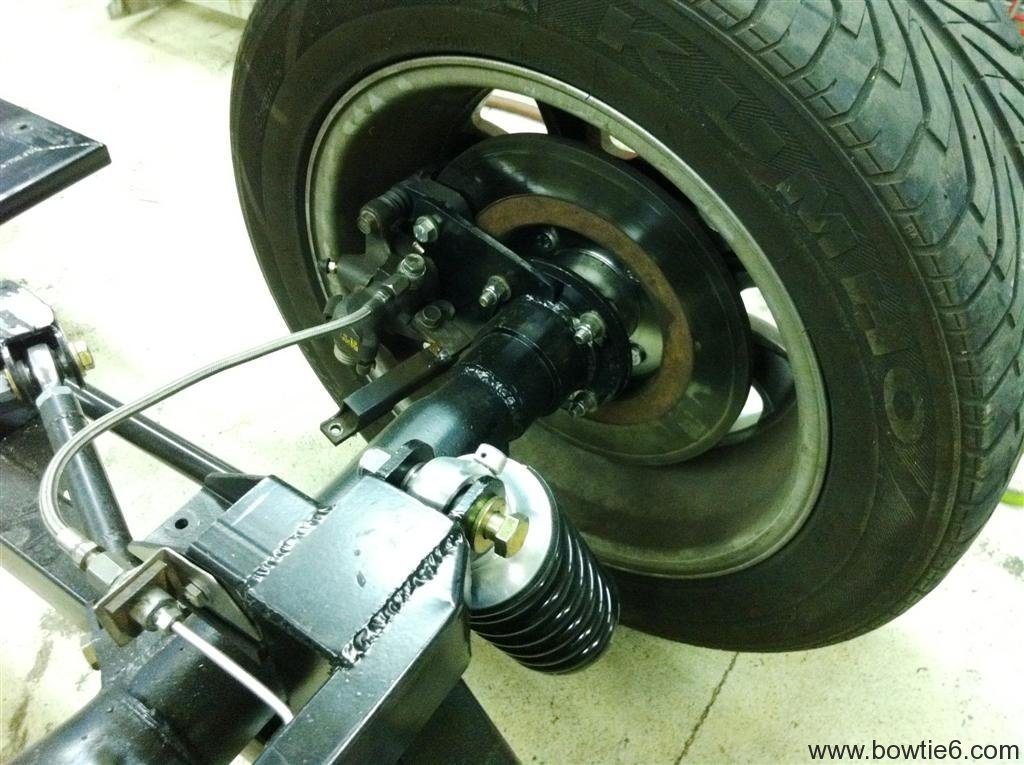
  • Yes, those are “stock” rotors.  They are cheap, and this allows me to use a very aggressive pad compound on my Wilwood calipers.  I am not racing this car so there is no need for the extra unsprung weight of “vented” rotors.  Contrary to popular opinion, these rotors along with the uprated calipers offer plenty of stopping power.  Remember, the master cylinder is from a Vette so this offers more than adequate clamping power.
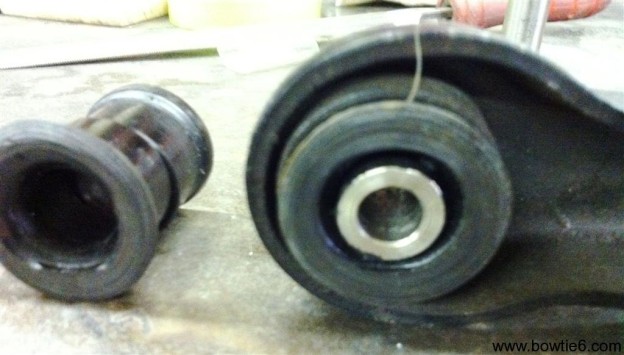
  • Take a look at the sway bar end.  It has a blue SuperFlex bushing.  All the rest of the front suspension uses SuperFlex bushings – I ordered these from England.  They are amazing; a bit pricey but certainly worth the expense.
  • The coilovers are adjustable for rebound.  That is the little knob on the top, right below the top “A” arm.  I’m still trying to dial them in.

This is what the Wilwood caliper looks like:

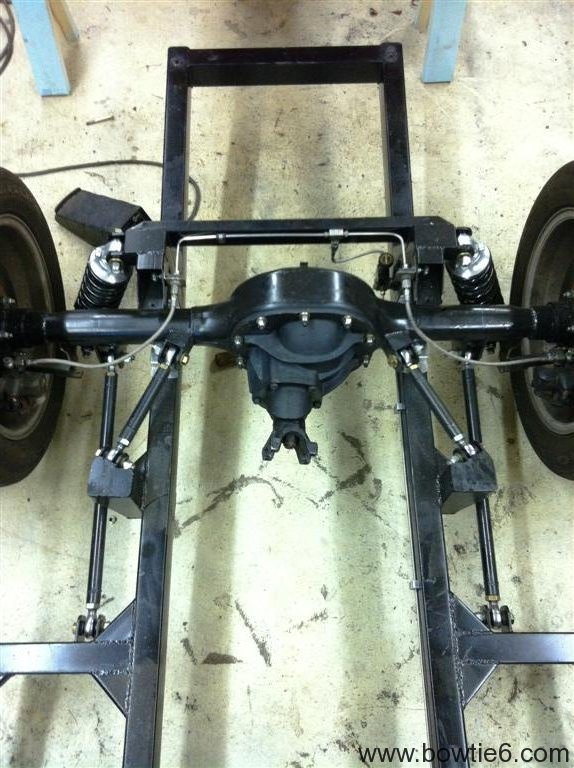
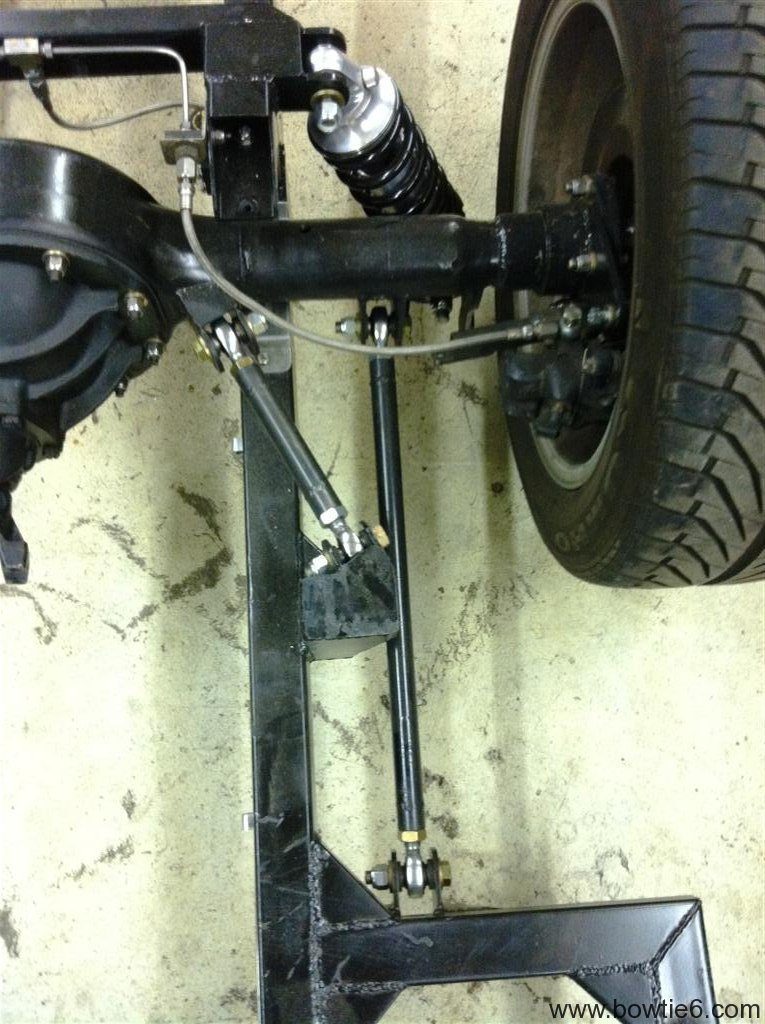
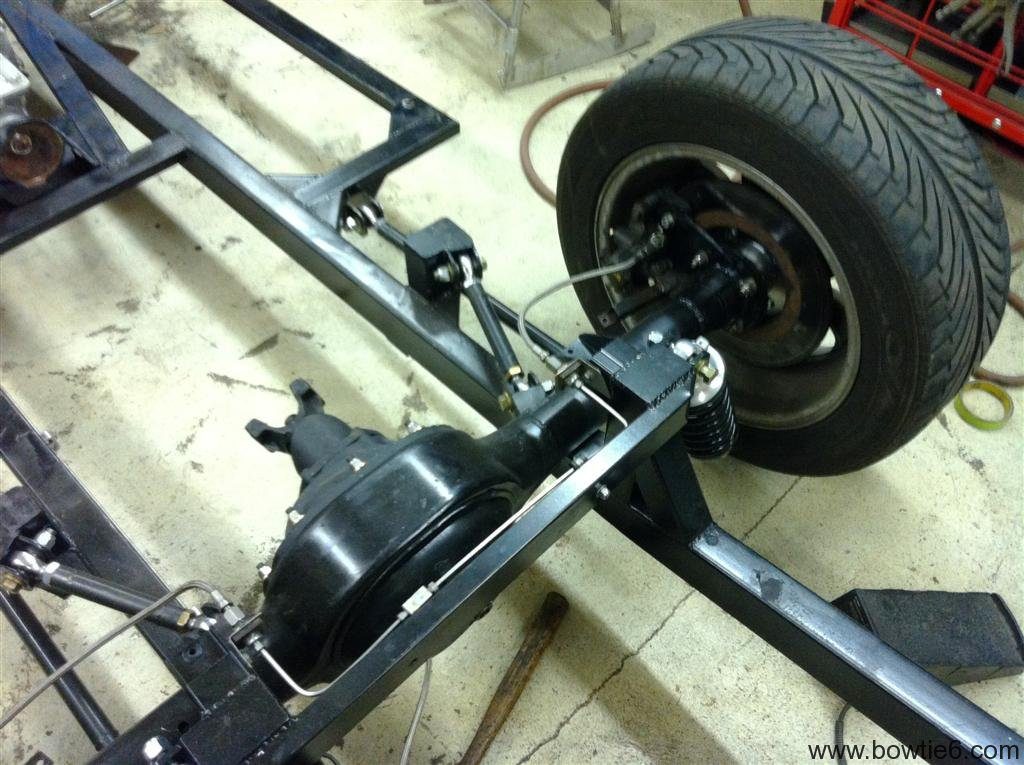
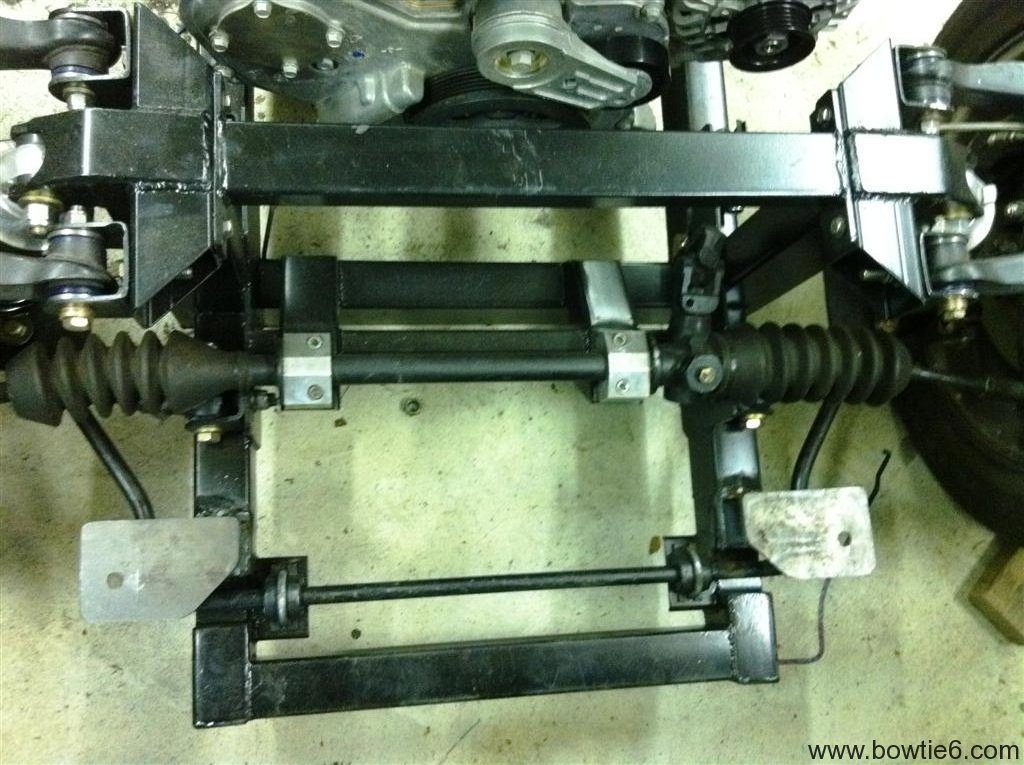
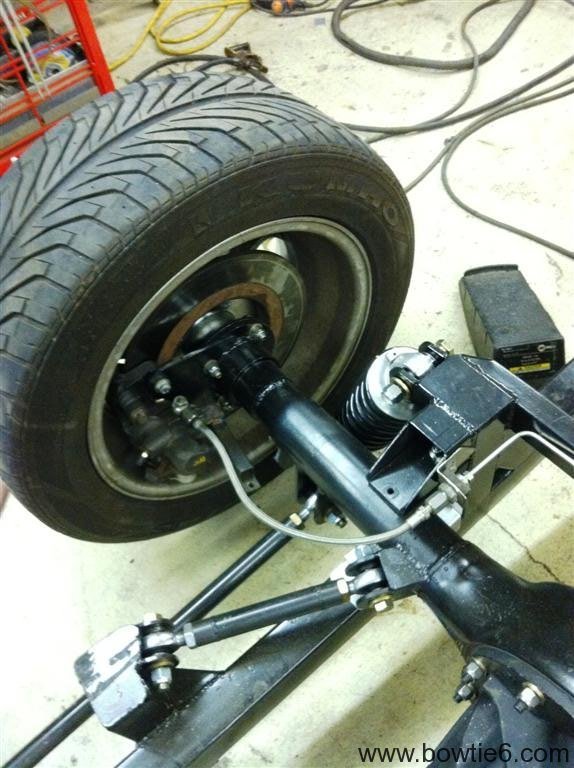
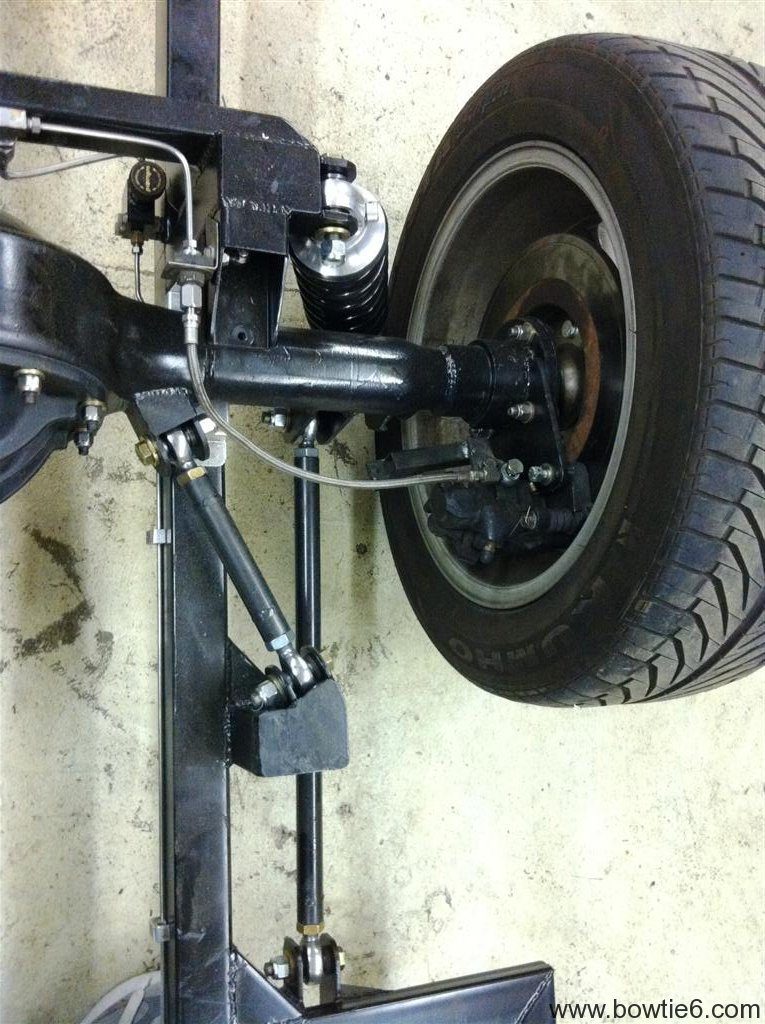
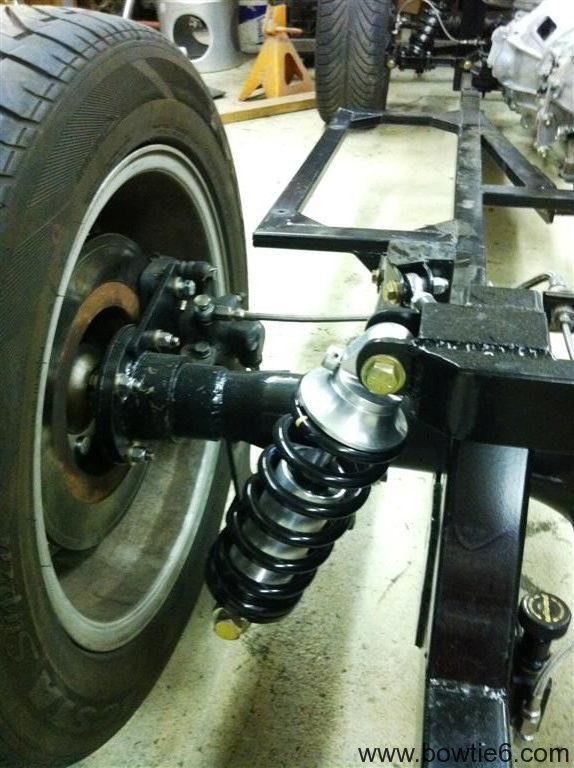
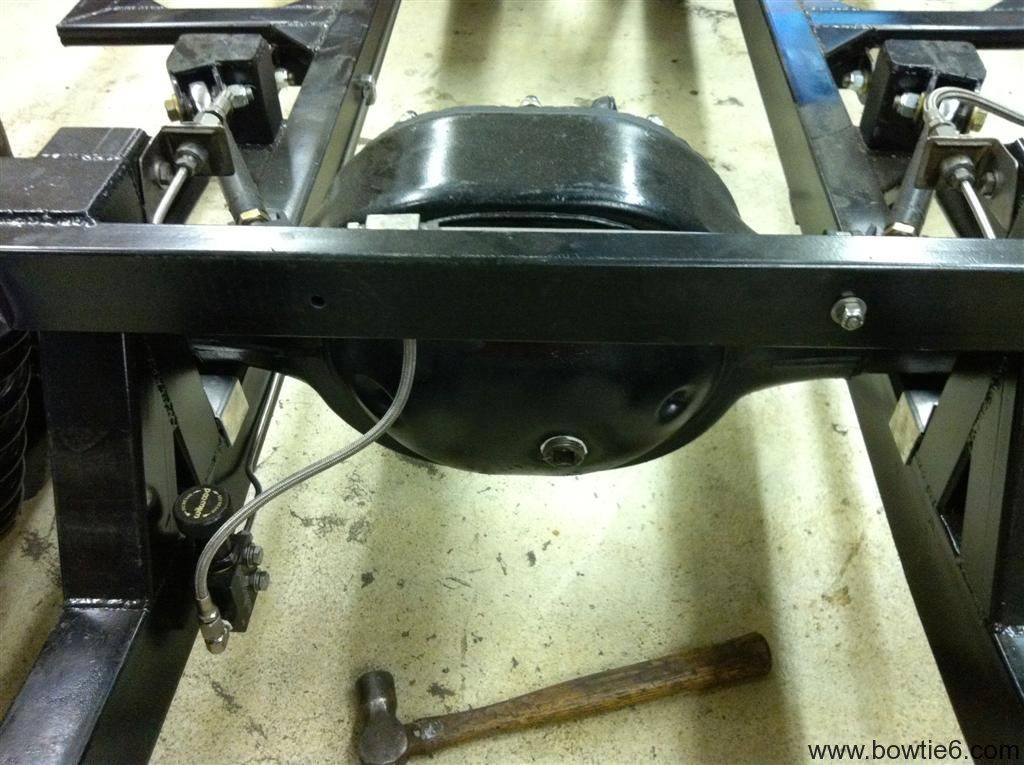
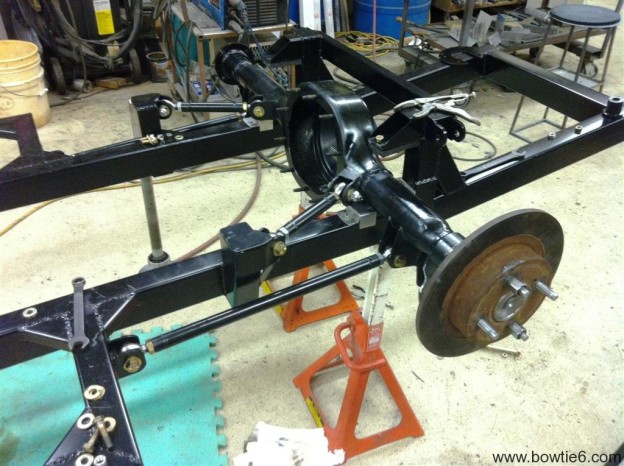
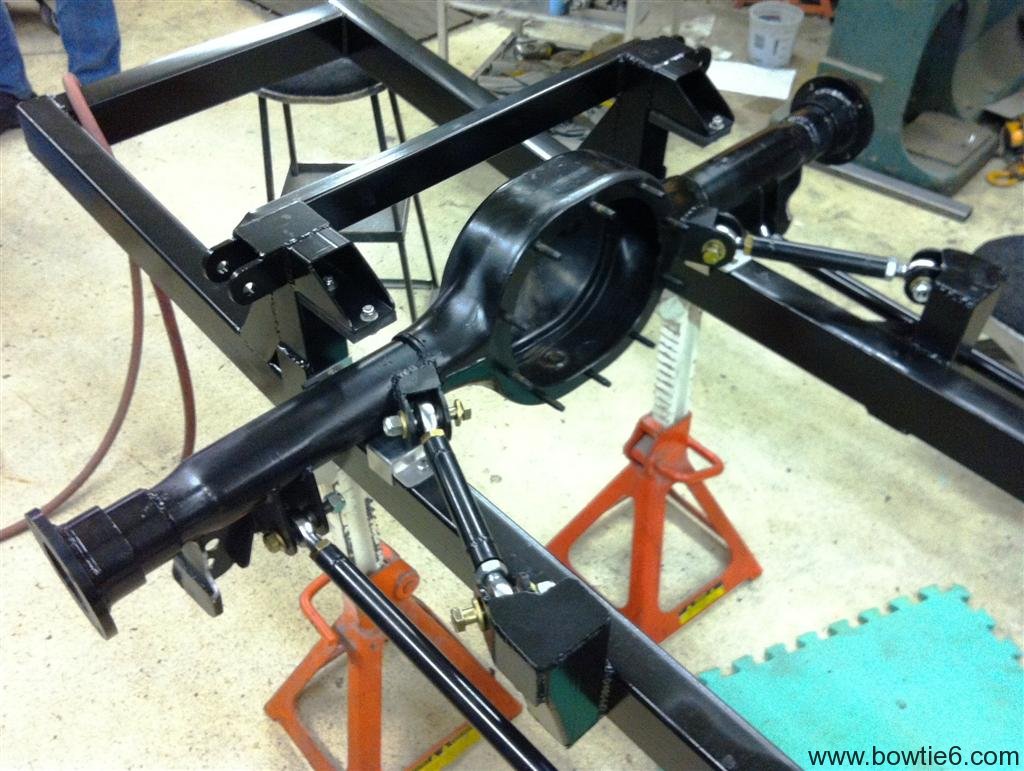
Just like a good looking super-model, bowtie6‘s backside is just as sexy…

  • The rear coilovers are similar to the fronts; these are also adjustable for rebound.
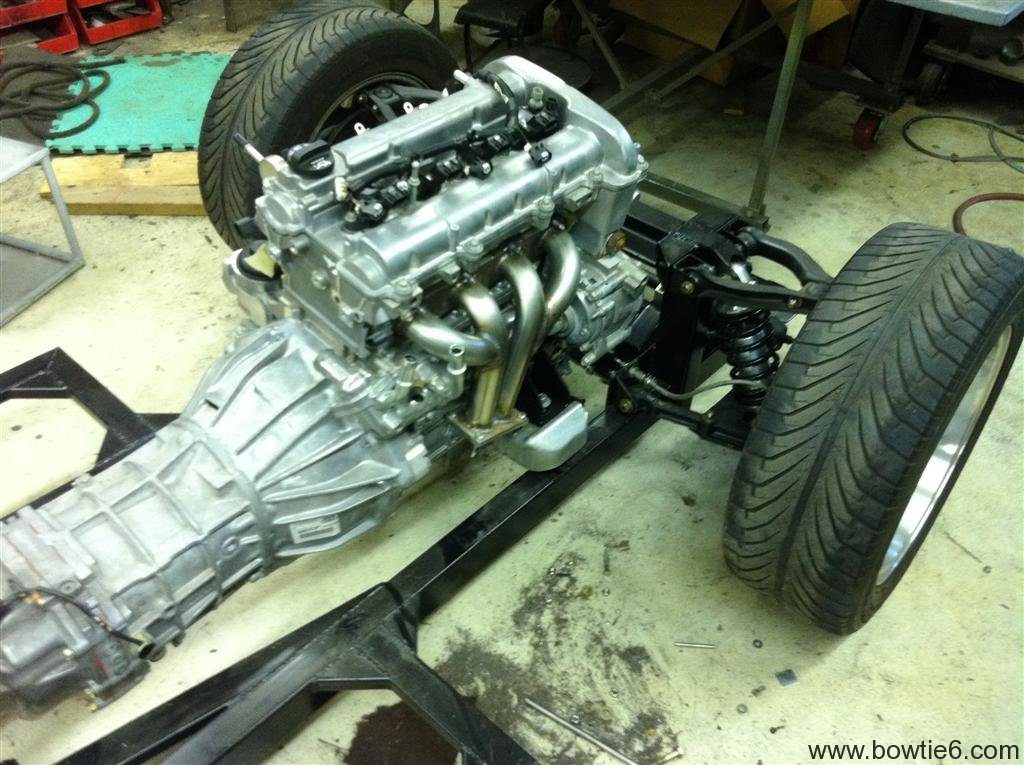
  • The exhaust is a single 2.75 pipe.  We have a single resonator just past the bend off the headers and then at the exhaust end, a pair of SuperTrapp mufflers.  The basic principle with SuperTrapps is their adjustable baffles.  This works by adding or subtracting discs that add or subtract backpressure and noise.  The less discs the more backpressure and less noise.  With more discs, less backpressure and more noise.  I added quite a few discs but this made for a very high shriek anywhere north of 4500 revs.  So, I had to tone it down.  Right now we’re running eight discs – four on each side.

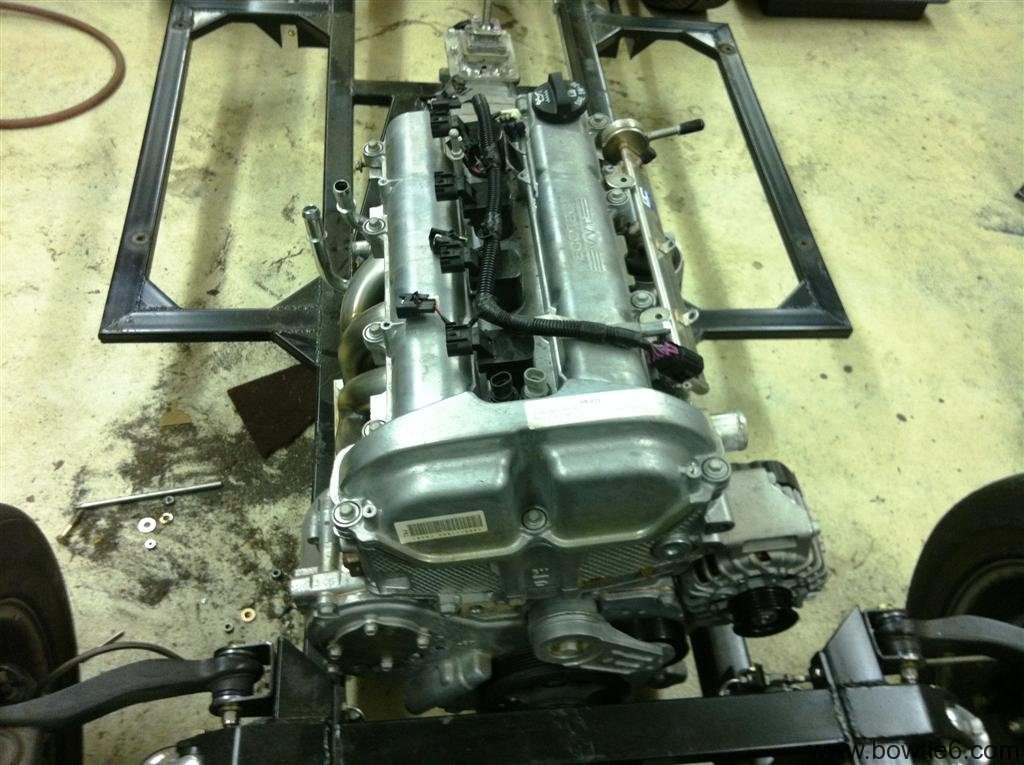
I’ve already started messing with the ECM a little.  HPTuners is an awesome tool to dial in the engine and I am just getting started.  With the new redesigned intake, headers and above mentioned exhaust things are flowing very “freely”.  I noticed the airflow mappings were way off and this has been the first thing I’ve started to modify with pretty good results.


Final Pics of the New TR6 Frame

Here is a final set of pictures of the new frame serving as bowtie6’s backbone.  The body has now been permanently bolted on, so this is the last set…

Some misconceptions have surfaced as to the origin of this frame.  Suffice to say this is NOT (repeat, IT IS NOT) a RATCO frame.  Those folks produce a nice aftermarket frame but this one is all bespoke and designed for the ECOTEC and the solid rear axle specifically.

Why so many entries on this blog about the frame?  Well, simply put:  I am very proud of it.  My cousin Jim Thompson has put together a very clever, lightweight and strong frame using modern frame-building techniques and materials while being able to retain some of the original TR6 bits.

The front suspension is almost all stock TR6.  The “A” arms, ball joins, steering rack, sway bar, trunions, hubs and rotors are all stock Triumph.  The calipers are Wilwood.  The springs/shocks have been replaced with coilovers.  The coilovers offer several advantages:  no spring compressors, spring interchangeability and the ability to control ride height.  However, they are not cheap but worth every penny.

The rear is all new and it is trick!  The axle is an 8” Ford, custom sized.  It was cut on both sides and custom cut axles have been sourced from Moser.  The gears are from Motive; posi-traction (of course) with a 3.80 to 1 ratio.  Disc rotors and calipers are used on the rear end (with full emergency brake capability using the original TR6 cables and lever), as well as matching coilovers.  There is a four point suspension holding the axle in place with Heim ends on all four control arms.  We tried polyurethane ends, but they did not survive the power from the ECOTEC.  Enter the Heim ends.  Again, only the best have been purchased.  These are precision ground steel (normally used on sprint cars) along with special boots to keep debris out.  Brake and fuel lines are all hand made, hand fitted and hand formed from stainless tubing; with teflon lined, braided lines going to all four calipers.  Again, only the best has been sourced.

This is the second frame built using this design.  The first frame is under Jim’s TR4 and it has proven to be astounding.  It is very stiff – gone is the ‘flex’ that the original frame exhibits.  The new frame is made from much stronger square tubing.  This tubing is a solid square, not a “U” channel with a cap spot-welded as in the original design from Triumph.  I repeat, this is very strong stuff.

Finally, the ECOTEC 2.4 litre engine sits on special plates (on the frame side) that allow the use of the original Solstice engine mounts as well as tranny mount.  The mounts are really nice because they are made with rubber to help isolate vibrations.  Furthermore, the GM mounts have a locking mechanism that if the rubber ever fails the engine will only rock a very small distance and the locks keep it from making undesirable and expensive damage.

Finally some thoughts:

  • I realize this frame has nothing in common with the ‘original’ frame.  My condolence to the purists – but the idea is performance and this frame works and works very well.
  • I’ve read where folks discuss the shortcomings of the AISIN gearbox and say the gearing is all wrong.  Depends what you want to do:  bowtie6 is not built as a drag car.  Yes, first gear is a bit tall and that might not sit well with folks.  I don’t mind it.  From the experience gained from my prior setup and my cousin’s TR4, the car excels like a dream in second, third and fourth.  These three gears are quite simply awesome.  What about fifth?  Well, suffice to say that at speed and in fifth gear all you have to do is punch it and the car will take off.
  • The last thing about the new frame has come as a bit of a surprise to me.  In my cousin’s TR4 the steering “effort” has been reduced significantly.  The “far-back” engine placement has something to do with this.  But there is also the extra pressure of the original spring pushing on the “A” arms that has been deleted.  The new “feel” is much more positive, lightning-quick and a delight to use at parking-lot-speeds.

Here is the final picture gallery of the frame prior to the body being permanently installed.


bowtie6‘s New Differential and Rear Suspension

bowtie6’s new frame gets a new differential.  In order to handle the power of the ECOTEC – remember boost is in the plans – we needed something that would not break.  Furthermore, one of my requirements for the new drivetrain is to have full posi-traction (and by this I mean the real deal and not viscous).

In the following gallery, you will see the following:

  • The rear axle is a narrowed 9″ Ford.  Yes, it might be a little overkill but again, this is all being built so we don’t have any unexpected “failures”.  The solid axle in this application will by far surpass the IRS as originally implemented.
  • The diff is a Motive full posi-traction unit.  It is set up with a 3.80 to 1 ratio – it is a bit tall in first gear with the Solstice’s AISIN gearbox but you have to remember this:  I am not building this to be a drag car.  With this ratio, the car is extremely quick and nimble at speed.  From the setup in my cousin Jim’s TR4, we have determined this rear axle ratio works fantastic with the engine in second, third and fourth gear; with fifth being even more fun at speed.
  • You can see in the pictures the special order Moser axles.  These were custom made with the correct length in order to handle the narrowed housing.
  • The rear axle is held in place as a four point suspension.  The control arms are fitted the special Heim ends.  These were quite pricey and come with special seals to keep dust and grit out.  Why Heim ends?  I’ll have an article about this later…
  • Finally, take a close look at the driver’s side axle:  the rear brake rotor is fitted.  Yes, we will be re-using the disc brakes we had previously used.
  • Not shown in the pictures is the all new, custom made brake lines.  We are using stainless tubing this time and it has all been hand made, and bent just special for this frame.  I’ll have a future article about this because the mounts that Jim made are real special.

Replacing bowtie6‘s Front Suspension Bushings

With the new custom frame finished, it is time to start putting things back together. Yesterday, the front suspension was fully disassembled and I found some interesting surprises. When I first put bowtie6 together, the front suspension was completely overhauled and of course, the a-arm bushings were replaced with what I thought to be high-quality state-of-the-art  components. Well, after 15,000 miles I have found the bushings deteriorated and they did so severely.

The bushings mounted on the lower a-arms survived fairly well. I did not take any pictures of them, since they damage there was not as dramatic as the top a-arm bushings.  Suffice to say there was a bit of slop and the bottom bolt did not fit tight.  The top bushings though, were in very bad shape.

Take a look at the images in the following gallery.  Basically these were taken before we removed the worn bushings and as you can tell, there is significant wear.  In addition to the bushings actually coming apart, there is quite a bit of deformation in the overall shape of the bushing.  Not what I have expected from these bushings, but then again such is life.

For replacements, I have sourced a different brand this time.  The new ones come from a high-performance supplier in the UK.  The new set was actually quite pricey but the design is far superior.  The bushings I replaced were of a two-piece design.  The new ones are basically one piece, but they are a bitch to put on.  It took two of us, a good vise and a bit of cursing to coerce the new bushings in place.  The new bushings are polyurethane and have a little bit more “give”.  I’m hoping this might help prevent them from breaking apart as severely as the others did.

The point of all this is for you folks thinking that these type bushings are the final solution – think again!  These things do wear out and in my case they did in only 15,000 miles.  Of course the high load that the compressed front spring puts on the front suspension is in part responsible for the wear, but nevertheless these bushings do wear out.  For you folks running V8’s (LT1, Fords or whatever) keep this in mind:  the V8’s weight is much higher than the original TR6 tractor engine or (in my case) the V6.


New Frame Update…

New frame update…  Last post I had pictures and talked about the new front suspension on bowtie6‘s new frame.  Quick post today…

The mounts for the front sway bar are done and the look trick!  The sway bar is stock,  mounted on poly bushings – it worked well on the prior setup, so this will be our starting point for the new frame.  This is what it looks like:

Front sway bar mounts.