The Kentucky Bourbon Trail…

Not doing a lot of work on bowtie6 this weekend since the Mrs and I decided to take a little road trip along the Kentucky Bourbon Trail.  Since I am a fan of good bourbon I thought this would be a great opportunity to learn more about it.. What a trip this has been!!

We won’t have a chance to stop by all the distilleries along the way, but we did take the time to check out some of the ones I really like.  We started at Maker’s Mark – a smaller operation but nevertheless very impressive.  Actually had a chance to see where “46” is made – if you haven’t had a chance to try it, do yourself a favour and get some.  In the gift shop there, they had quite a nice selection and among the items not available except at the shop:  the Maker’s Mark Mint Julep had been highly recommended.  They also had “white dog” (the spirit before being aged) for sale in clear bottles.  We had a taste at the tasting station and it was extremely good – I reckon this will burn with a blue flame and indeed it had plenty of “bubbles”.  Yes, this was good “moonshine”.

Next on the list of visits was the Jim Beam distillery.  This was a much larger scale facility and in addition to Jim Beam, they make smaller production batches of among other things, Knob Creek.  Since they don’t rotate the barrels in their warehouses, the “good stuff” is found towards the middle to top of the racks of the warehouses.  And by good stuff, they are not joking! In those select racks they choose the barrels that will become such items as Knob Creek Single Barrel (unique to the gift shop), Basil Hayden, Baker’s and Booker’s.  We had a chance to taste Booker’s and that stuff is amazing:  it is 129 proof!!

Well needless to say, when on such trips one never knows what one might see.  At Maker’s Mark I spotted a fellow with a shirt with the Automobile Magazine logo embroidered on it…  Well, in the parking lot was this:

I have seen this bad boy in several magazines and indeed this is the new Mini Cooper coupe.  It is strictly a two seater.  As it turns out, the fellow with the Automobile Magazine shirt is one of the web editors, and of course I had to start a conversation!  This thing would be some serious fun.  He said it was quick indeed and it performed as good as it looks.  Here are some more shots…

That is a wing on the roof and it is trick!

So, if you are reading this post Mr Automobile Magazine Web Editor, it sure was nice chatting with you today!
 

bowtie6 Back Together

Labour day has come and gone.  bowtie6 is back together.  Yeah!

We spent pretty much all day yesterday fitting body panels.  This is a challenge.  TR6’s don’t quite “fit” very well even with a perfectly plumb frame.  So we had to do quite a bit of fitment, shims and spacers to make things line up.  Suffice to say, after a long day yesterday all fenders are finally bolted on, the bonnet lined up quite well and the boot lid is in place.  Quite a day.

Sorry, no pictures but I promise a full set the next time I get to work on bowtie6.

On a side note, today’s post marks a bit of a milestone:  this is the 50th post since I started this blog.  I’ve been able to track hits via Google Analytics and so far, I have a pretty much global audience.

Just for the hell of it, if you happen to be reading this post – please, make a quick entry and just say where you are reading my blog from.  Just curious…

Pictures will be posted soon…

bowtie6 Reassembly – With Pictures –

Hi folks.  Sitting here tonight, with a about 2 finger’s worth of Maker’s Mark 46 in a jelly glass.  If you haven’t tried this, I highly recommend it.  At any rate, here are a few recent pics of bowtie6 finally coming together.

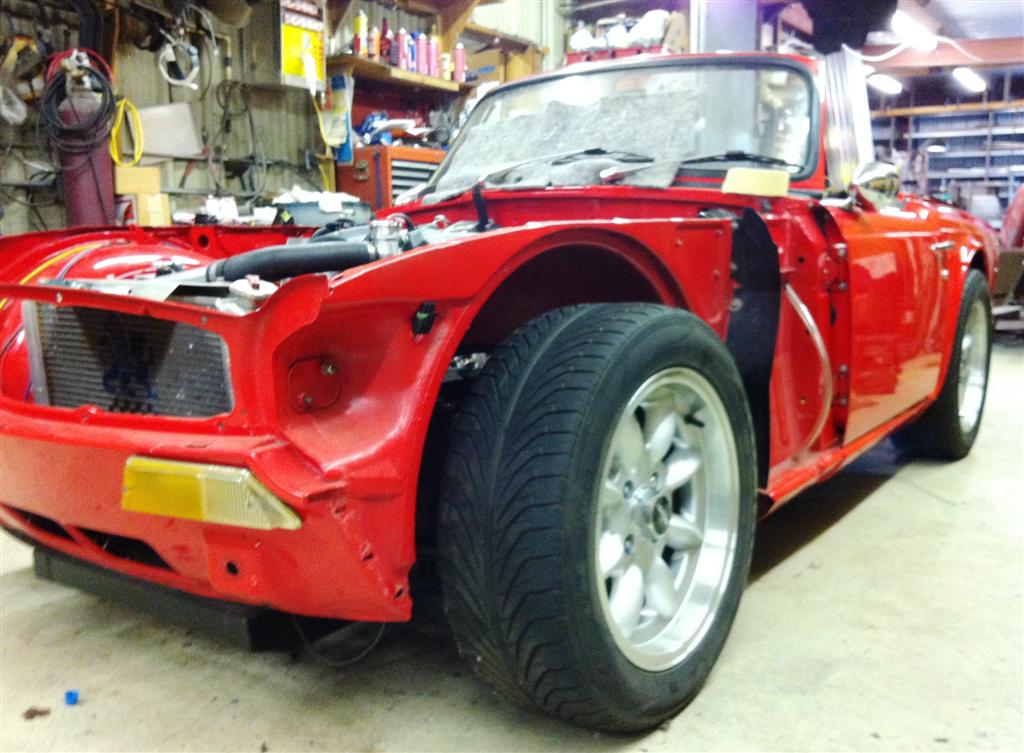
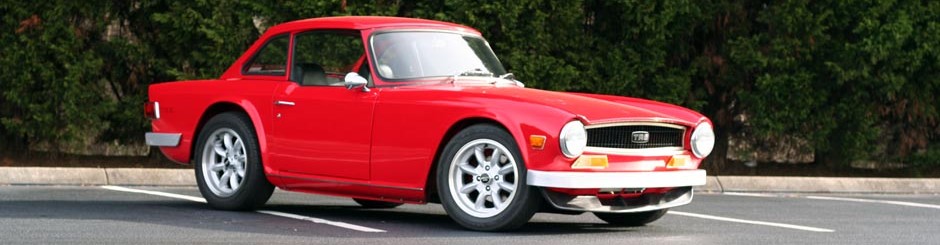
Today is special actually.  We put the wheels back on and dropped the car on the ground after doing the initial body tub fitment.  Since the car has been on jackstands for so long, I had forgotten how damn low to the ground this thing really is.  Take a look and you will see what I mean.

I’m sure you are wondering what type wheels/tyres are fitted.  Answer:

  • Wheels – Panasport sixteen by seven inchers.  These are the Triumph bolt pattern and yes, they are Panasport.  Not cheap, but these are the real deal.
  • Tyres – The rears are 215/55-16; the fronts are 205/55-16’s.  215’s are a bit too wide for the front.

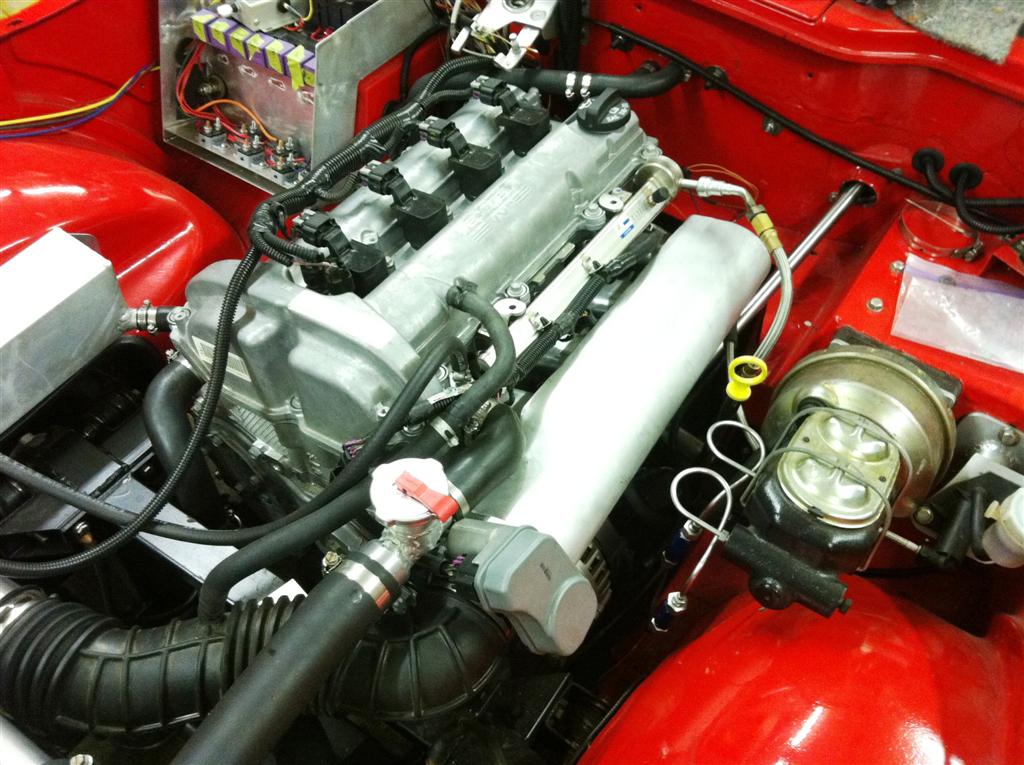
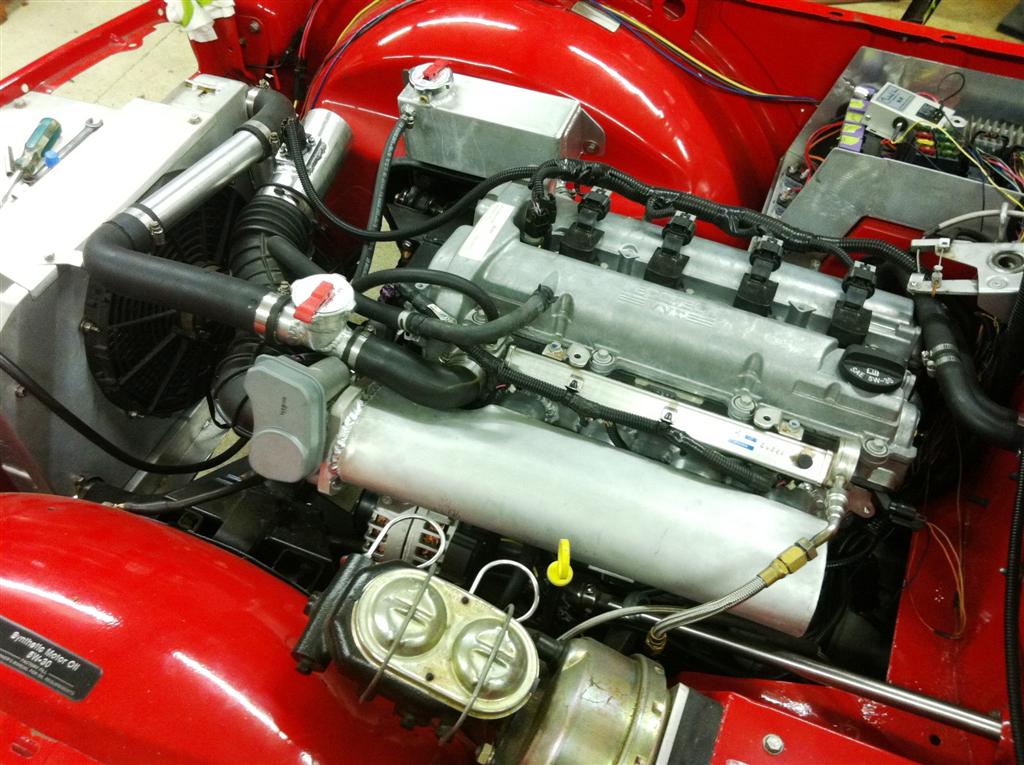
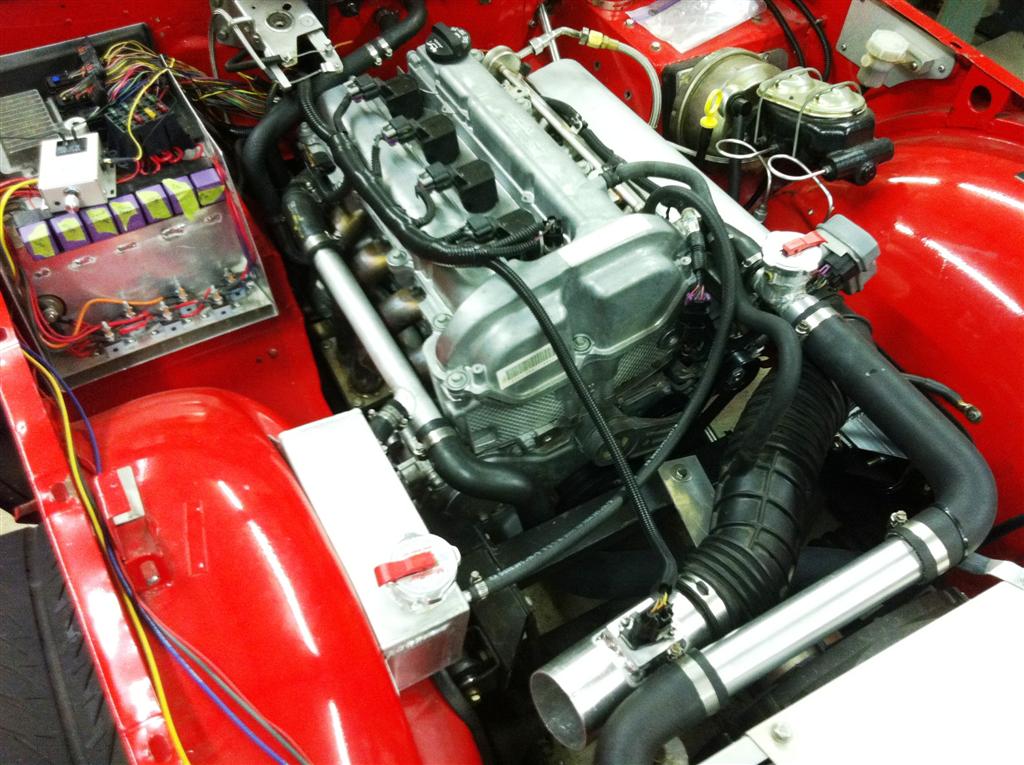
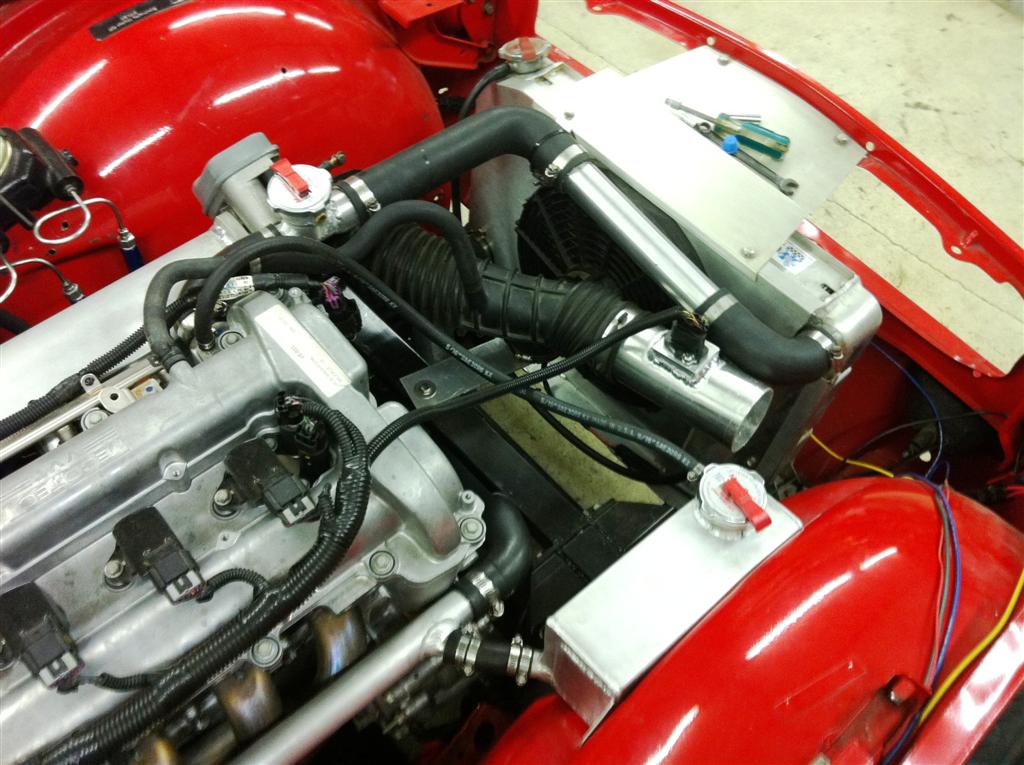
I know the pictures of the engine might be a bit overkill.  After all, there are plenty plastered on my website.  However, these are different…

  • Check out the hand made aluminium intake.  The plenum has been made to fit a GM Performance Parts intake flange.  The flange has been made by the good folks at GM and it fits perfectly the intake runners on the head.  Of course, all you get is a high pressure water-cut flange, the rest is all magic my cousin Jim made.  You can see the electronic throttle body as well as the intake tube where the MAF and IAT sensors mount while on the bottom of the intake plenum is the MAP sensor.
  • The headers are also hand-made and also attached to a GMPP exhaust flange.  The flange actually is special because the size of the openings is much larger than the one on the stock exhaust.  You get the idea.
  • The Griffin aluminium radiator is fully bolted in and plumbed.  Ecotec’s are special regarding plumbing.  If you don’t get this dead nuts, the engine will overheat.
  • The fuse box holds the ECM, fuses, relays, and electric fan controller.  Yes it is a little crowded in there but there will be a cover for all this and when we get that bolted on, it will really look nice.
  • Yes, those are Euro spec front turn signal lenses.
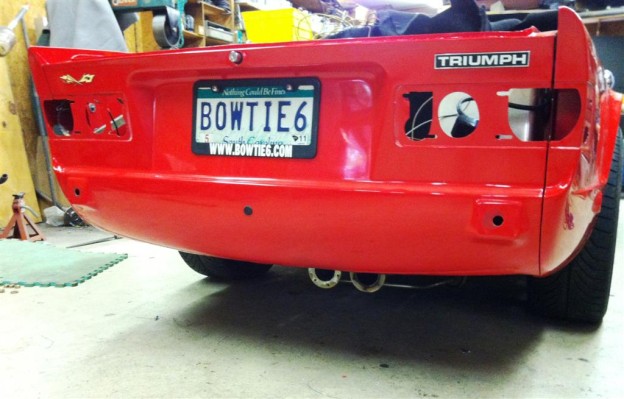
  • Finally, the rear picture of bowtie6 shows the back fenders bolted back on.  At the bottom you can see the exhaust peeking through.  Those ends are not finished yet:  that is where the Supertrapp baffles are bolted on.  I am a big fan of Supertrapp mufflers and they not only give an awesome sound but are also very low restriction.  I’ll have a writeup on this later, when I get all that bolted on.

I’m sure the question will be brought up:  that engine is really pushed back towards the firewall.  Why push it back so far back?  Well the answer is simple:  weight distribution.  We don’t have numbers yet, but I’m hoping to have a near 50-50 distribution.  My cousin’s TR4 is actually fairly close to this – don’t believe me?  Then you need to check out my writeup on weight distribution.

So here are the pictures in no particular order:

bowtie6 Reassembly

Labour day.  This summer has flown by.  Finally, the end of summer and heat.

A great deal of progress has been made and quite a bit is left to do.  However, today we decided to start putting body panels back together.  No pictures, there is nothing glamorous about bolting doors and fenders back on.  You get the idea.  Actually this is a major pain in the ass for many reasons:

  • Much attention has to be paid to avoid damaging expensive red paint.
  • A great deal of time has to be spent in order to get all body panels to line up properly (not easy to do on a British car).
  • Since we have a new frame, the body must be shimmed in order to make things line up properly.
  • Don’t scratch the painted body panels!!

This is especially hard work because we strive to get body panel gaps as close as possible.  This is not easy on a TR6.  These things are notorious for bad body gaps, especially the distance between the doors and the rear fenders.  This is where “purists” have a cow because in order to solve this problem shims must be placed under the body shell and this allows the gaps to be cleared.

Since we have a much more “true” frame to begin with, it will take some work to determine the appropriate shims and most important, where to place the shims to get the correction required to get the body gaps “just right”.

The plan is to get the bowtie6 back together so I can bring it back home.  Then  I will finish up all the wiring.  Once we get that done, new carpet can be installed (yes, new carpet) as well as many other small details.  I’ll have pictures soon.

Stay tuned…

The New ECOTEC is Alive!

It has been quite some time since my last post.  The bowtie6 Ecotec project is alive and well:  this weekend we fired up the Ecotec for the first time!  Needless to say this was quite an awesome event!!

First, here is a quick recap:

  • The engine compartment has been fully wired up.  There is a new engine control fusebox containing circuit breakers, relays and the ECM.
  • Inside the car there is another small panel with relays and fuses controlling turn signals, park lights and main light circuits.  The dash is all back together along with all gauges.
  • In the trunk I have the battery mounted in a special enclosure.  Yet to be done is a separate set of relays and fuses to control the stop lights and fuel pump.

We hot-wired the fuel pump for this weekend’s engine start.  With the aid of my laptop and software, we disabled the VATS system by reflashing the ECM.  We removed the spark plugs, turned the engine a few times and sure enough after a few seconds we had oil pressure.  All good so far.

Next was fueling up and priming the pump.  After running the fuel pump for a few seconds it finally “primed” itself and started pumping fuel.  We attached a fuel pressure gauge and pressure looked very nice indeed.

The next step called for re-installing the spark plugs and re-installing the coilpacks.  Turned the key, and pushed the button.  It took a few tries but finally she fired up and ran.  I hooked up the laptop again, this time to check for DTC’s.  There were a few.  Not good.

Turns out we had a few “issues” with the wiring.  The 2.4 Ecotec has VVT on both the intake as well as the exhaust.  There are two cam sensors on the top of the engine and two more on the back of the engine.  The two on the back of the engine are identical to each other, and I had made the mistake of hooking up the wrong plug to the wrong sensor.  This is something very unusual for GM harnesses: all plugs are unique; in this case the camshaft sensors are identical and share the same plugs.  My bad.

We tried again.  This time the engine ran fine but the scanner on the laptop read we were having fuel delivery issues.  We tapped the throttle a few times.  Coolant temps started to normally go up and we let the engine run for a few more minutes.  Then things started to settle down.  The fuel delivery issue went away and the engine started running better.  We have encountered this issue before when re-starting an engine that has been sitting for a while and this can be attributed to an injector sticking.  Once it has fresh fuel flowing, it loosens up any gummed up fuel and all is good.

We let the engine cool down and this is where things got interesting.  On cold re-start the Ecotec sputtered and coughed.  We noticed we had quite a few more DTC’s.  This type of behaviour is to be expected.  Suffice to say, that after many hours of debugging, changing a few parts around and a lot of tracing of the wiring harness all checked out.  There is no issue with the ECM – we swapped the one in my cousin Jim’s TR4 and the engine behaved in the same way.  So we ruled out wiring, ECM and sensors.  We started looking closer…

As it turns out, the new fabricated intake had an issue.  No, not a leak!  We re-used the rubber intake from the donor Solstice.  However, the housing for the MAF sensor is all home-made in order to allow the low restriction air cleaner element to be mounted.  The size of the housing was the culprit.  This was giving some false readings and this caused the ECM to make erroneous calculations regarding the air flow into the engine.  After correcting the offending intake tube we fired the engine back up, and now it runs smooth as silk.

Next will be to start plugging in new values for engine run-time parameters.  We’ve done some of this on my cousin’s TR4 and this along with some other tweaks will enable my TR6 to finally be back on the road.

So what is next?  Now that the engine is fully operational, we are going to start hanging fenders and doors on the body shell.  We anticipate having to make some special shims for the body since the frame is all new.  However, the frame is perfectly level so we are hoping not to have to shim it too much!

I have some final wiring to do and once that is all complete the next step would be the maiden trip down the road.  Still a few weeks away from that, but the engine runs and this has been a great weekend!

Stay tuned…