Category Archives: Engine

Bowtie6 engines

Exhaust Changes…

Yesterday we took the exhaust pipe apart for a modification.  In the previous post, I made mention of what the exhaust system looks like and I had the picture on the left showing the SuperTrapp tips.  As you can see, the whole affair ends underneath the trunk floor.  We did this for several reasons, but mainly because it hid the exhaust from sight. However, even though this was with the V6, somehow exhaust “smell” would end up in the cab.  So we had to make a small change.

Since I dropped the whole thing, I thought it would be nice to document the way it looks in its entirety.  First, the following pictures show the flange that is bolted to the flange on the header’s collector.  This is where the bung was welded to hold the O2 sensor.

A copper gasket fits between the two flanges – the one shown above and the one on the header.  Why put the bung and 02 sensor on the exhaust side rather than the header?  The exhaust is much easier to remove than the header.  These four bolts holds the front part and at the rear two tabs fit inside two rubber hangers (see the picture at the very top), so the whole tube “floats”.

Moving along, this is the mid section:

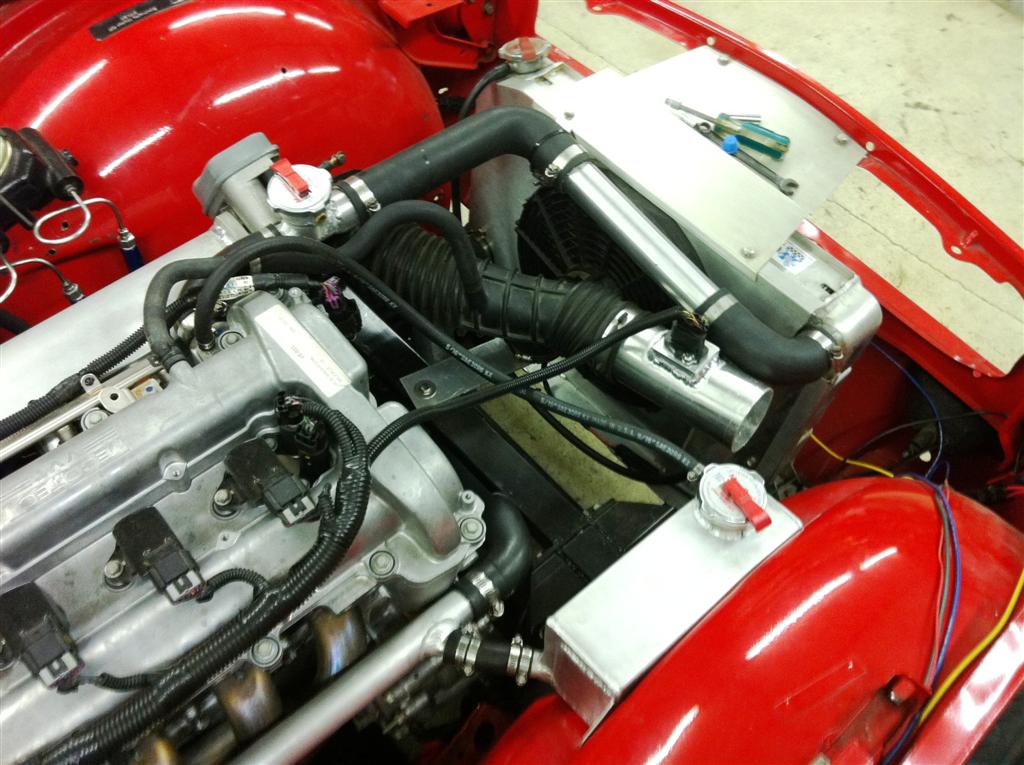
There is a bend right below the O2 sensor, followed by a section that “swells” up a bit.  That is an inline resonator to reduce noise.  At first, on my cousin Jim’s TR4 we ran the exhaust without the resonator – just the SuperTrapp tips – and the thing ended up being way too loud.  The Ecotec has a killer shriek at around 3500 RPM’s when the VVT kicks in.  That is why we used this resonator. Here is another picture showing the area aft of the bend:

This section is between the elbow and resonator.  It looks crushed.  And yes it is.  I am sure questions will come up as to why this is done this way:  we wanted to make sure nothing was below the frame line.  This section of the exhaust had to clear some crossbracing on the frame and the transmision mounts.  Does it restrict things?  Not really.  This is 2.75″ stainless tubing.  Yes, we decided to make the whole thing out of stainless.  The tubing was a bit pricey, but this way we do it one time and not have to worry about it ever.

Finally, the end of the pipe looks like this:

Look close at the picture above.  Several things:  on the mid-left is one of the SuperTrapp ends.  On the top right (standing up) is the tube extension that we added to make the ends stick out a little further back.  And in the center is the tail end of the exhaust with the end flanges cut off.  You can see in the tube extension standing up, the flange is on the end resting on the work table.  Finally, you can see underneath the two split pipes the “hanger” that fits in the rubber donuts mounted on the frame that is used to hang the whole affair.

That is all that holds the pipes in place.  Simple and effective.

The picture above shows the new extension before being welded.  You can see the flange on the left where the SuperTrapp ends are affixed.  These are a bit of a pain to put in place since each has 8 screws, lockwashers and nuts.  Taks a little time but all good things do too.

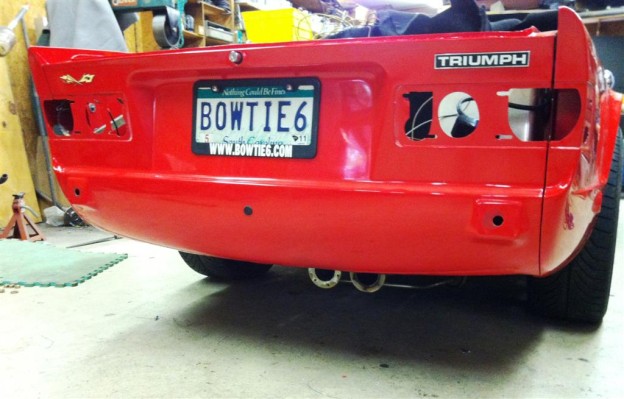
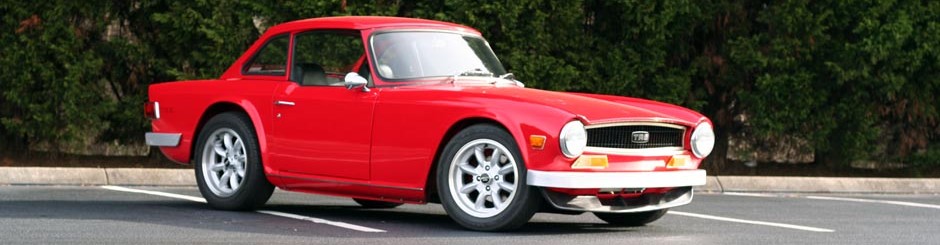
So what does this all look like on the car?  Take a look:

We added about a foot to both ends of the exhaust.  Now, it sticks past the roll pan of the trunk and is a little more prominent.  We still clear the whole frame since the new frame follows the curve of the body and has a bit of a slope “up” past the diff.  Sure, not everybody is going to like it but then again it is my opinion that matters and I really dig it.

Practically speaking, the result of this small alteration turned out well.  No more scent of eau d’Smoked-T-Rex in the cabin and things are a bit quieter too.  With the exhaust now past the body instead of underneath the trunk, the exhaust note is a bit more muffled.  This is still loud under WOT though and that is the way I like it.


bowtie6 is Back Home

Fall has arrived.  Today’s weather was gloomy and rainy here in the Upstate of South Carolina.  I decided to take a few days off from work and do some work on bowtie6.  Today, after a year’s worth of work I had a chance to finally driver her home from my cousin’s shop. All I can say is the Ecotec is something else.  The 3.4 V6 is so passe it is pitiful.  The 2.4 Ecotec is so far superior!!  This engine’s power band is amazing.  The torque is amazing. I only had a chance to put a few miles on bowtie6, but I can certainly tell the difference:

  • The new frame is stiff.  I mean Viagra stiff.  There is no flex, the car feels extremely solid.  With the original frame, with no hard top…  I could feel the body flex.  Not so now.  It is (as Bob Seger would say), “like a rock”.  Amazing.
  • Solid axle with PosiTraction – once you get a chance to feel what this is like, you will never go back to IRS.  This thing is amazing.  The “bite” is so different.  There is not “squatting”.  You hit the gas and there is no hesitation.  It gets the job done.
  • Coilovers – OMG!!!  Now we have coilovers on all four corners.  The rears are quite amazing, but the fronts have transformed the whole driving experience:  at parking-lot-speed it almost feels like power steering.  The effort to turn the wheels is almost non-existent.  And…  Remember, I am running 205/55-16’s up front.  At speed, this thing is lightning quick.  Point-and-shoot, baby!!  This and the Ecotec has been the best money spent so far.

I’ll have pictures soon.  I have to work on the interior, do some work under the hood and do a lot of “detailing”.  There is still a lot of work to be done but in a few days I hope to have things back together soon…  Stay tuned!

bowtie6 and ECOTEC vs 3.4L V6

I put some 15,000 trouble free miles on bowtie6 powered by the V6 conversion we did several years ago.  The car performed flawlessly, surpassed my expectations and not once was it ever a disappointment.  Not even from the start, on the contrary:  from day-one I have been very proud of my car.

Not wanting to keep the engine ‘stock’, I started doing some research into performance improvements.  Don’t take me wrong, the engine had plenty of power and torque but I just wondered “what if?”  After all, what fun is there in leaving things alone?

This is no “mid-life” attempt to produce a firebreathing monster – if that were my wish then I would be building something else altogether.  I have the ability and resources to do it, but I decided to take a well preserved TR6 and improve it.  It has been a very fun project that I plan to continue to work on and improve.

bowtie6‘s 3.4 V6 came from a ’95 Camaro so out of the box it is a few years old.  I had it dynoe’d the first time and it produced 150hp at the rear wheels.  Not bad for a ‘stock’ V6 with fifty-some thousand miles on it.  I could have left it there and just driven the thing forever putzing around town like an old fart, but that would be no fun at all.  I had proven the concept was sound:  I had an extremely reliable TR6 that did not leak, had no “issue” to speak of and in which I could drive anywhere, anytime with no second thoughts and no assortment of spare parts in the trunk.

Modifications started with a hot cam and roller rockers.  I already had headers so we modified the intake in order to let the engine breathe as well as it let exhaust gases exit.  The car went to the dyno again, this time producing roughly 170hp at the rear wheels.  Then, we found a brand new set of heads which I had ported, polished and flowed.  I also ported the upper intake manifold and bolted an LT1 throttle body.  It was expensive but I wanted to break the 200hp mark.  Along with the ported heads came an adjustable fuel pressure regulator that helped fine tune the already larger injectors.

Third time to the dyno:  this time we produced slightly above the 200hp at the wheels mark.  I had achieved what I set my goals for.  The difference was indeed palpable and made for an even more fun TR6.  However, this proved to be too much for the tired factory Triumph frame made of 10 gauge materials.  This resulted in a frame failure (which I have discussed previously) and forced a review of the foundation beneath bowtie6.

I did not want to ditch the car because I have quite an investment in it.  The frame was un-repairable so we made the decision to make a new frame.  My cousin Jim’s TR4 was nearing completion with a similar frame.  Soon after I had a chance to drive it and see what a new frame and ECOTEC power would be like we had more data to allow a good decision to be made.

So what was it like?  No, it did not “blow the doors off” my V6 powered TR6.  Jim’s TR4 is lighter than my TR6 giving it an edge.  The ECOTEC is a fantastic engine and has way too many advantages over the V6, even with all the improvements we made.  For starters the ECOTEC is lighter and incorporates much more modern features.  The engine has a huge rev range and offers fully tunable ECM vs the opposite for the V6.  Power wise my fully tweaked V6 is matched by the stock 2.4 ECOTEC.

Back to the frame.  Again.  At first, I had a notion to use the V6 in the new frame.  Add that to a solid rear axle with positraction and a robust frame and I would have been in business back on the road.  But no.  The V6 had reached the end of what I could do with it.  Furthermore, I found an ECOTEC with only 4 miles on it (I’ve written about this here before) so using that over the V6 was a mute point.  There is no compelling reason to go with the V6.  Also, supply of V6’s in junkyards getting smaller yet I am told new crate V6’s can be had for $1980 delivered to my house.  Point taken.  Then again, I have $2000 in a 4 mile 2.4 ECOTEC and that includes a 4 mile AISIN five speed gearbox (last time I checked, crate engines don’t come with gearboxes).  I also own a 2.2 ECOTEC that I paid $500 for and will be in my next project.  Truth be known, Jim’s car was initially powered by  a 2.2 ECOTEC but we realized the 2.4 would be a better choice.  So no matter how you slice it, the ECOTEC proved to be my best choice.

Very soon I’ll have bowtie6 back on the road.  It has evolved through the years.  It has been featured in magazines, won awards and I have received a huge amount of compliments which I am very grateful for and I graciously accept.  bowtie6.com has been hit from every state of the Union as well as from many countries around the world which shows me there are some folks that find this collection of words somewhat entertaining.  Along with the good, I have also had many negative comments ranging from “why did you do it?”, “it is ugly”, “it is not original”, to “your car is a complete abomination”.  I am very grateful for those too.  I fully accept this is not everyone’s cup of tea (that seems to come up a lot too, I guess it is a polite way to say “I really don’t like it”) and that is all good.  Bottom line, latter comments are the ones that make me grin and reinforce the fact that I did the right thing!!!

It is funny though, that I have taken my TR6 to non-LBC events (read street rod events) and not once has it ever been looked down upon.  Matter of fact, folks not only know what they are looking at but also compliment our efforts.  The LBC folks though are something else:  many turn their noses up and walk away, others shrug their shoulders and walk away and others give me strange looks and walk away.  But, in fairness there are some that do appreciate the work, don’t walk away and ask questions.  I’ve met many folks that way that have been very gracious.  The ones that are not gracious, well…  They are fun to meet too.

The truth is in the pudding.  My friend Mike likes to restore TR’s back to stock form.  We have a nice “agreement to disagree” thing going on, but it is all in good fun.  I’ve driven his stock TR’s and see why folks would want to keep them that way.  But then, when I get behind the wheel of one of ours…

…and suddenly I get a big grin on my face and know this is the only way to go.  If only folks could ride in our cars before they make “remarks”, they would see why we like them so much.

For what I have in bowtie6 in time, resources and effort probably I could have a newer car (I’ve been told that too, “why didn’t you just go buy an brand-x or brand-y car?”) but that would not have given me the chance to experience all that I have written about bowtie6.  I know the answer is a bit of a cliché:  it is priceless!

bowtie6 Back Together

Labour day has come and gone.  bowtie6 is back together.  Yeah!

We spent pretty much all day yesterday fitting body panels.  This is a challenge.  TR6’s don’t quite “fit” very well even with a perfectly plumb frame.  So we had to do quite a bit of fitment, shims and spacers to make things line up.  Suffice to say, after a long day yesterday all fenders are finally bolted on, the bonnet lined up quite well and the boot lid is in place.  Quite a day.

Sorry, no pictures but I promise a full set the next time I get to work on bowtie6.

On a side note, today’s post marks a bit of a milestone:  this is the 50th post since I started this blog.  I’ve been able to track hits via Google Analytics and so far, I have a pretty much global audience.

Just for the hell of it, if you happen to be reading this post – please, make a quick entry and just say where you are reading my blog from.  Just curious…

Pictures will be posted soon…

bowtie6 Reassembly – With Pictures –

Hi folks.  Sitting here tonight, with a about 2 finger’s worth of Maker’s Mark 46 in a jelly glass.  If you haven’t tried this, I highly recommend it.  At any rate, here are a few recent pics of bowtie6 finally coming together.

Today is special actually.  We put the wheels back on and dropped the car on the ground after doing the initial body tub fitment.  Since the car has been on jackstands for so long, I had forgotten how damn low to the ground this thing really is.  Take a look and you will see what I mean.

I’m sure you are wondering what type wheels/tyres are fitted.  Answer:

  • Wheels – Panasport sixteen by seven inchers.  These are the Triumph bolt pattern and yes, they are Panasport.  Not cheap, but these are the real deal.
  • Tyres – The rears are 215/55-16; the fronts are 205/55-16’s.  215’s are a bit too wide for the front.

I know the pictures of the engine might be a bit overkill.  After all, there are plenty plastered on my website.  However, these are different…

  • Check out the hand made aluminium intake.  The plenum has been made to fit a GM Performance Parts intake flange.  The flange has been made by the good folks at GM and it fits perfectly the intake runners on the head.  Of course, all you get is a high pressure water-cut flange, the rest is all magic my cousin Jim made.  You can see the electronic throttle body as well as the intake tube where the MAF and IAT sensors mount while on the bottom of the intake plenum is the MAP sensor.
  • The headers are also hand-made and also attached to a GMPP exhaust flange.  The flange actually is special because the size of the openings is much larger than the one on the stock exhaust.  You get the idea.
  • The Griffin aluminium radiator is fully bolted in and plumbed.  Ecotec’s are special regarding plumbing.  If you don’t get this dead nuts, the engine will overheat.
  • The fuse box holds the ECM, fuses, relays, and electric fan controller.  Yes it is a little crowded in there but there will be a cover for all this and when we get that bolted on, it will really look nice.
  • Yes, those are Euro spec front turn signal lenses.
  • Finally, the rear picture of bowtie6 shows the back fenders bolted back on.  At the bottom you can see the exhaust peeking through.  Those ends are not finished yet:  that is where the Supertrapp baffles are bolted on.  I am a big fan of Supertrapp mufflers and they not only give an awesome sound but are also very low restriction.  I’ll have a writeup on this later, when I get all that bolted on.

I’m sure the question will be brought up:  that engine is really pushed back towards the firewall.  Why push it back so far back?  Well the answer is simple:  weight distribution.  We don’t have numbers yet, but I’m hoping to have a near 50-50 distribution.  My cousin’s TR4 is actually fairly close to this – don’t believe me?  Then you need to check out my writeup on weight distribution.

So here are the pictures in no particular order: