 After the success we had with bowtie6, my cousin Jim and I had many conversations on improving the concept. I remember countless hours of discussions next to the space heater in Jim’s well equipped shop several winters ago. We quickly zeroed-in on the engine: the Ecotec as fitted to the Pontiac Solstice mated to the Aisin 5 speed gearbox would supply a powerful and reliable drive-train. It would also offer a PCM that we could tweak with a laptop. We also decided a Triumph or MG would be a good platform for the Ecotec. Finally, we would subscribe to the ideas that Anthony Colin Bruce Chapman based his designs upon: keep wight at a minimum.
Eventually, we got word there was a local fellow with several cars in his basement that had to be sold Needless to say, Jim and I quickly grabbed our gloves and jumped in the shop-truck and headed out to this fellow’s basement. Sure enough. We found a 1964 TR4 as well as a Datsun 2000 roadster. The Datsun was our first choice since it is the more “exotic” of the pair however it was missing entirely too many parts. Jim decided the TR4 would be the best choice. A few days later we arrived with a trailer and brought the TR4 home.
I could write about all this for hours but I think you want to see pictures and not a bunch of words, so let me fast forward to the present and show you what Jim’s TR4 looks like today. Unfortunately I cannot cover the entire car in one article; I’ll break this up into several. Today, I’ll start with the outside. After all, beauty can’t be only skin deep, right?
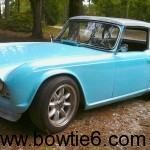
As you can see in the picture above, the nose of this TR4 incorporates many subtle changes. For starters, the turn signals are gone. They are now hidden behind that hand-made aluminum grill. The front bumper is also gone and the oval air inlets below the grill have stainless mesh behind them. Finally there is a hand formed “air dam” with two “nerf” bars on the roll pan. Jim likes his “nerf” bars – Steve if you are reading this, I am sure you will agree with me. 🙂
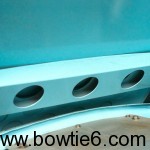
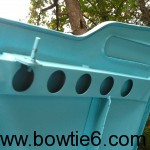
 The picture above shows the new bonnet. When I mean “new”, I mean this piece was formed entirely from aluminum. If you look closely, you will see the “bulge” is missing – I guess it is a matter of choice but this is the way Jim decided to build the bonnet. The trick to making this bonnet was piecing together several sections. They were all carefully formed on the English wheel and TIG welded together. The following gallery shows what the back of the bonnet looks like.
But… Before you start clicking on all these pictures take a look at the first one of the set. There is a small recess, wide enough for two fingers to be used to lift the bonnet once the latch is released. Pretty cool, huh?
Next you can see the backbone of the bonnet. This backbone is also made from aluminum and is not welded, instead it has been bonded to the backside of the bonnet with automotive epoxy glue. Finally, take a look at the third picture. If you look close enough, you can see some of the hammer marks left from when Jim formed the headlight bulges. Yes, all this was carefully welded and shaped just like it in the glory days of hand formed bodies.
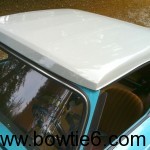
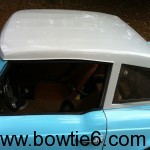
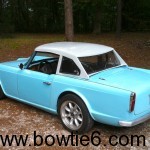
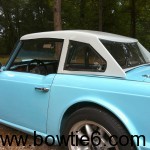
The next gallery shown above, displays the hard top Jim made for the TR4. This top is entirely made of aluminum and just like the bonnet, is extremely lightweight. Again, many pieces formed by hand and on the English wheel, TIG welded and carefully finished. If you look at the surface of the top (see second picture) you will see ridges formed by Jim’s Pullmax machine. These ridges are there to add strength and to prevent the top from oil-canning. Finally, to keep weight down Jim used thin Plexiglass in the windows instead of glass. Oh and the side windows open; Jim made special hinges to allow the side windows to pivot. The following collection of pictures shows what the top looks like from the back and from the sides.
The back third of the top has a small taper. It is also formed in such a way to give the rear glass a curved look. At first, one would think this would hinder visibility but the seats are very low in this car, and outward visibility is excellent. I think it looks very cool!

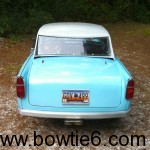
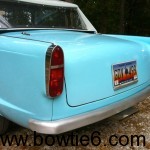
Finally is this picture from the back of the car. The bonnet is also different from stock. Yep, you guessed it. It is also formed from aluminum. Jim made a similar backbone frame for it and it is extremely lightweight. As if that were not enough, take a look at the rear bumper. This one is not as wide as the ones Jim made for bowtie6, but is just as lightweight. This bumper also is different from mine in that it’s finish is made by simply wiping it with ScotchBrite. This gives the aluminum a muted, matte finish.
I hope you have found this interesting. I’ll have more about Jim’s TR4 in future articles, so stay tuned! 😉
 Here is another shot of the engine. What is so remarkable here is the whole package just “fits”! Steve told me he had to make some alterations to the firewall and there is a small cut around the edge of the trunklid opening near the rubber seal. That had to be done in order to gain access to the oil filler cap.
 And one last picture… This is what the interior looks like. Oh and both the hood and trunk lid have been treated to the same cool pinstripe work as the dash. Overall this is one hell of a nice Volkswagen Beetle.

