Author Archives: bowtie6

Holley EFI Terminator Kit

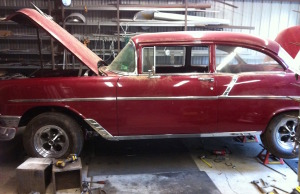
I’m not very keen on endorsing products but, I will make an exception for the Holley EFI Terminator kit.  At my cousin Jim’s shop is Wayne’s 1956 Chevrolet 210, restored sometime in the 1980’s with a nice paint job, interior and a crate engine.  Wayne wanted something more reliable and fuel-efficient, so the old carburetor got ditched and work started to help bring this American icon back to life with modern EFI.  The centerpiece of all the new parts and today’s topic is the Holley Terminator EFI kit.

IMG_2458

Wayne’s 1956 Chevrolet 210

A new, fuel-injection compatible fuel tank with high pressure fuel pump, replaced the original tank.  The fuel pump kit included a special cylindrical shape sock made of a material that resembles a loofah sponge; this prevents sloshing and erratic fuel gauge readings.  Pretty cool stuff.  This was then plumed forward to the engine compartment with new stainless tubing.  Nice and tidy.

The Holley Terminator EFI kit comes packaged in a large box including all the bits needed to replace an aging carburetor.  This includes a device that resembles a 4 barrel carburetor but with all the necessary sensors needed by the EFI controller.

IMG_2473

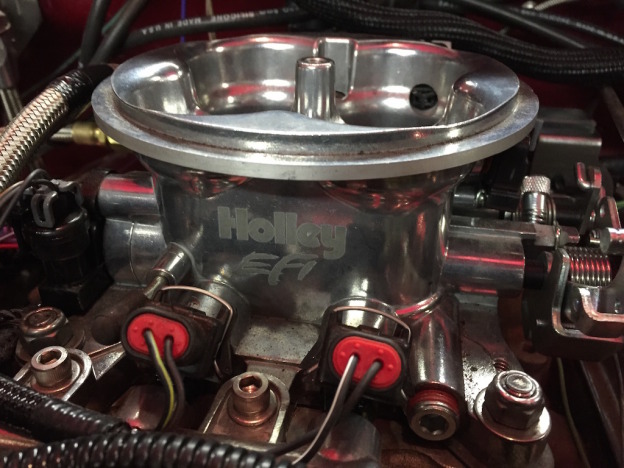
EFI Throttle body – note the 2 injectors and Throttle Position Sensor (TPS)

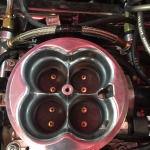
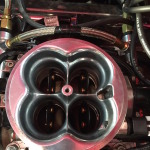
So essentially this is a Throttle Body Injection (TBI) kit.  You can see in this picture the four butterflies, the two fuel rails and two of the four injectors.  These injectors are special in that they spread a very fine mist below the butterflies that bust up fuel into a very fine fog.  There is a throttle position sensor (TPS), manifold absolute pressure sensor (MAP) and an idle air controller (IAC).  This whole affair sits on top of the intake manifold with no changes.

efi-controller

Holley Terminator EFI Controller (from the Holley website)

In the box is also a high quality wiring harness with first-class connectors and very clearly labeled wiring harness; wide band oxygen sensor and engine coolant temperature (ECT) sensor.  Several plastic bags are also included with just about any bolt and transmission linkage adapter one could ever need.  Finally the centerpiece of the kit:  the Terminator EFI controller and hand-held interface.  This is the same controller used by NASCRAP these days except that instead of four injectors, they use eight.  This controller can also be configured to run 4, 6, 8 or 10 injectors so this makes an excellent choice for other projects.  :mrgreen:

IMG_2472

GM HEI distributor

The Terminator controller provides the ability to also control timing provided the a suitable distributor exists.  In this case, Jim installed a GM HEI distributor with new custom-cut spark plug wires.

Configuring the EFI Terminator and First Start-up

IMG_2474

Holley EFI Terminator hand-held interface

This is where the Terminator kit really shines.  To kit comes with a joystick driven interface used to navigate a simple menu driven configuration.  The interface gets connected to a special port in the harness and enables the user to configure the controller as well as for monitoring real-time the sensors.  Prior to startup, the “Wizard” option enables input of engine-size, cam-profile and distributor type.

IMG_2476

Throttle linkage and MAP sensor

Next, the Throttle Position Sensor (TPS) requires calibration.  Using another configuration menu option in the handheld interface, the throttle linkage gets cycled twice.  This action tells the controller the range of motion of the TPS.  The goal is to have the range of motion between 0% and 100% and this is easy to read in one of the “MONITOR” screens on the hand-held interface.

Once initial controller configuration is complete, it is time to start the engine.  Part of the built-in logic of the controller is the ability to “prime” the intake manifold by cycling the injectors depending on readings from all sensors.  This prevents flooding.

In our case, it took a few tries but eventually it fired off and ran very strong.  After a few minutes at idle the controller went to closed-loop.  Next on the configuration process we had to set timing.  This required revving the engine to approx 2000 RPM’s and shining a timing light.  The HEI distributor needed a minor adjustment enabling the RPM’s shown on the hand-held interface to match the reading on the crank.  At this point, the distributor could be locked in place.

Concluding initial setup required setting the idle speed.  This step calls for selecting the “MONITOR” option and reading the idle air controller (IAC) value at idle.  With a few tweaks of the butterfly adjustment screw we set the IAC value in accordance to the instructions.

Now What?

The next step requires taking the car out on the street.  We are not ready for that just yet because the interior must be put back, instruments installed and so forth.

Overall the Holley EFI Terminator kit is impressive.  Installation is very straightforward and the hand-held interface foolproof.  Yes, it is very “basic” (more on that in a minute) but it gets you going with very little confusion. One thing I did not like is the flimsy and diminutive plug used to connect the hand-held interface to the main harness.  It is very delicate – perhaps a more robust connector could have been used.

The documentation provided in this kit is excellent.  Somebody took their time writing this and Holley structured the start-up process in a very well-organized and detailed way.  There are plenty of pictures and diagrams especially of the menu-driven interface configs.  This instruction manual deserves careful reading because there is a lot of information.

Another very big plus about this system is the ability to control electric fans.  The controller is capable of running one or two electric fans.  The hand-held controller also allows setting the “ON” and “OFF” temperatures for fan operation.  In this installation because of space limitations there was room for only one fan.  The preset temperatures were left alone:  fans turn ON at 195 degrees and they go OFF at 180.

As if this were not enough, the controller can also be connected to a laptop!  The software is available for download from the Holley website and requires a USB cable.  In this case the cable gets connected directly to a port on the controller.  According to what I have read, this is how more complex and detailed configurations get selected.

I’ll have more details on how the rest of the configuration goes once the car is ready for the road.


Z28 Camaro is 20 Years Old

Hard to believe it, but my Z28 Camaro is 20 years old!  😯

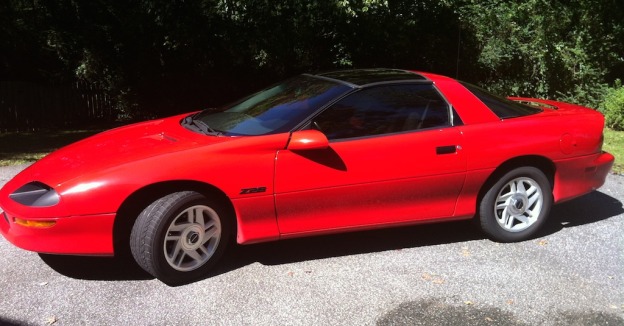
I was going through some old papers and came across the original documents for my 1995 F-Body Camaro Z28.  Sure enough,  my daily driver left the Sainte-Thérèse, Quebec, Canada assembly plant the third week of September 1994 as a 1995 model.  This car had been special ordered sometime in early 1994 and hence carries some odd features (more on that later).

IMG_2431

Some History

Back in the day, the fourth-generation Z28 Camaro was quite the awesome machine, sporting wide ZR rated tires, lightweight bodywork and the impressive 5.7L LT1 V8 with almost 300hp and enough torque to light up the expensive Good-Year GSC asymmetric tires in the blink of an eye.

Needless to say, I had to have one.

I remember doing a great deal of research – my heart was set on a 6 speed – but at that time, the manual cars were very, very hard to find.  After many months of searching, an acquaintance who was in the car business told me about a special-order red Camaro that was up for sale at a dealership he knew well.  It came equipped with all I wanted, however that included the 4L60E automatic transmission.

Reluctantly I agreed to go see the Camaro.  It was parked on the front row of the dealership and how nobody had bought it before me has always made me wonder.  At any rate, as I walked up to it I realized it was immaculate.  I opened the door, sat down and looked at the odometer.  It is then when I realized it had only 5,300 odd miles on it.  As I gave the car a closer inspection, I realized this one was a keeper.  We struck a very favorable deal and I signed the dotted line.  Yes, it had the 4L60E automatic transmission but I would have been an idiot to pass this one up.

Purchase and a Few Surprises

A few days later, after the proper paperwork and money changed hands I picked up the Bright Red 1995 F-body Camaro Z28 pictured here.  I’ll never forget it:  it had rained that day and the roads were wet.  First stop was to a gas station down the street from the car dealership.  After filling the tank with Premium Unleaded I cracked the throttle a bit too far on the way out the service station.  The posi-traction locked and hooked up and since the street was wet, the rear of the car walked out.

Damn!!  I knew right then I had something special!  :mrgreen:

IMG_2429

As I went through the glove-box and center console, I found papers.  Many papers.  The original build sheet was there, the window sticker was there as well as the dot-matrix printout from when the car was spec’d out at the dealer when the special order was filled out.  Owner’s manual was there as well as the address of the original owner.  That would come in handy because I ended up contacting him for a few missing items such as the extra remote FOB and the T-Top shades.

After meeting the original owner, he told me he requested every option except two:  leather seats and a rear-window defroster.  He told he didn’t believe in rear window defrosters.  Well how wrong he was!

Everything else though, was included:  from the upgraded suspension featuring the preferred 3.23:1 rear end differential, to the Z28 package which included the 5.7L LT1 and 4L60E automatic transmission.  The interior was requested with Torch Red cloth inserts and matching door panels.  Also included were the tinted-glass T-Tops with removable inserts and “salad shooter” wheels.  The audio package featured the Bose quad-speaker system with sub-woofer and a CD player – very advanced for the time, might I add!  Finally, very unusual for a 95 Camaro are the body-color mirrors and roof bar (Z28’s in 1995 were built with black mirrors and black roof bar).

IMG_2435

The Journey

Once I started to get used to the car, I ordered a few “enhancements”.  First was a cold-air intake.  At the time not many were available so I bought one of the early Calloway kits with matching K&N filter – it was not cheap!

Glass abounds on the Fourth Gen Camaro.  This lets in a huge amount of heat as well as UV light.  So, to protect the interior I had a dark window tint applied to the door windows as well as the rear glass hatch.  During the summer months I keep the T-Top shades in place – during the winter months I take them off.  Totally transforms the driving experience!

Next I ordered a BMR strut-tower brace as well as beefier BMR rear control arms.  Finally, the sway bars and deCarbon shocks were replaced with the factory installed on the B4C Police Package units.  This enhanced the traction and cornering abilities of my Z28.

IMG_2436

IMG_2438One of the drawbacks about these cars have been the brakes.  So when the factory brakes needed replacing, I splurged and installed cross drilled rotors (front and back) as well as upgraded pads and braided steel brake lines.  While not as sure-footed as my S2000 or bowtie6, the upgrades did make a big difference.  On my list of “to-do” things is to upgrade the front calipers to Wilwoods – maybe one of these days!!

The AC compressor was replaced about 4 years ago.  I’ve never let anybody touch my car however, when the compressor gave up the ghost I took it to a local, very reputable Chevrolet dealer in Greenville, SC.  They changed the compressor alright, and charged me dearly for it.  However, they did one very shitty job.  Turns out, when the compressor granaded itself, it sent out minuscule shavings that clogged the expansion valve.  Of course, the dealer failed to change said valve and the AC did not perform the way it was supposed to.  Oh, they claimed it was “done to spec” but I knew better.  I ordered a new expansion valve, installed it myself and with my cousin Jim’s help, we charged the AC system back up to the correct R134 settings.  Problem solved – AC is cold as the day it left the factory.

Moral of the story?  Don’t let shitty dealerships work on your car.

Oil has been religiously changed some 30 times during the last twenty years.  I’ve always replaced it with Mobil1 synthetic 5W-30 and premium filters.  Yes, my Z28 has 93,000 miles and it is still going strong. These days, I use the Mobil1 High Mileage version since it has a little more ZZDP.

I’ve gone through several sets of Good-Year GSC’s through the years.  Back when the SS Camaros were built by SLP you could order “take off” wheels from them.  These were perfectly new wheels and tires (GSC’s) for cheap.  I ordered one of these sets:  they are the five-spoke TransAm wheels.  I ran them for several years and boy did I get a few stares from folks!  The last few sets of tires I ordered came from BFGoodrich and they are nice.  I had them mounted on the original salad-shooters to give the car its original look.

I’ve bought several batteries through the years – matter of fact, I’m due for one.  With winter soon approaching, this will be the next purchase for the Z28.  Coolant has been flushed several times as well as transmission fluid, differential fluid (with the extra GM “additive”) and last but not least, brake fluid.

The BOSE radio/CD-deck was sent off and repaired several years ago.  They did a good job repairing it but just for good measure I bought a “spare” off eBay for a decent price.  Try to find one today!

The most recent replacement item were the gas-filled struts that hold the rear hatch open.  I bought them off eBay and they are perfect.  The bolt holding the strut to the inside body mounts was very difficult to remove – after all these years that LocTite really did its job!  But after some heavy cursing and a good lever, they came loose.  The hatch opens and holds just like new now.

The Future…

Currently, I subscribe to several car magazines.  Forever you read about folks that talk about owning that special car they have owned since the start of time.  They also often talk about the special bonds they have with their rides.  I am no exception.

This Z28 has been part of my life for twenty years.  This machine has been by my side in good times and bad times.  I endured a divorce while owning it.  It has been my best friend when I could not find a friend.  Yes, I have been looking for a Vette for several years but somehow I don’t see myself letting my old friend go…

Build quality might not be “refined”; fit and finish is not perfect.  In wet weather the rear tends to “walk” if you crack the throttle too quick.  It is noisy.  It might rattle on bumpy roads.  The window motors stick from time to time.   There is no iPod connector nor satellite radio.  There is no backup camera.  It is, after all a muscle car.

It might be a “Camaro”, but it can still hold its own and it does very well.  Recently I took a road trip partly on a freeway, partly on secondary roads.  And still, twenty years later this machine delivers when asked.  I suppose for me, the thrill is still there.

I don’t like to abuse my cars.  I like to keep them together in one piece and as such, I give my Z28 a bit of break of sorts.  Yeah, it will light up the rear tires just like before but now it takes two blinks of the eye. 😉  However, I respect the old warrior.  It has definitely earned that respect.

IMG_2430

In Summary

Twenty years ago, this Z28 was state-of-the-art and oh believe you me, it turned heads.  Did it ever!

Ten years ago, Z28’s like mine fell in the hands of second, third, fourth ownerships and the great majority started to show as if they had been driven hard and put up wet.

Today, I look around as I drive to work every day and rarely see Fourth Gen Z28’s (or cousin WS6’s) on the streets anymore.  Yes, there are a few out there but not many that are well taken care of.

Who knows, if I hold on to my Z28 and continue to keep it up maybe ten years from now (or sooner), I can drive it to Cars & Coffee and once again, turns heads…

That would be pretty cool.

Triple Tree Aerodrome Fly In

I had a chance to visit the 8th annual Triple Tree Aerodrome Fly In in Woodruff, South Carolina this Saturday.  It was a very warm and humid day – felt more like 4th of July weekend rather than the weekend after Labour Day.  However, once we got there things were all good!

Cousin Jim and I arrived late.  We had “issues” with the transmission on Jim’s shop-truck – the tranny gave up the ghost.  With the help of one of our buddies Mike R, we got a ride back to Jim’s shop.  We called a local rollback to go pick up the shop-truck.  In the meantime we jumped in the backup shop-truck-2.0 and headed out to Woodruff.

Triple Tree Aerodrome is quite a nice place.  There are some 80+ acres of freshly mowed grass and other amenities.  My friend Richard S, happens to be a member there and that is how we found out about the fly-in.  Once we got there, volunteers promptly asked us to sign a waiver and pay our $15 to get in.  Then we rode one of the buses to travel the 2-odd miles to the event I had a chance to take a few pictures…

Update:  Made a change to the gallery so a full-sized picture will display when you click on each thumbnail…  Enjoy!

For those of you on the mailing list, please go to The Bowtie6 Blog and check out the gallery!

This is also the same Aerodrome used for RC airplanes.  From what I understand there are several very awesome events that take place there.  At any rate, I hope you enjoy the gallery of pictures.  As always feedback would be appreciated…

Cheers!  :mrgreen:

Letter to a Soldier…

Today, my friend Jeff showed me a tweet from a letter to a soldier from an elementary school kid.  You know, the ones that thousands of little kids send to our brave warriors proudly serving our Nation and defending Democracy overseas.

I suppose this is the innocence of an 8 year-old…  Then again, I think Jack (and Jack’s Dad) got it right especially with the behavior being displayed by goat ****’s these days.   :mrgreen:

I showed this tweet to another friend of mine – a retired USMC Major – and he told me this would make a soldier’s day.  I’ll post this here in the hope that a brave Soldier reads it.

As young Jack said, “I hope you get them”.  Hurrah!!


1935 Bugatti Type 57S Compétition Coupé Aerolithe

What a treat today has been!  Drove to the High Museum of Art Atlanta to see the Dream Cars collection exhibition, which will continue until September 7, 2014.  If you get a chance to make the drive, I highly recommend it.  A total of seventeen concept cars are on display each magnificent except for two turds.  Both German – one, a BMW and the second a Porsche.  Oh well, can’t have it all I suppose.

So I’ll start by listing what I thought was the most impressive in the collection:  a 1935 Type 57S Compétition Coupé Aerolithe.  The finish of this car is a shade of very light green metallic that exhibits properties akin to a chameleon:  one moment it looked light green, and the next it became almost silver.  And yes, this is the Bugatti with the exposed backbone assembled with hundreds of rivets.  Feast your eyes…

IMG_2293

The front of the car displays an immense amount of exceptionally perfect chrome.  The grill has what appears to be thermostatically controlled vertical blade arrangement allowing the correct amount of cool air to keep the engine from overheating.  The headlights were particularly impressive:  everything was crystal-clear except for the bulbs: they were yellow.  The side vents on the hood were also flawless and the latches holding the sides were magnificent.

IMG_2312Moving right along, notice the doors.  What a door!  Check out how high the door sills are and the teardrop design of the side glass window.  The occupant’s shoulder would be even with the lower edge of the window – how awesome is that?  Finally as if it were not obvious enough, those are suicide doors held in place by two delicately made door hinges.  To make something look this simple and elegant takes an obscene amount of knowledge, craftsmanship and time.

IMG_2319Here is a closeup of the rear wheel cover.  The cover has five fasteners that when turned in the correct direction allow the cover to be removed.  Pay close attention to the lower right corner where the wheel cover meets the rear curve of the fender.  The amount of detail is immense.  The cover has a compound curve – it boggles the mind how this the master craftsman in charge hand-formed this from a sheet of metal using his hands, an English Wheel, perhaps a planishing hammer…  And it goes without saying, but look at all those rivets holding the fender to the rest of the body.

IMG_2320The tail of this Bugatti is once again an amazing work of art.  Here we see the exposed backbone with all those alternating rivets.  The spare wheel must be under that large round cover.  Notice how perfect the sweeping seam on the fender meets the backbone in the middle.  Finally, below the roll-pan are four very tastefully placed indicators.  They are just neatly tucked away as to not distract the eye from the flowing curve of the back of this work of art.  Amazing don’t you think?

IMG_2323Here you see the four lights I mentioned before, but wait…  Look at that simple but elegant chromed release handle for the boot cover.  It appears to be designed to be lifted and then pulled back where it would rest on a detent.  Then the entire back cover would open.

IMG_2325This picture shows the exposed backbone actually goes under the car for a certain distance.  I was unable to get a closer look but I think there are even more surprises under all the shiny bodywork. If you look close enough towards the left, you see that small tapered point on the wheel cover that shows just how high the level of detail exists on this coachwork.

IMG_2326Here are the back windows.  Unfortunately the light was not good enough to show the interior, but from this vantage point I could actually see all the instrumentation as well as the dash and steering wheel.

IMG_2322I realize this is not exactly the best of photos, but look at how the door extends into the roof area of the car.  I suppose this would have aided the occupant when entering/exiting the inside of the car.  Nothing seems left to chance here.  Exceptional, don’t you think?

IMG_2300

IMG_2302I took the two pictures above, to highlight something particular about this car.  The entire body is a flow of curves.  The long swooping fenders, the compound curve of the rear wheel cover, the roof, the curves on the rear deck…  Except for one thing…  Look at the extreme sharp edge on the engine cover as it meets the firewall.  Then think when this was all formed:  the mid 1930’s.  This is not a car – this is art.

Finally, I’ll just close with a few more pictures of this exceptional rolling masterpiece.

IMG_2294IMG_2298IMG_2295Stay tuned…  I took many pictures of the rest of the cars in the collection.  I’ll try to write about them in the next few posts