Category Archives: 1. bowtie6

ECOTEC Fuel System

Supplying fuel to the Ecotec required a special delivery system.  Unlike the system we had in place for the V6, the Ecotec is a “returnless” design.  I’ll get back to that, but first let me describe what we had before with the V6.

The V6’s fuel rail required a “loop” for the fuel to flow in.  So a special made aluminium tank was made to fit the stock fuel tank location.  Since we wanted to extend the range, the tank was made larger.  This tank has two bungs, one is an output and the other a return.  The output was connected to an external high pressure fuel pump and plumbed to supply fuel to the fuel pressure regulator and ultimately the fuel rail up front on the engine.  A return line was also plumbed and this dumped unspent fuel back to the tank.  This is a “return” fuel system.

There are advantages to this design.  The pump can be easily serviced and replaced if needed.  However, these high pressure pumps are getting a little expensive these days.  Another advantage is that the fuel returns back to the tank and ensures a fresh supply of “cool” fuel – no vapour lock.  The big disadvantage and something that really screws up folks doing conversions is the tank must be modified (unless specifically designed like mine) to have a return line bung.

The Ecotec however, is part of the new design that does not use a return line.  With this system, there is a single line going to the fuel rail constantly supplying high pressure fuel to the injectors.  This posed some challenges for us.  Since we had made that nice alumimium tank, we did not feel like pulling it out and making a new one with only one output instead of the two used by the return system.

This is what it looks like now:

Whoa!  This looks busy.  Well, let me explain what is going on.  The fuel tank is covered with the black carpet.  At the very bottom, on the extreme right is the former “return” line input.  On the bottom of the tank you see another line feeding the small box on the left.  That is now the supply line into the small box holding the high pressure fuel pump (see picture below).  The fuel pump box above has two lines going up ending in blue fittings.  They supply high pressure fuel into the new fuel pressure regulator and combined fuel filter.  So you see, excess fuel goes back directly to the pump box.  The silver braided line coming out of the regulator feeds a stainless line that runs on the frame and feeds the fuel rail up front with high pressure fuel.  Very neat, and only one line goes forward.

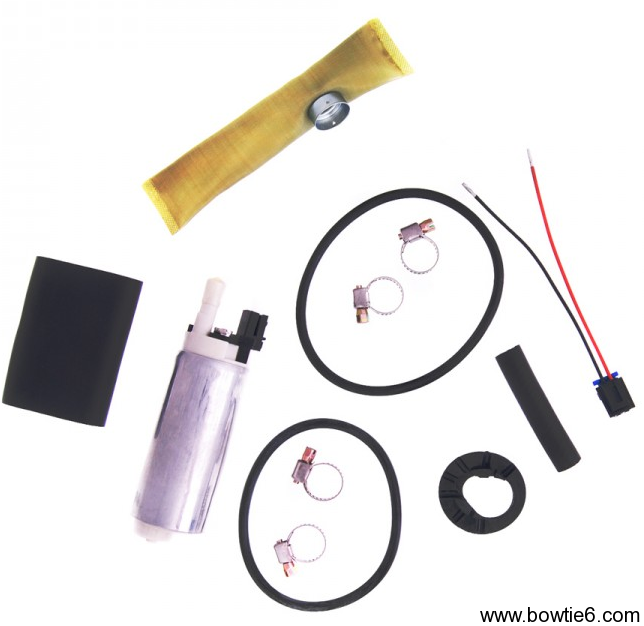
This is what the fuel pump looks like.  The pump has a “sock” that mounts to the input side.  This is a pre-filter.  The rest of the bits are the rubber isolation tube on the left and the wiring adapter.  This is all GM as fitted to Corvettes.

OK – there is a reason for all this.  If you look closely at the tank you see a protrusion at the very bottom.  Even though the tank is baffled, when doing heavy cornering fuel has a tendency to starve the pump.  We solved that by making a special lower compartment that will not allow that.  Kinda like a windage tray on an oil pan.

The fuel pump tank (the small box) as described previously contains a submerged GM high pressure fuel pump.  The box has a “lid” held by several screws and machined to hold Vitrol “O” rings to keep fuel from leaking.  This is a tight seal.  The rubber line at the top of the fuel pump box allows air to escape, allowing the box to always be full of fuel.

The tank holds about 15 gallons and the small box holds about another gallon (give or take).  The beauty of all this is the fuel pump box always contains fuel.  When taking turns at high speed this all now ensured no fuel starvation.

Of course all this comes at a price.  All this has taken up precious space in the trunk but then again, I don’t carry a bunch of wrenches and spare parts like many other owners of “originally” restored cars do.  Furthermore, the extra fuel capacity offers a much more respectable driving range:  I have already been able to get 350 miles of city driving from a tankfull and still had some fuel left in the tank before filling it back.  I am hoping that once I get bowtie6 on a long trip on an interstate, I can reach the 400 mile mark.  Not too bad huh?

One more picture showing the custom made aluminium battery box housing an Optima Red Top battery.  Behind the battery box is the Triumph “bleed” tank that is plumbed to the fuel tank filler neck and allows fumes to be routed back to the intake side of the engine.
 

bowtie6‘s Muffler

Looks like my last post about the muffler and exhaust has drawn some interest..

I’ve been asked for more info about the muffler.  Well here is the skinny:

Since the entire tubing is all stainless (this stuff was pricey) I figured the muffler should be stainless also.  The tubing is all 2.75″ and the muffler is stainless too.  This bad boy came from Speedway Motors and is called a “bullet muffler” (CLICK HERE for more info).  They have several options on finish.  Mine is the “non-polished” version.

Something to keep in mind:  as nice as this muffler is, it is not quite enough to tame the Ecotec.  When the VVT kicks in, the Ecotec really starts to wail.  That is why we are running the Supertrapp tips at the end of the pipe.  Speaking about the Supertrapps, I have been experimenting with the number of discs.  With Supertrapps, the more discs you add the less restrictive the exhaust is, at the expense of noise.  With less discs, it gets more muffled but backpressure increases.  Right now, I am using 12 discs – six on each tip – and this puts one hell of a smile on my face past 4500 revs.  I’ve ordered more stainless discs and plan to add at least two more per side.  We shall see how they turn out.


Exhaust Changes…

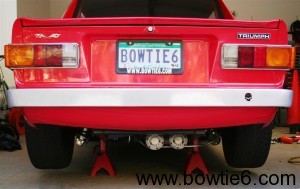
Yesterday we took the exhaust pipe apart for a modification.  In the previous post, I made mention of what the exhaust system looks like and I had the picture on the left showing the SuperTrapp tips.  As you can see, the whole affair ends underneath the trunk floor.  We did this for several reasons, but mainly because it hid the exhaust from sight. However, even though this was with the V6, somehow exhaust “smell” would end up in the cab.  So we had to make a small change.

Since I dropped the whole thing, I thought it would be nice to document the way it looks in its entirety.  First, the following pictures show the flange that is bolted to the flange on the header’s collector.  This is where the bung was welded to hold the O2 sensor.

A copper gasket fits between the two flanges – the one shown above and the one on the header.  Why put the bung and 02 sensor on the exhaust side rather than the header?  The exhaust is much easier to remove than the header.  These four bolts holds the front part and at the rear two tabs fit inside two rubber hangers (see the picture at the very top), so the whole tube “floats”.

Moving along, this is the mid section:

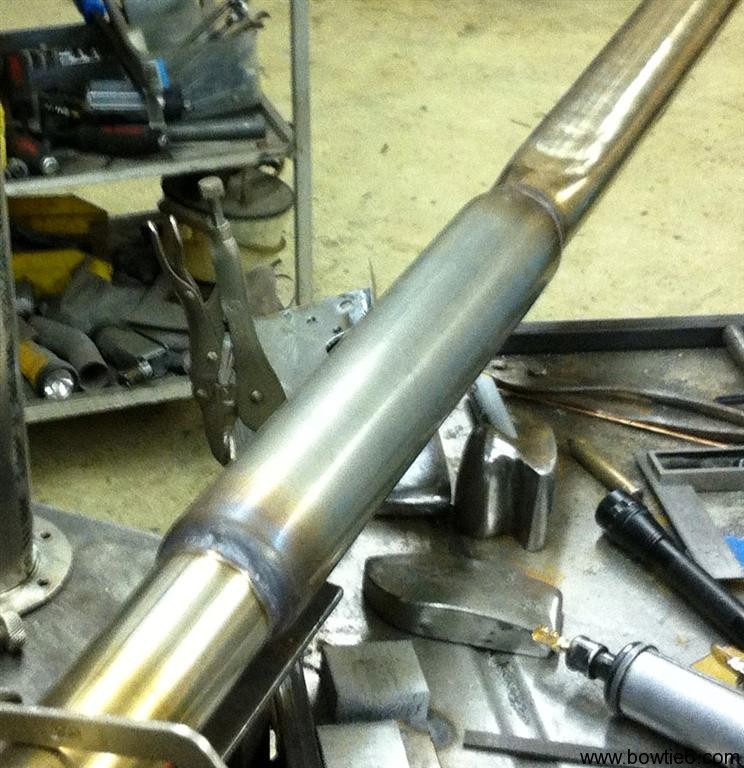
There is a bend right below the O2 sensor, followed by a section that “swells” up a bit.  That is an inline resonator to reduce noise.  At first, on my cousin Jim’s TR4 we ran the exhaust without the resonator – just the SuperTrapp tips – and the thing ended up being way too loud.  The Ecotec has a killer shriek at around 3500 RPM’s when the VVT kicks in.  That is why we used this resonator. Here is another picture showing the area aft of the bend:

This section is between the elbow and resonator.  It looks crushed.  And yes it is.  I am sure questions will come up as to why this is done this way:  we wanted to make sure nothing was below the frame line.  This section of the exhaust had to clear some crossbracing on the frame and the transmision mounts.  Does it restrict things?  Not really.  This is 2.75″ stainless tubing.  Yes, we decided to make the whole thing out of stainless.  The tubing was a bit pricey, but this way we do it one time and not have to worry about it ever.

Finally, the end of the pipe looks like this:

Look close at the picture above.  Several things:  on the mid-left is one of the SuperTrapp ends.  On the top right (standing up) is the tube extension that we added to make the ends stick out a little further back.  And in the center is the tail end of the exhaust with the end flanges cut off.  You can see in the tube extension standing up, the flange is on the end resting on the work table.  Finally, you can see underneath the two split pipes the “hanger” that fits in the rubber donuts mounted on the frame that is used to hang the whole affair.

That is all that holds the pipes in place.  Simple and effective.

The picture above shows the new extension before being welded.  You can see the flange on the left where the SuperTrapp ends are affixed.  These are a bit of a pain to put in place since each has 8 screws, lockwashers and nuts.  Taks a little time but all good things do too.

So what does this all look like on the car?  Take a look:

We added about a foot to both ends of the exhaust.  Now, it sticks past the roll pan of the trunk and is a little more prominent.  We still clear the whole frame since the new frame follows the curve of the body and has a bit of a slope “up” past the diff.  Sure, not everybody is going to like it but then again it is my opinion that matters and I really dig it.

Practically speaking, the result of this small alteration turned out well.  No more scent of eau d’Smoked-T-Rex in the cabin and things are a bit quieter too.  With the exhaust now past the body instead of underneath the trunk, the exhaust note is a bit more muffled.  This is still loud under WOT though and that is the way I like it.


400 Miles and Counting…

Well, I’ve got about 400 miles on bowtie6 with the new frame and the Ecotec.  Simply put, this thing rocks.  I expected an improvement, but damn!  This thing is awesome.  And I have only scratched the surface.

Where to begin?  Well, the coilovers are amazing.  The front coilovers have made an incredible difference in the steering “feel”.  Before, with Richard Good uprated springs and SPAX adjustable shocks the steering was very “heavy”.  At parking-lot speeds it took quite some effort to turn the wheel.  Perhaps it had something to do with the 205/55-16’s up front or the extra heavy springs but now, this thing turns as if it had power steering.  At speed, the steering response is very quick; point and shoot actually.  What does this look like?  Take a look:

The front suspension towers were designed in such a way to accommodate the TR6 front suspension pieces but also the front coilovers.  Some things to note:

  • Yes, those are “stock” rotors.  They are cheap, and this allows me to use a very aggressive pad compound on my Wilwood calipers.  I am not racing this car so there is no need for the extra unsprung weight of “vented” rotors.  Contrary to popular opinion, these rotors along with the uprated calipers offer plenty of stopping power.  Remember, the master cylinder is from a Vette so this offers more than adequate clamping power.
  • Take a look at the sway bar end.  It has a blue SuperFlex bushing.  All the rest of the front suspension uses SuperFlex bushings – I ordered these from England.  They are amazing; a bit pricey but certainly worth the expense.
  • The coilovers are adjustable for rebound.  That is the little knob on the top, right below the top “A” arm.  I’m still trying to dial them in.

This is what the Wilwood caliper looks like:

Just like a good looking super-model, bowtie6‘s backside is just as sexy…

  • The rear coilovers are similar to the fronts; these are also adjustable for rebound.
  • The exhaust is a single 2.75 pipe.  We have a single resonator just past the bend off the headers and then at the exhaust end, a pair of SuperTrapp mufflers.  The basic principle with SuperTrapps is their adjustable baffles.  This works by adding or subtracting discs that add or subtract backpressure and noise.  The less discs the more backpressure and less noise.  With more discs, less backpressure and more noise.  I added quite a few discs but this made for a very high shriek anywhere north of 4500 revs.  So, I had to tone it down.  Right now we’re running eight discs – four on each side.

I’ve already started messing with the ECM a little.  HPTuners is an awesome tool to dial in the engine and I am just getting started.  With the new redesigned intake, headers and above mentioned exhaust things are flowing very “freely”.  I noticed the airflow mappings were way off and this has been the first thing I’ve started to modify with pretty good results.


bowtie6 is Back Home

Fall has arrived.  Today’s weather was gloomy and rainy here in the Upstate of South Carolina.  I decided to take a few days off from work and do some work on bowtie6.  Today, after a year’s worth of work I had a chance to finally driver her home from my cousin’s shop. All I can say is the Ecotec is something else.  The 3.4 V6 is so passe it is pitiful.  The 2.4 Ecotec is so far superior!!  This engine’s power band is amazing.  The torque is amazing. I only had a chance to put a few miles on bowtie6, but I can certainly tell the difference:

  • The new frame is stiff.  I mean Viagra stiff.  There is no flex, the car feels extremely solid.  With the original frame, with no hard top…  I could feel the body flex.  Not so now.  It is (as Bob Seger would say), “like a rock”.  Amazing.
  • Solid axle with PosiTraction – once you get a chance to feel what this is like, you will never go back to IRS.  This thing is amazing.  The “bite” is so different.  There is not “squatting”.  You hit the gas and there is no hesitation.  It gets the job done.
  • Coilovers – OMG!!!  Now we have coilovers on all four corners.  The rears are quite amazing, but the fronts have transformed the whole driving experience:  at parking-lot-speed it almost feels like power steering.  The effort to turn the wheels is almost non-existent.  And…  Remember, I am running 205/55-16’s up front.  At speed, this thing is lightning quick.  Point-and-shoot, baby!!  This and the Ecotec has been the best money spent so far.

I’ll have pictures soon.  I have to work on the interior, do some work under the hood and do a lot of “detailing”.  There is still a lot of work to be done but in a few days I hope to have things back together soon…  Stay tuned!