Author Archives: bowtie6

Habanero Pepper Jam

For the past few years, I have been planting a small garden in my back yard.  I started with a small planter box and through the years, i’ve added three more.  I don’t get too elaborate, mainly eggplant, tomatoes, zucchini, squash, herbs and a few hot pepper plants.

This year, thanks to Covid the majority of the plants came from Burpee – they were shipped a little late because everybody in America decided on planting a garden but it was all good. The Burpee plants did very well, but I still needed my hot peppers.  The peppers came from Lowe’s, where I bought one Habanero pepper plant, one Tabasco pepper plant and one Havasu pepper plant.

One of my favorite hot peppers are Habaneros – they are hot as hell and they really make you feel alive when you cut one up and added to some salsa or eat it in tiny bites.  This year, I planted my Habanero plant in a small pot, with some fresh potting soil.  This little plant has been awesome:  I’ve picked dozens of peppers and they are especially hot.

But, what to do with a bountiful harvest of Habanero peppers?  Well, the answer is Habanero Jam. I found a great Habanero Pepper Jam recipe that really works.  I won’t go into all the details because they have already been covered in that link – but suffice to say, the result is amazing.  The Habanero pepper jam comes out with plenty of kick.  Very satisfying, just hot enough to make you come back for more.  So far, i’ve made three batches.  The first two batches I made according to the recipe but I deviated a bit on batch number three.

The “base” recipe yields four 8-ounce Mason jars of goodness.  You will have a little bit extra, enough to be used the day you make the batch.  The recipe calls for 1/2 pound of Habanero peppers – about 15-20 peppers depending on size.

But first, some words of CAUTION.  Habaneros are weapons-grade peppers.  You must handle them with care, in a well ventilated area.  I cut mine in the patio, wearing disposable gloves.  The peppers must be cut and cleaned before cooking – I removed all seeds as well as the inside membrane.

To make things exciting, I’ve added a handful of Tabasco peppers.  You can see in the picture above, the little red peppers.  These peppers don’t have the kick of the Habaneros, but they are quite hot.  I also removed the seeds by cutting the tip and pushing them out.  Basically, they add a little red to the end result.

And finally, I added three Havasu peppers.  These peppers taste like bell peppers but have a small kick of heat.  They add color as well.

I added one more ingredient to today’s mix.  A couple of nice mangoes…

All this goes in a food processor and that gets pulsed a few times until you have a smooth consistency.  Again CAUTION:  the fumes after processing the peppers can take your breath away – just be careful.  This mixture is potent!

From here you follow Canning 101 steps…

  • Sterilize the jars
  • Fill them up using a wide funnel (can’t do this without it)
  • Handle the jars with special tongs

Adding the two mangos increased the yield – this time I got 7 jars instead of just 4.  It also gave the jam a fuller body.  Adding the mango turned out just great!

I’ve tried the jam on baked salmon – it was awesome.  Also tried it on a pork chop and it was really good.  Finally, take a Ritz cracker, add a little bit of cream cheese and top it off with Habanero jam, for a real treat.  
Finally, one last trick:  Once the Mason jar lids “pop”, start turning the jars end over end a few times.  Do this until the jam sets up and it will ensure an even distribution of the contents.  Otherwise, the bits will tend to float to the top.

All that is left, is enjoy!

As always, hope all is well with you during these weird times.  Be safe!

2014 Camaro Tail Lights

My 2014 Camaro SS

The 2014 Camaro tail lights are mounted in a way to allow water on either side of the trunk to freely flow and exit under the rear bodywork.  Two plastic covers finish off the installation and give a nice appearance, however their design is piss-poor.

But first, why did I remove the rear tail light plastic covers to begin with?  Turns out, I recently washed my 2014 Camaro SS and noticed not only a handsome scratch but also a dent on the tip of the rear driver’s side fender.

That should buff out…

Thanks to Covid, my driving has been reduced dramatically and I just can’t place where this damage happened.  I am very anal when it comes to this type of thing, so I made a few phone calls and found a local paintless dent repair shop not far from my home.  I visited the shop and after a few minutes, the fellow said “no problem, we can fix the damage”.  I was not too thrilled about the price, but hey, the fellow at the repair shop has to make a living.

Back to the plastic covers…

Here is the driver’s side covers before removal.  They are held in place with three of those expanding plastic tabs – the damn things are a pain to remove.  As you can see, the plastic cover is designed to direct water (and any debris) to flow under it.  And there lies the design issue…

This is what the cavity looks like, and you can now see the problem.  This area is a magnet for dust, debris, pollen, you name it.  I pulled out two good hand fulls of crap from here.  I can see in the future one day, folks finding major rust areas in this cavity.

And so, i’ve learned the hard way to keep this area clean.  I will make a point to keep this area clean by removing the covers more frequently.  After a quick search on eBay I found a vendor that sells the plastic clips for not much money.  Those things are so easy to break. so I will have a few replacements going forward.

How did the dent removal go?  Pleased to say it was worth every penny.  They found a couple of other places that needed attention and I could not be happier.  Amazing what they can do!

Life continues in our new “normal”.  F1 is back – yay! – sure is nice to watch it again.  There is some close racing, just wish some of the other teams were closer to the Mercs.  HAM is great but it would be nice to see others reach the podium.  Then again, there is some great racing in the midfield.

I just finished reading “Countdown 1945: The Extraordinary Story Of The Atomic Bomb And The 118 Days That Changed The World”.  Once you get past the opening pages, the book reads very fast and is amazing.

Here are in no particular order some take aways…

Harry Truman had no clue of the Manhattan Project at the time of FDR’s death.  After assuming office, Truman meets with War Secretary Henry Stimson and General Leslie Groves (director of the Manhattan Project and incidentally overseer of the construction of The Pentagon) and in in 45 minutes is briefed about the tool that will end WWII.  I sincerely doubt modern-day politicians would have the ability to do that.  And on top of that, the ultimate decision to use the new weapon in 118 days.  Think about that…

Of course, the book explains in detail the 509th Composite Group and the man in charge of it: General Paul Tibbets.  Quite a few years ago, Paul Tibbets hosted a talk here in Greenville SC.  I made it a point to attend and after the presentation ended, I took the time to stay so I could shake his hand.  I remember he talked about the effort and determination on what had to be done and how that altered the course of the war.  As a result of the talk, I made it a point to go see the Enola Gay as well as Bockscar.

And finally, the book discussed the predictions the War Department made regarding casualties from an all-out invasion of Japan.  This hit very close to home…  My Dad didn’t talk much about his service during WWII but every now and again, he would break his silence.  A few years before he passed, we took a road trip to the AirForce Museum at Wright-Patterson AFB and that is where we saw Bockscar.  On the way back home, Dad explained how he was on leave in mid-1945 after serving in Germany.  He had been told by his superiors to enjoy the time off and get his shit together, because if needed he would be part of the invasion force against Japan.  Dad then told me the casualty predictions were better than 50%.  That is what this book mentioned.

I’ll have another update soon on my next book…  Stay safe.


NOCO X-Connect Eyelet Terminal Accessory

Today, I installed the NOCO X-Connect Eyelet Terminal accessory on my Red Top Optima.  I made mention of this in my prior post about the NOCO Genius10 battery charger.  Originally, I had thought about getting the OBDII adapter pigtail for the Genius10 however, after giving it some thought I decided to against the OBDII adapter.  Going through the OBDII connector means exposing the PCM directly to the charger and I rather not risk damage.

This pigtail comes with two round 3/8 eyelets that bolt to the screw on the battery terminal.  The other side of the pigtail has what NOCO calls an “X-Connect” and this connects to the plug on the Genius10 main charge cable.  It even has a “click” sound to tell you the connector is secure.  But first, this is what the battery box in bowtie6’s trunk looks like:

After removing the two screws holding the top down, we can now deal with the terminals.  Both terminals are protected with covers.  These two battery post covers are just as an extra precaution.  You can see on the bottom left corner of the photo below, part of the inside of the top lid.  It is covered with a thick layer of rubber.

And after sliding the covers back, I secured the two pigtail terminals to the bolts.  Here we we have the wires going through the covers before sliding them back in place:

And here is the pigtail after the top is secured back.  Yes, the clear coat has cracked but believe it or not, it is not flaking off yet.  Oh and this was rattle-can clearcoat!And finally, with the cover back on and the Genius10 connected the setup looks like this:

Pretty cool – this will save the hassle of having to remove the top cover on the battery box.

Oh and one more gizmo to talk about.  My wife’s car is a Chevy Equinox SUV.  This weekend was time for maintenance and the Equinox received 5 quarts of fresh Mobil1 as well as a new Mobil1 filter.  After I changed the oil, I checked out the tires and they looked like they needed rotation.  However, what to do with the TPMS devices?  How to get the sensors reprogrammed to their new locations?
After a little research, I found this TPMS reset device at Amazon.  The reset procedure could not be easier: Set the dash to “learn mode” with an audible horn confirmation.  Then, starting with the driver’s front wheel, point the TPMS Reset Tool at the valve stem and wait for the horn to beep.  Rinse and repeat on the remaining 3 wheels.  Finally, you get two more short beeps and you are done.  All is right with the universe again.

Well folks, that’s it for today’s post.  I know, exciting stuff, right?  Stay safe.

NOCO Genius10 Battery Charger Review

Today, I bring to you my personal NOCO Genius10 Battery Charger review.  But first, lets get this straight:  if you are a regular reader of my blog you know I don’t like to mention products by name and only on certain exceptions do I do a “review”.  Having said this, I thought this post might come in handy for other car enthusiasts with more than one machine in their stable.

Thanks to Covid19, my driving has been reduced dramatically.  The S2000 and bowtie6 have not been out in many weeks and given the weather has been nice, I wanted to take bowtie6 out for a ride.  I turned the key, pressed the start button and all I got was that sickening “brrrp-brrrp” sound.  The Red Top Optima just did not have the balls to get the Ecotec to turn over.  Fine, got the keys for the S2K and tried it.  Pressed the red Start button and ditto – “brrrp-brrrp”.  Damn.

Yes, I have procrastinated for many years and been cheap in not having a decent battery charger/tender.  I would normally just  borrow my cousin Jim’s charger and solve the problem.  This time, I did a little research and decided to invest in my own charger/tender.  Logged into Amazon and found very good reviews on the NOCO Genius10 charger/maintainer.  The price was actually discounted from what the NOCO website has it listed, so I ordered one.  If it didn’t work, I could always send it back, right?

The box came with the charger, a separate cord with clamps and a little instructions booklet.  If you are wondering why the separate cord with clamps is configured that way, well… It is because there are other corded adapters available.  For example, there is a pigtail with an OBD-II plug that will charge the battery through the OBD-II port.

Here is a closeup of the clamps.  You can see the clamps are held in place by button-head screws that if removed, turn the cable into something that can be permanently attached to the battery posts.  Yes, there is a separate accessory available for purchase, that provides this functionality.  There is also another adapter that can be added that even has a little charge gauge of sorts.  Pretty nifty.


Charger Impression

The charger is made well.  It is quite heavy and easy to use.  The little plugs used to connect the accessory pigtail are OK.  They could “click” a little better but for what they are, they will suffice.  Finally, the cables are long enough although I did use a short heavy gauge extension cord to go from the receptacle to the charger.

The interface is handled by one button that when pressed correctly enables the Genius10 to charge pretty much any kind of battery.  There are a number of icons that show what is going on.  And, on the back of the unit the sticker clearly states “Made in Vietnam”.

Pressing the single control button cycles through the different battery types and voltages available.  This charger will handle lead batteries as well as AGM batteries like my Red Top Optima.  The charger sells for about $100.

I started with the lead battery setting on the S2000’s battery and after about 4-5 hours, the green LED finally reached the “done” setting.  I clicked on the button to make it jump to the AGM setting and then moved over to the Optima in bowtie6.  This took a little longer, but eventually the green LED reached the “done” setting.  Needless to say, both cars started right up and all I can say is that I should have bought this device a long time go.

If I had a complaint to make is the flimsy box this device comes in.  You would think the folks making this charger would have included some sort of case to go with it.  NORCO makes cases, but they are right pricey – actually a third of what the device sells for.  You would think with a premium product like this, some sort of case should have been included.  I suppose Mick had it right, “You can’t always get what you want, but if you try sometime, you get what you need”.

Now some other thoughts about things in general, in no particular order…

This weekend has come and gone; the days just seem to run into each other thanks to our pandemic.  The new “normal” is grim, I know.  But…  Finally we get to watch live NASCAR at Darlington and that gave a feeling of somewhat “normalcy” if you will to this Sunday afternoon.  Gosh it sure is nice to hear the engines run again.  Hard to believe this May won’t have the glorious F1 machines in Monaco nor we watch the spectacle of engines wailing at the Brickyard…

Hope those of you reading this post are doing well.  I’ve been watching a lot of old movies on TCM these past few weeks.  There have been some good films indeed.  Matter of fact, they even showed 2001 A Space Odyssey – one of my favorites – and HAL doing his thing.  I’ll date myself, but I remember actually watching that movie at the theater back in the day.  Awesome movie – just don’t try to make any sense out of it.  And while we are at it, try asking your Echo Dot, “Alexa close the pod bay doors”…  She don’t like that so well!  <grin>.

I made another trip to see my mom this past weekend and this time I drove the Camaro SS.  I track mileage on Fuelly.com and much to my surprise, it had been 2 months to the day since I had fueled up the Camaro.  How time goes by.

Not sure if you are a fan of podcasts, but there are a few that I have subscribe to that are excellent.  Among them is “Throughline” from NPR, “A History of Now” from Marketplace and one called “The Cold War: What We Saw“.  Depending on the subject matter, the episodes can vary in length but the content is fantastic.  Especially “Throughline“.

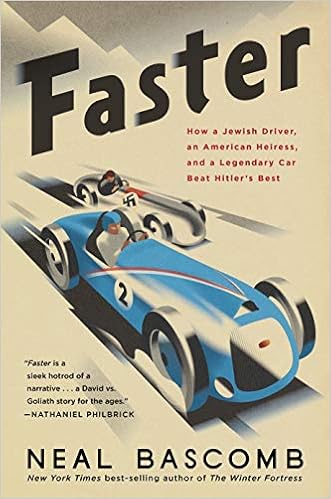
Finally – on the car theme – I’m really enjoying a new book I downloaded to read on my iPad.  The book is titled “Faster” and so far, it is excellent.  This book is about racing in the age prior to World War II and mixes the flamboyance of the early GP drivers and their cars and the upcoming Nazi regime with the rise of AutoUnion and Mercedes in the world scene with their mighty Silver Arrows.

The book takes a little time to get started, but once you get past the opening chapter or so, it starts to really get interesting.

And that is it for this weekend.  Stay safe!

Customized Dodge Challenger

This weekend, I made a quick road trip to visit my mom and on the way back, I found this customized Dodge Challenger parked on the side of the road.  This bad boy is another example of one of those things that make you go “hmmmm”…

Mom has a very supportive network of family and friends in the little town where she lives.  She is handling our new “normal” quite well, but she does not drive and she needed to go to the grocery store.  So we took care of that this weekend by going to North Augusta, SC.  Mom is now set for another couple weeks and I had a chance to finally get out on the road and clear my mind from being in lockdown.

So back to the customized Dodge Challenger.  All I can say is that somebody put a ton of money on this Challenger.  The pictures don’t do the paint job justice – it is flawless.  While it is not my cup of tea, I do appreciate the hard work invested.  The Challenger was painted probably with ChromaFlair because as you move around, the thing changed colors.  Somebody then took the time to ghost-in the Mopar logos on the quarter panels.  You can barely see an edge in the photo above.

The hood was also highly customized:  it had the Mopar logo as well.  I’m not a big fan of the color shifting paint but that paint-job did the trick:  it caught my eye.  I had to drive back to this parking lot and felt compelled to take these photos.

And last but not least, the wheels and tires.  I didn’t get out of my car, and inspect them closely, but they are LARGE.  Again, there is no telling how man dead presidents are invested in this set of wheels.  Having said all this…  I have a few questions:

    • With a wheel/tire combo like this, what effect does it have on the drivetrain.  If we go by the relationship of a lever, I would suspect this is going to load up the gearbox and strain it.
    • What effect does a whee/tire combo like this have on brakes?  Suppose you are driving at highway speed, would braking efficiency become compromised?
    • Speedo.  The speedo reading would certainly be hosed.  This is when tuning software and/or a separate box would save the day.  I am not familiar with this type of setup but there is certainly a lot of work here…
    • If you have any info on this, let me know…

Stay safe!